RailroadShield
Arduino shield with various DCC Cab Bus and control interfaces
UPDATE Added Open Source Hardware labeling
|

|
|
|

|
|
|
|
|
|
|
|
|
|
|
RailroadShield Version 2.5
First built: 2011-07
UPDATE Added Open Source Hardware labeling
|
|
|

UNPUBLISHED
RailroadShield Version 2.4
First built: 2011-07
UPDATE Fixed the DRC problems

|
|
|

UNPUBLISHED
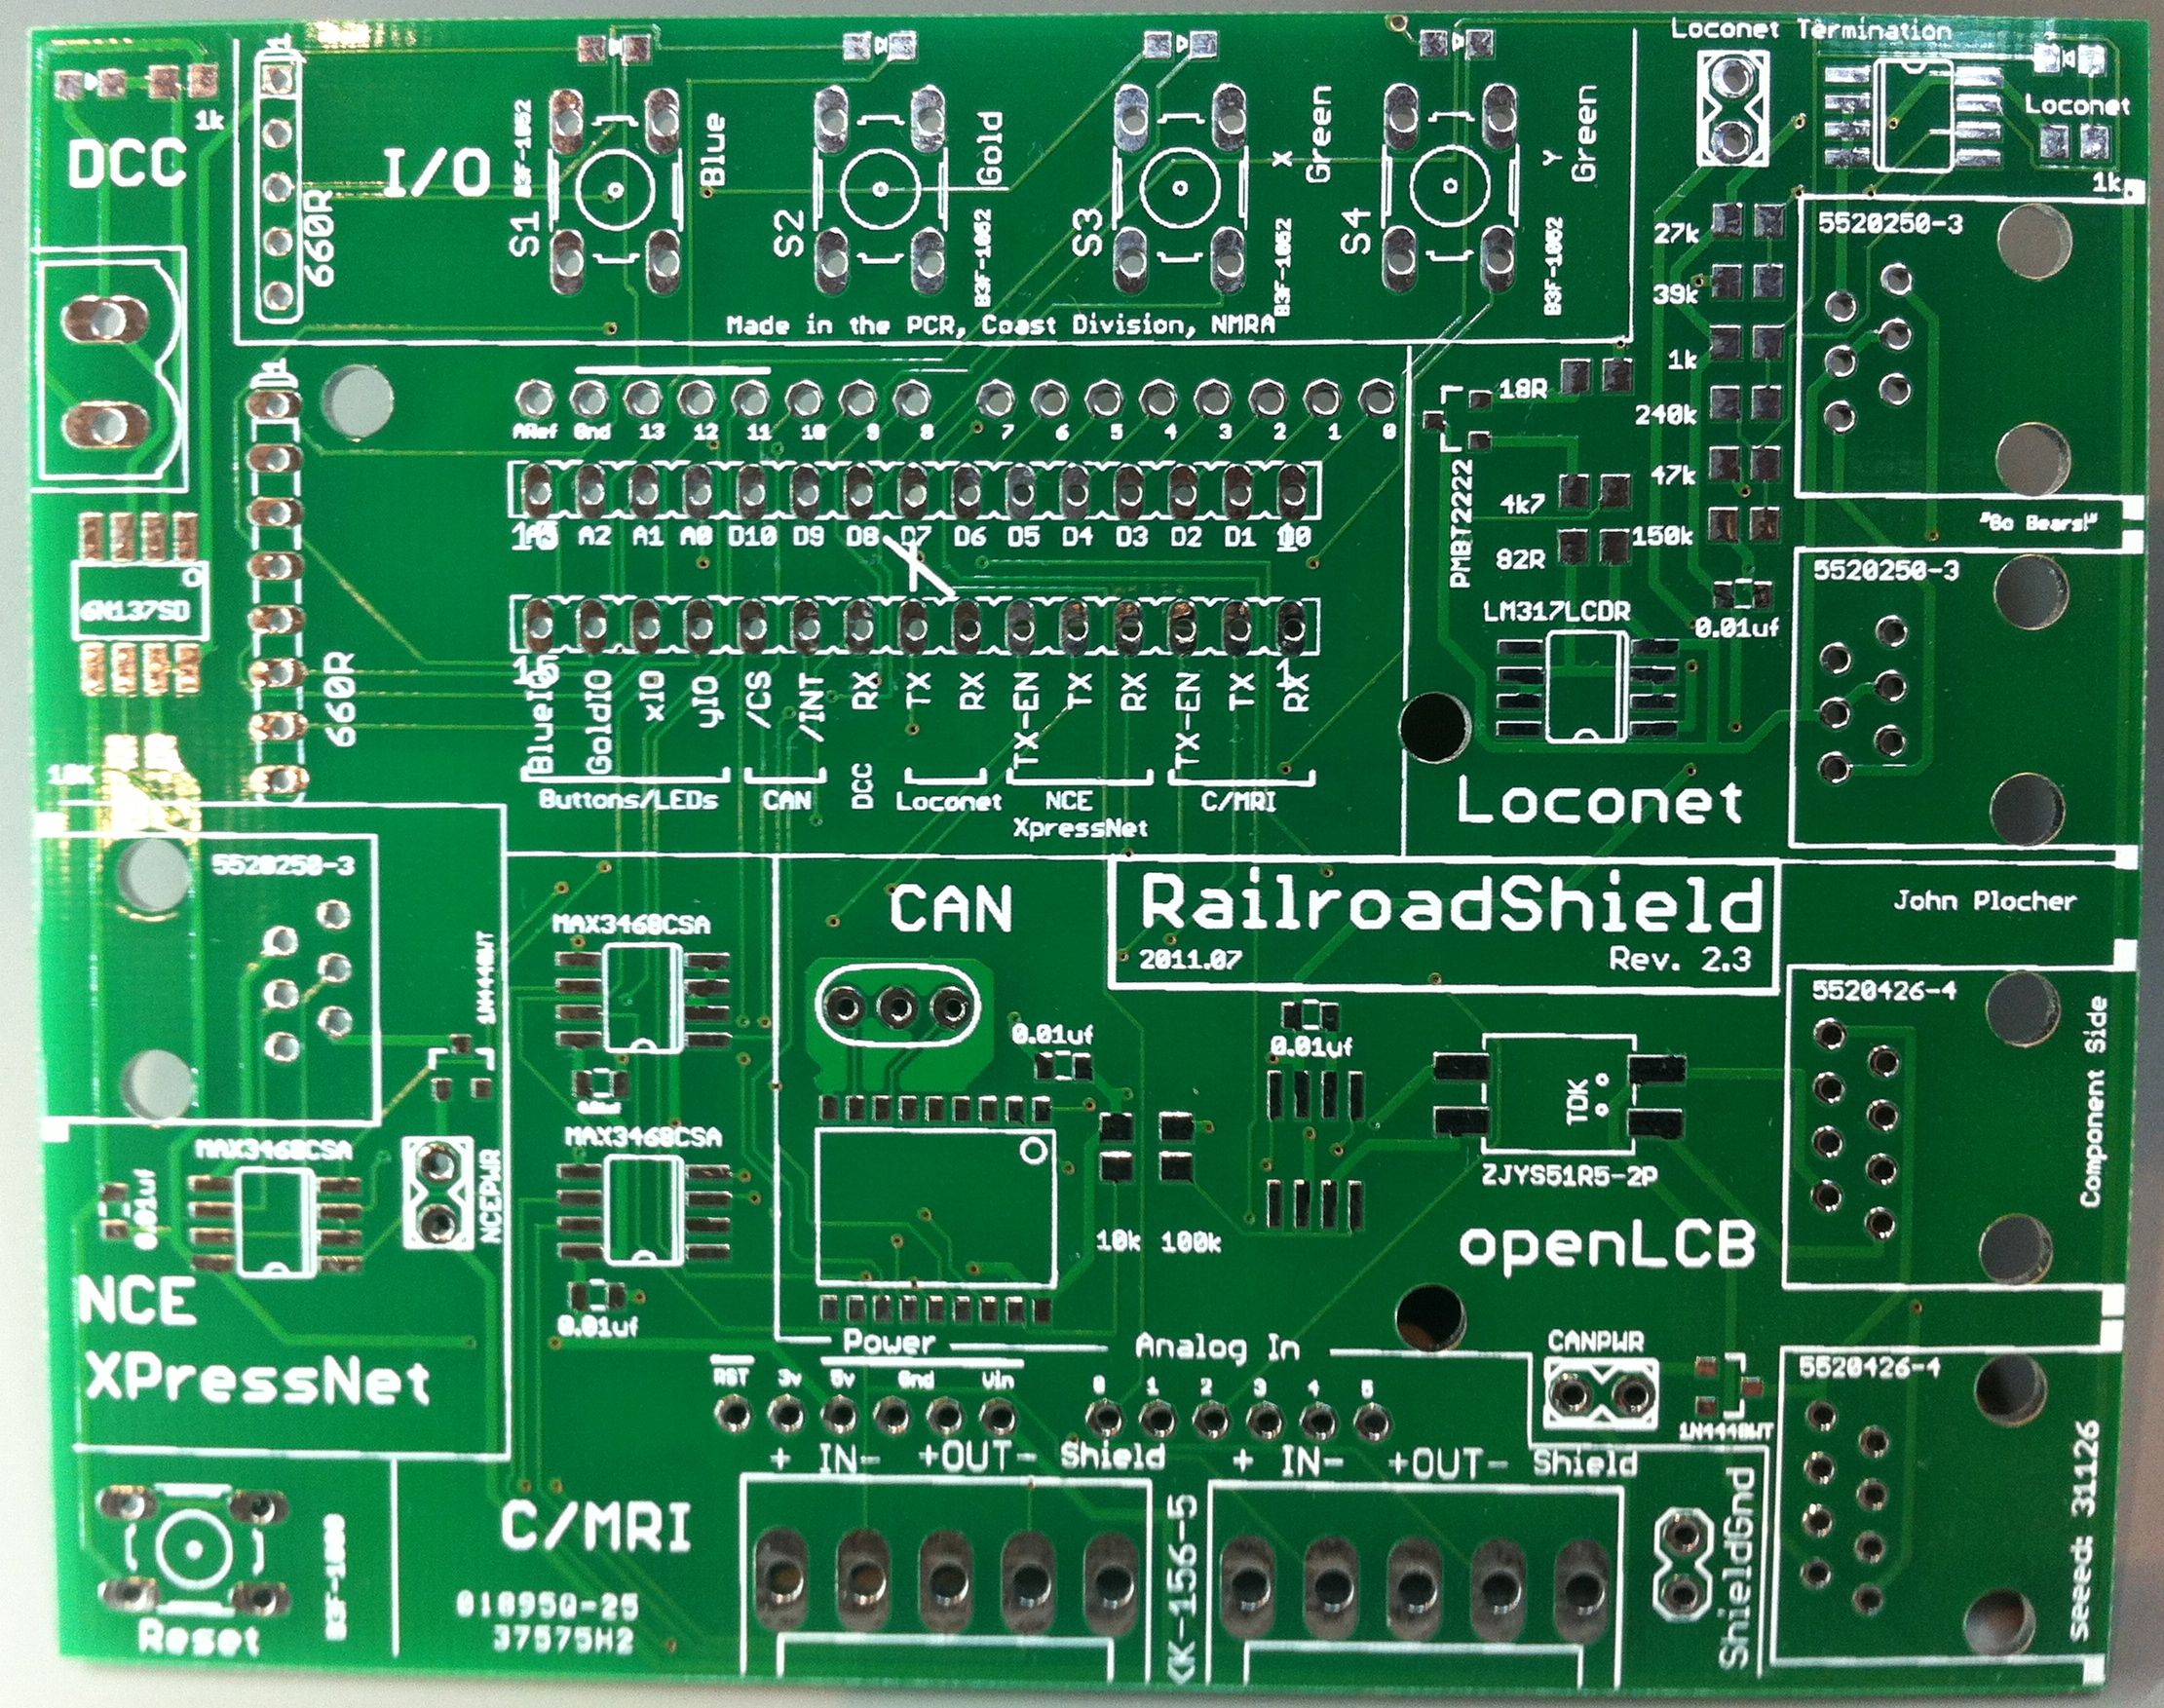
RailroadShield Version 2.3
First built: 2011-07
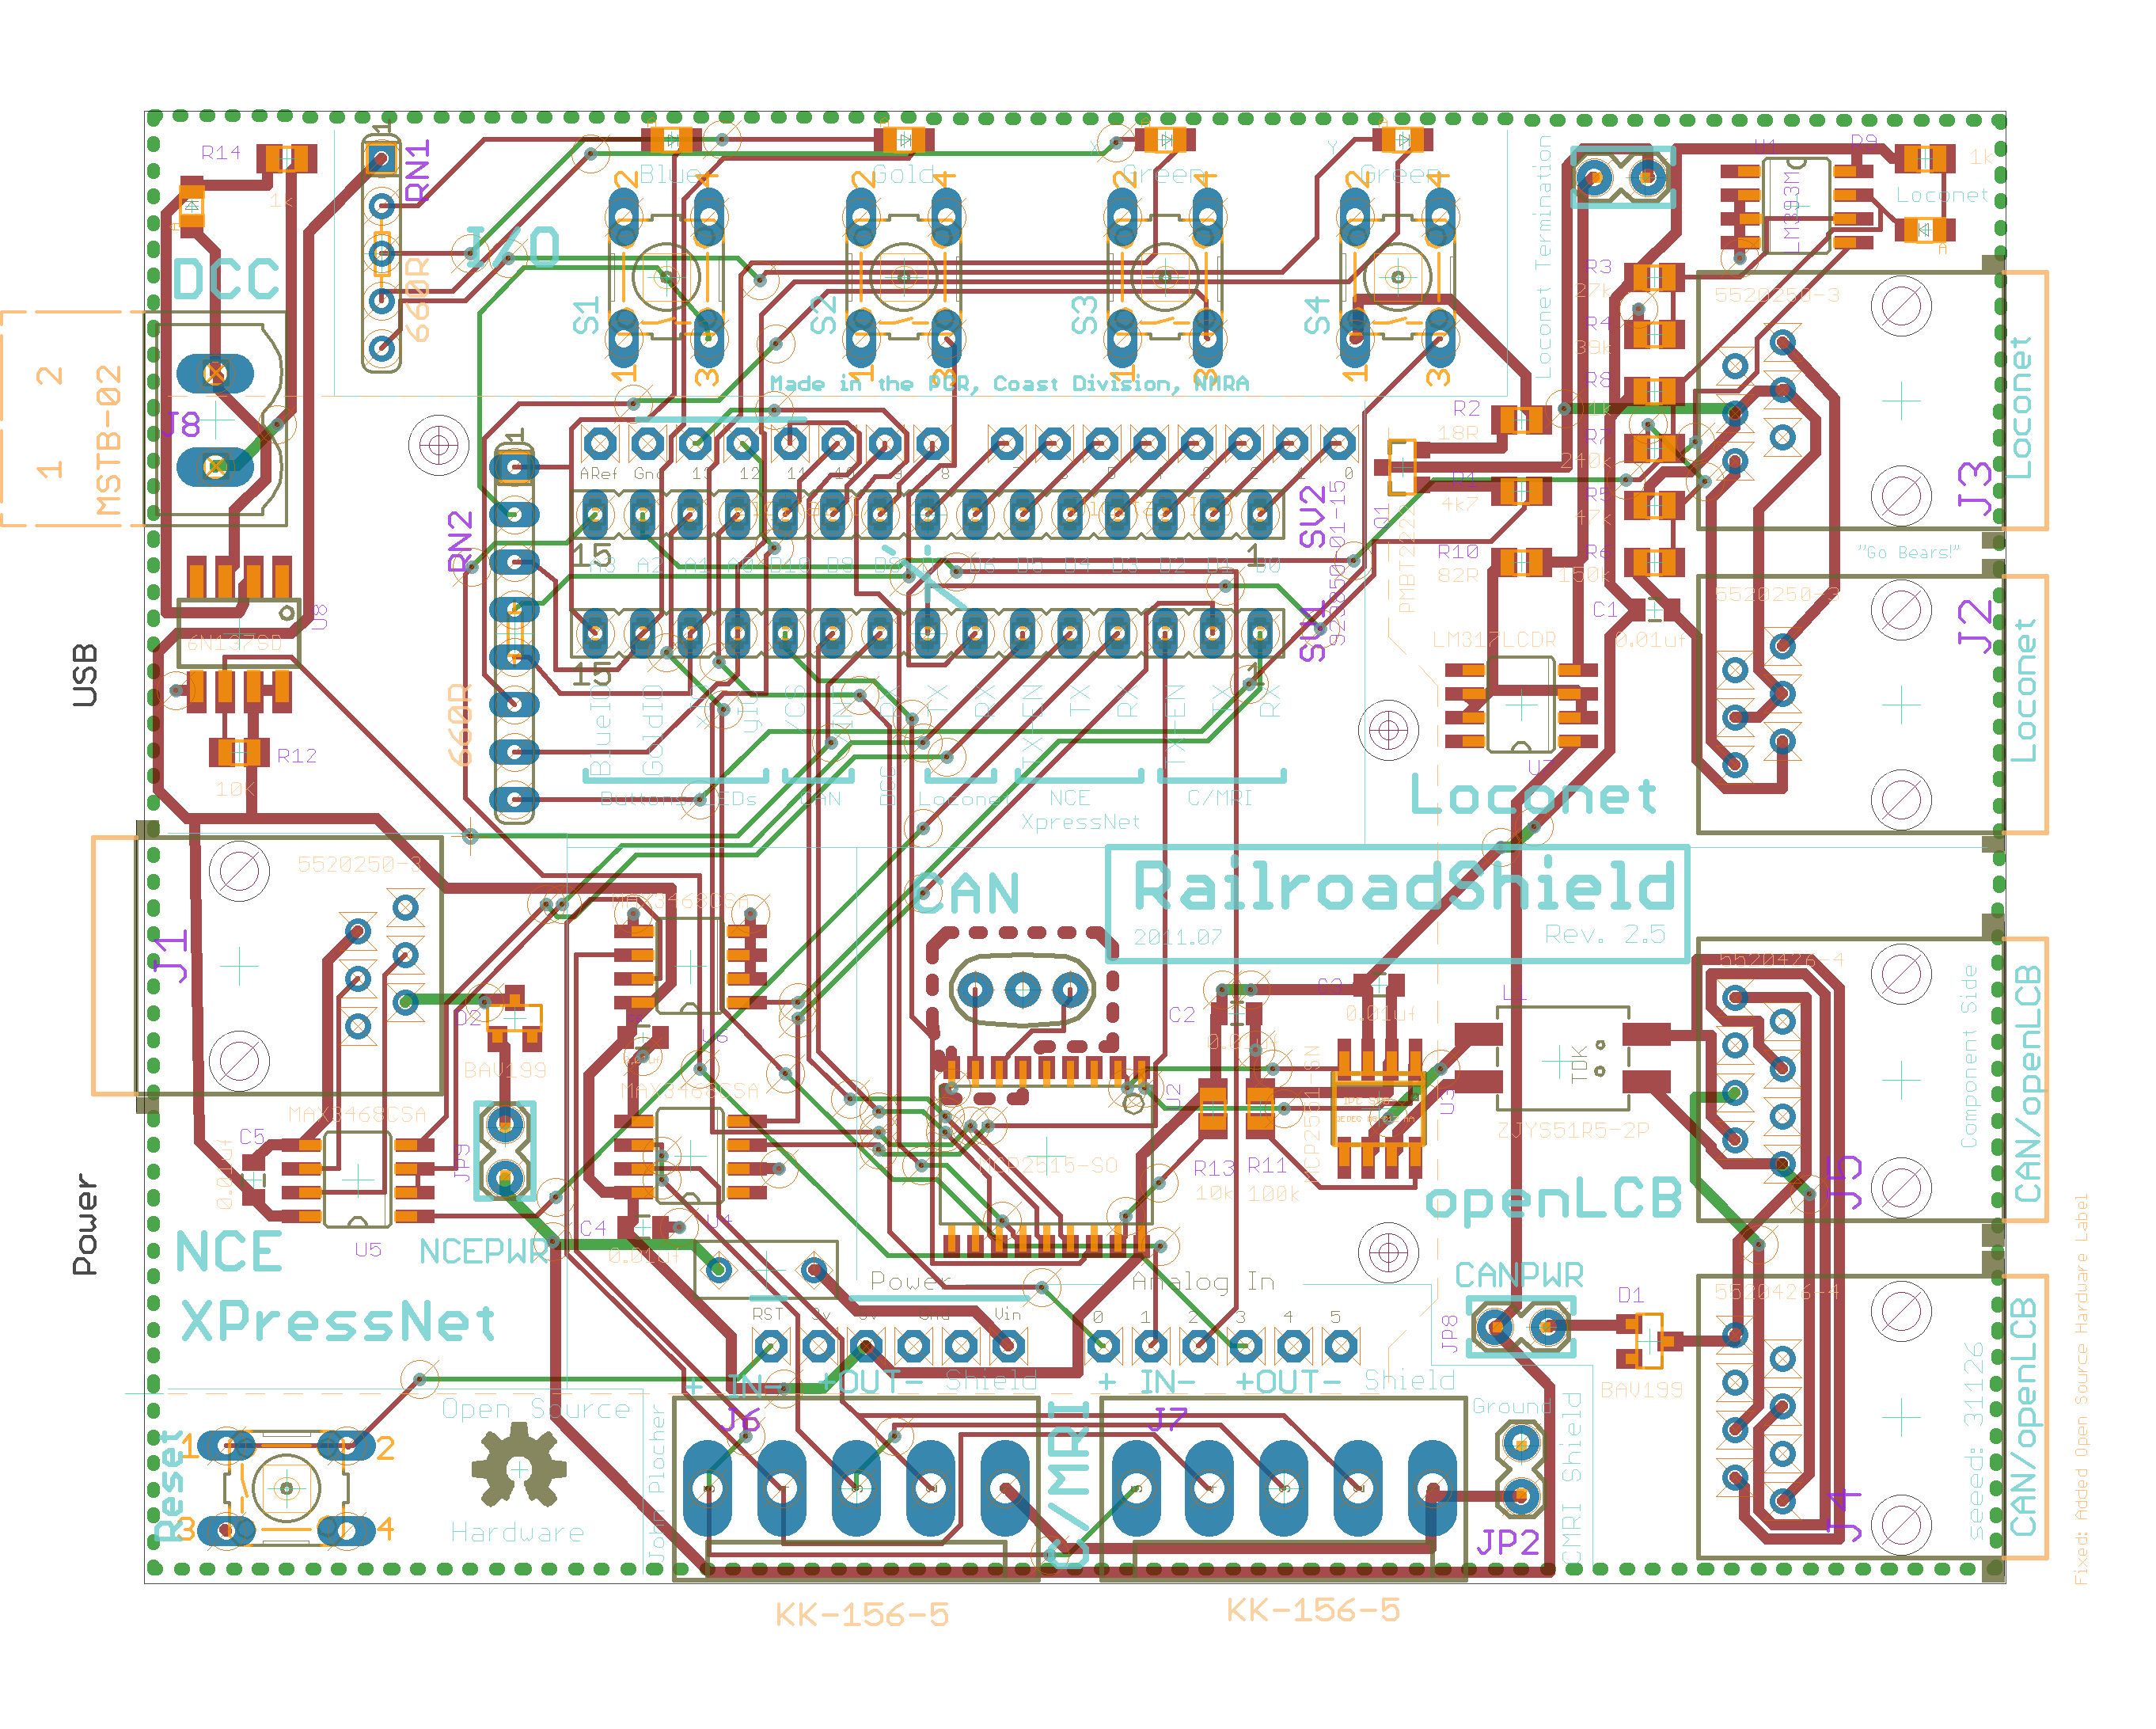
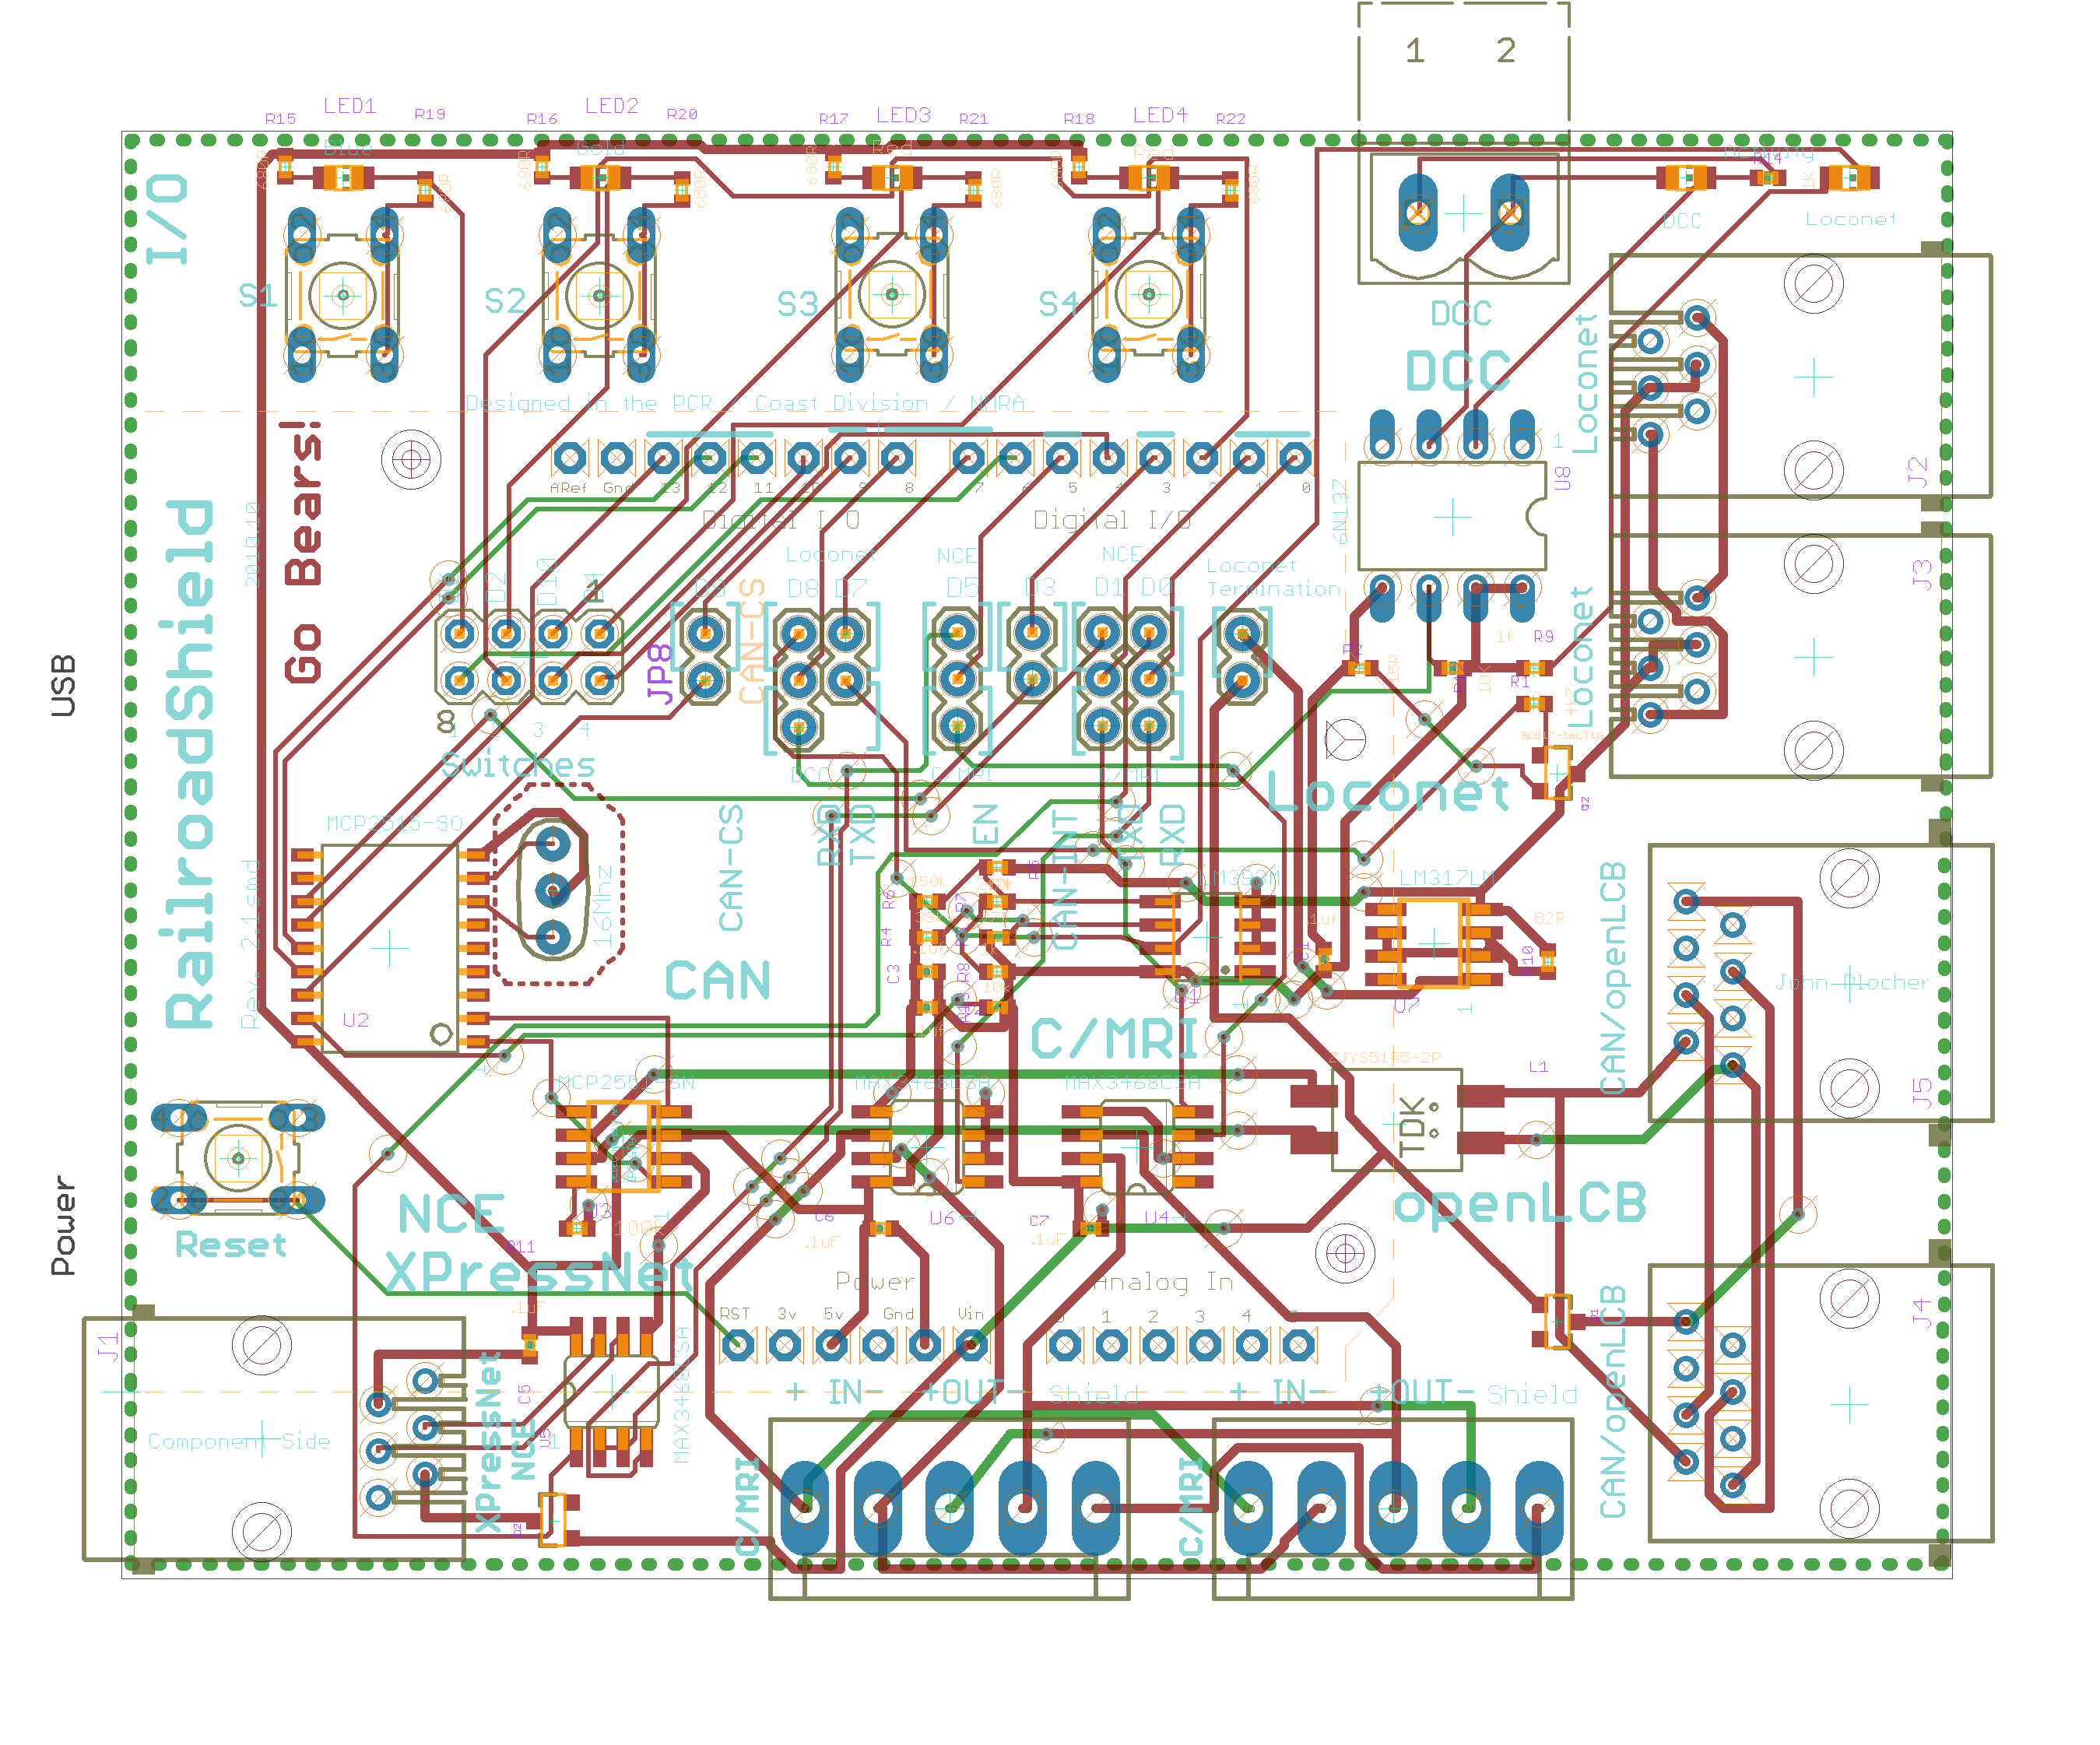
UPDATE I rev’d the board to 2.3, with SMT ICs, SOT23-3 diodes and a jumper block for all the I/O interconnects. There are a couple of DRC tight clearance problems that I missed:
- RailroadShield 2.3 PCB DRC Error #1 the DCC connector (J8) pad1 is close to a trace on the top layer
- RailroadShield 2.3 PCB DRC Error #2 there is a via situated between the jumper blocks SV1 & SV3 (by D6/LoconetRX) that is close to a trace on the bottom layer.
To see if there are problems, use an ohmmeter across the DCC jack - if there is continuity, use an exacto knife to trim the pad away from the trace; similarly, check between “yIO” and “A2” - if there is a connection, fix the bottom layer trace/via short.
|
|
|
UNPUBLISHED
RailroadShield Version 2.2
First built: 2010-10
UPDATE Converted to SMT chip packaging for better prices and simpler board production
|
|
|
UNPUBLISHED
RailroadShield Version 2.1smd
First built: 2010-10
Converting to SMD parts for ease of assembly
|
|
|

UNPUBLISHED
RailroadShield Version 2.1
First built: 2010-10, 2012-03
UPDATE More prototyping and experimentation Made a small production run Nit: The diodes I used in this version are too small to see the polarity banding, which makes assembly difficult! The first batch is out in the hands of OpenLCB developers, and seems to be working well - except for the overloading of D10 by the CAN SPI code, one of the buttons and the ethernet SPI shield… Sigh.
|
|
|
UNPUBLISHED
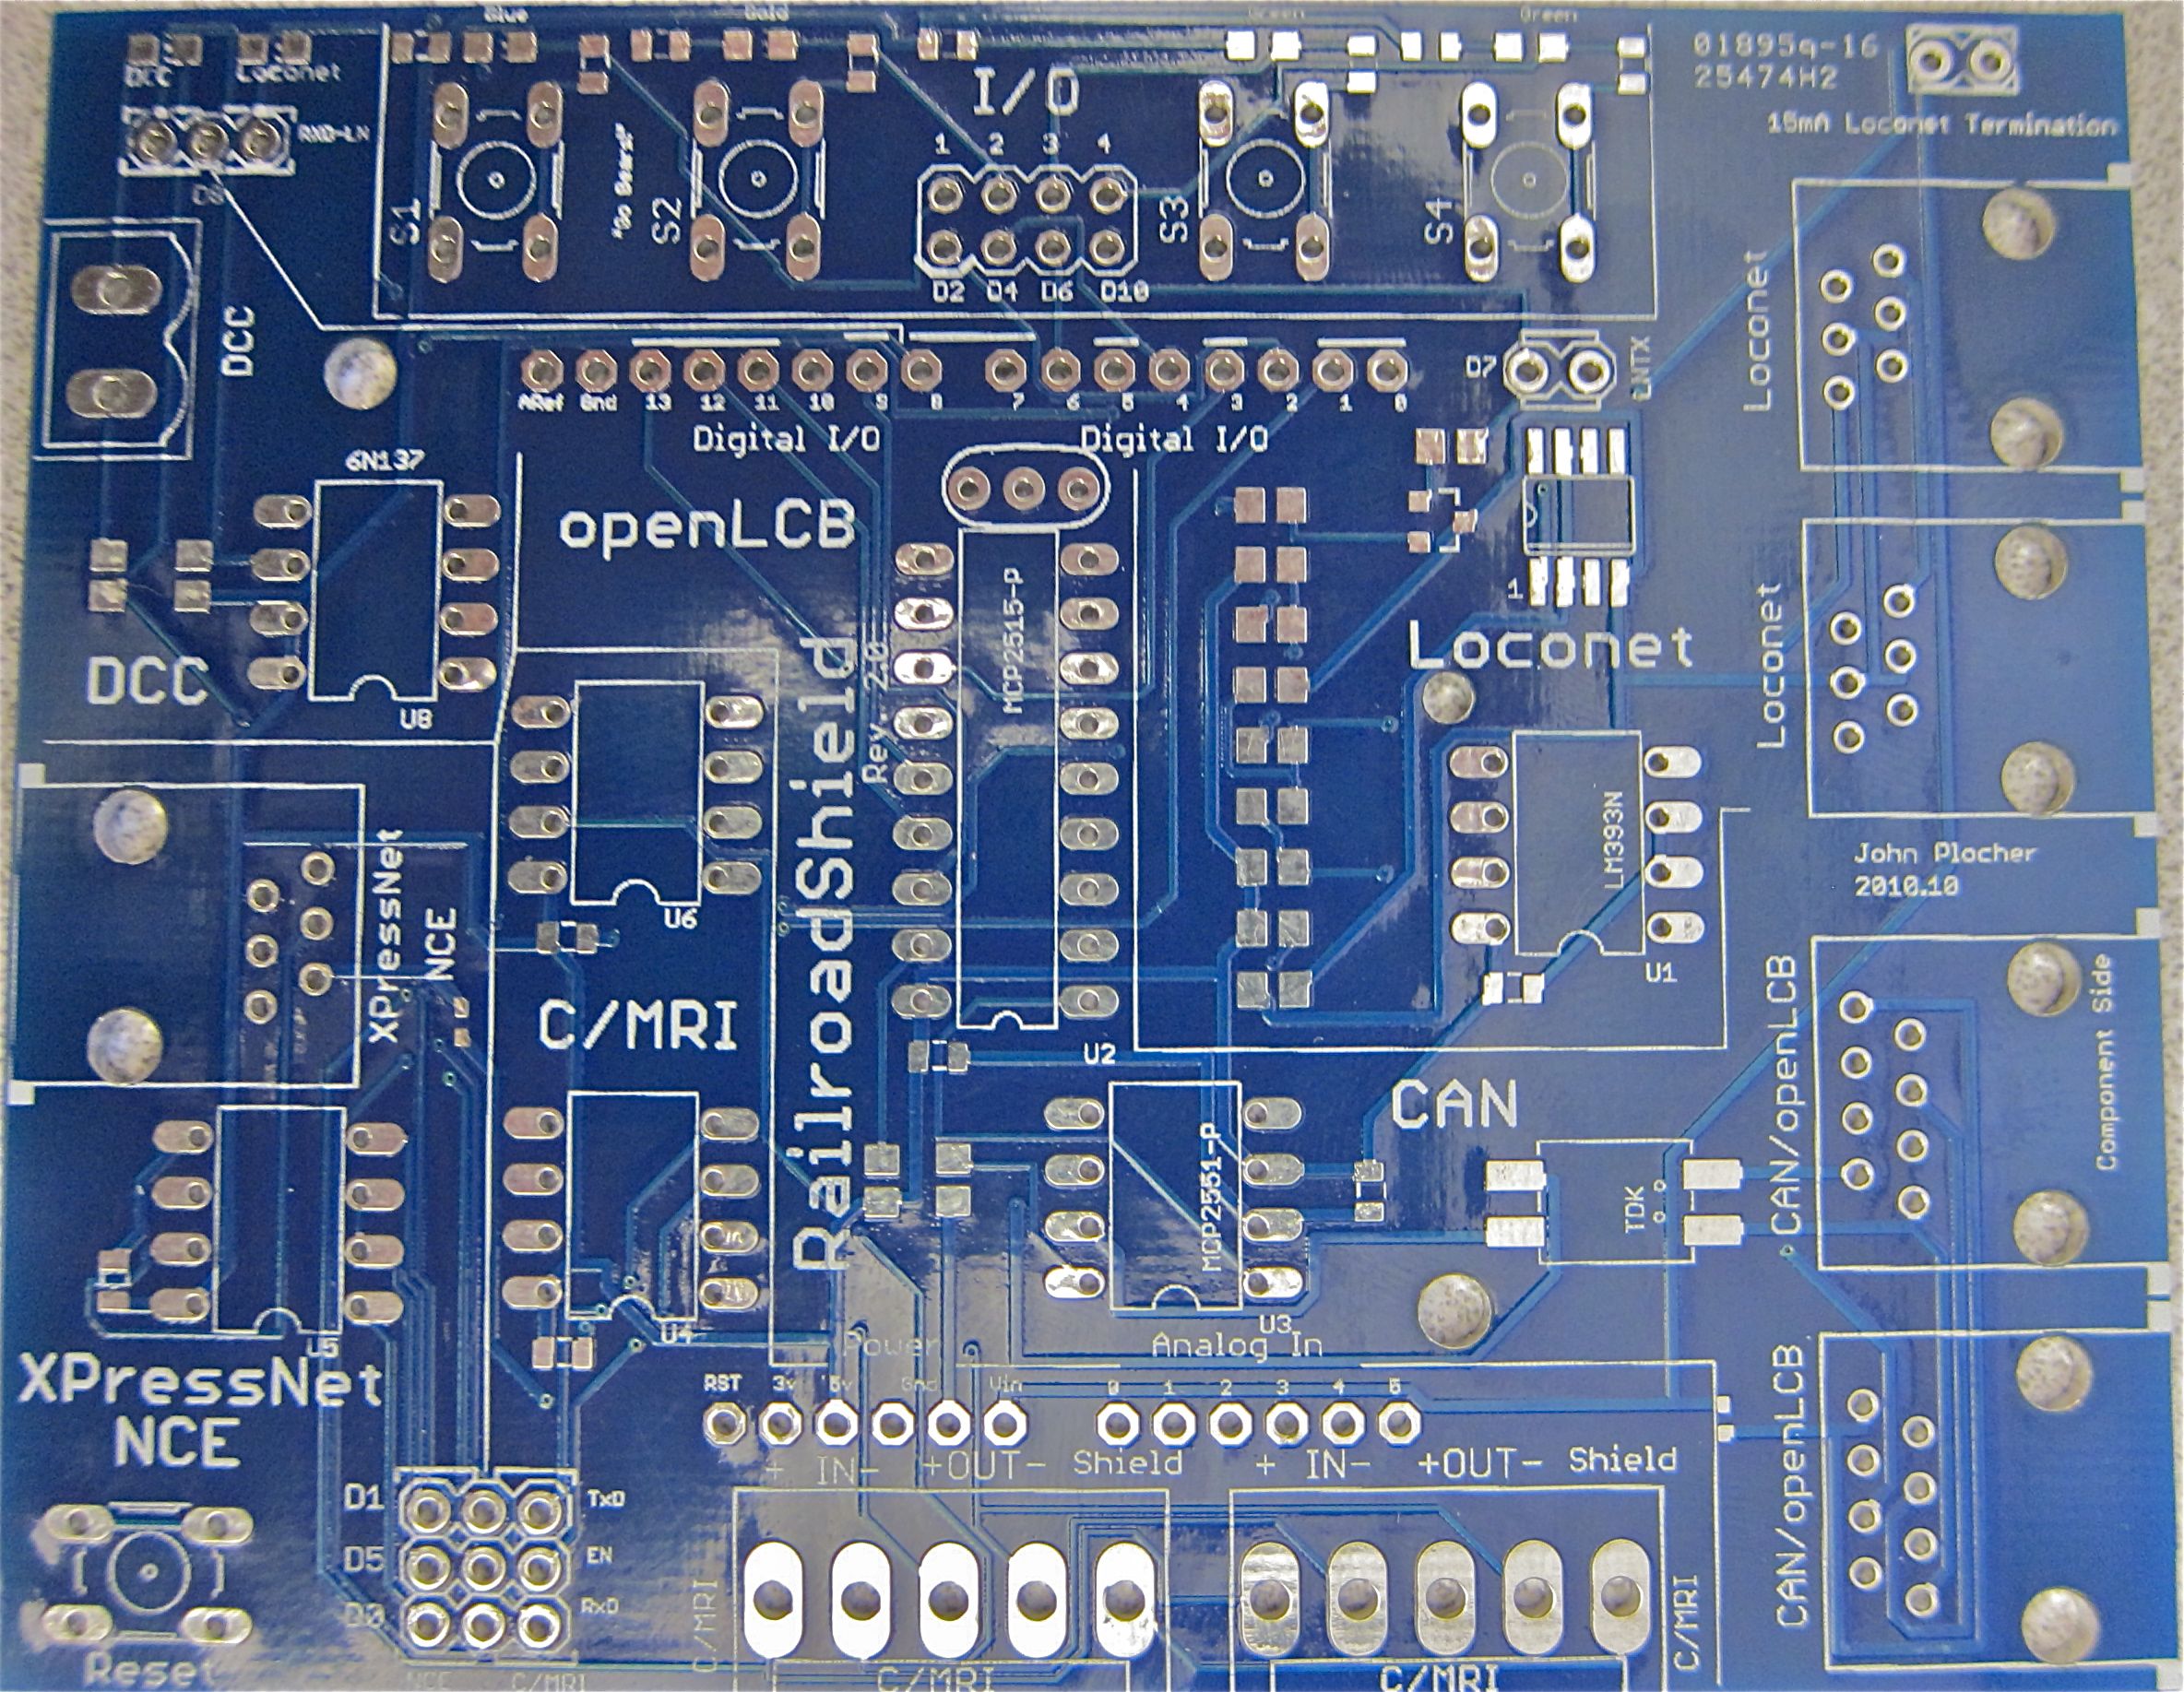
RailroadShield Version 2.0
First built: 2010-10
UPDATE Convert to Arduino Shield formfactor
|
|
|

UNPUBLISHED
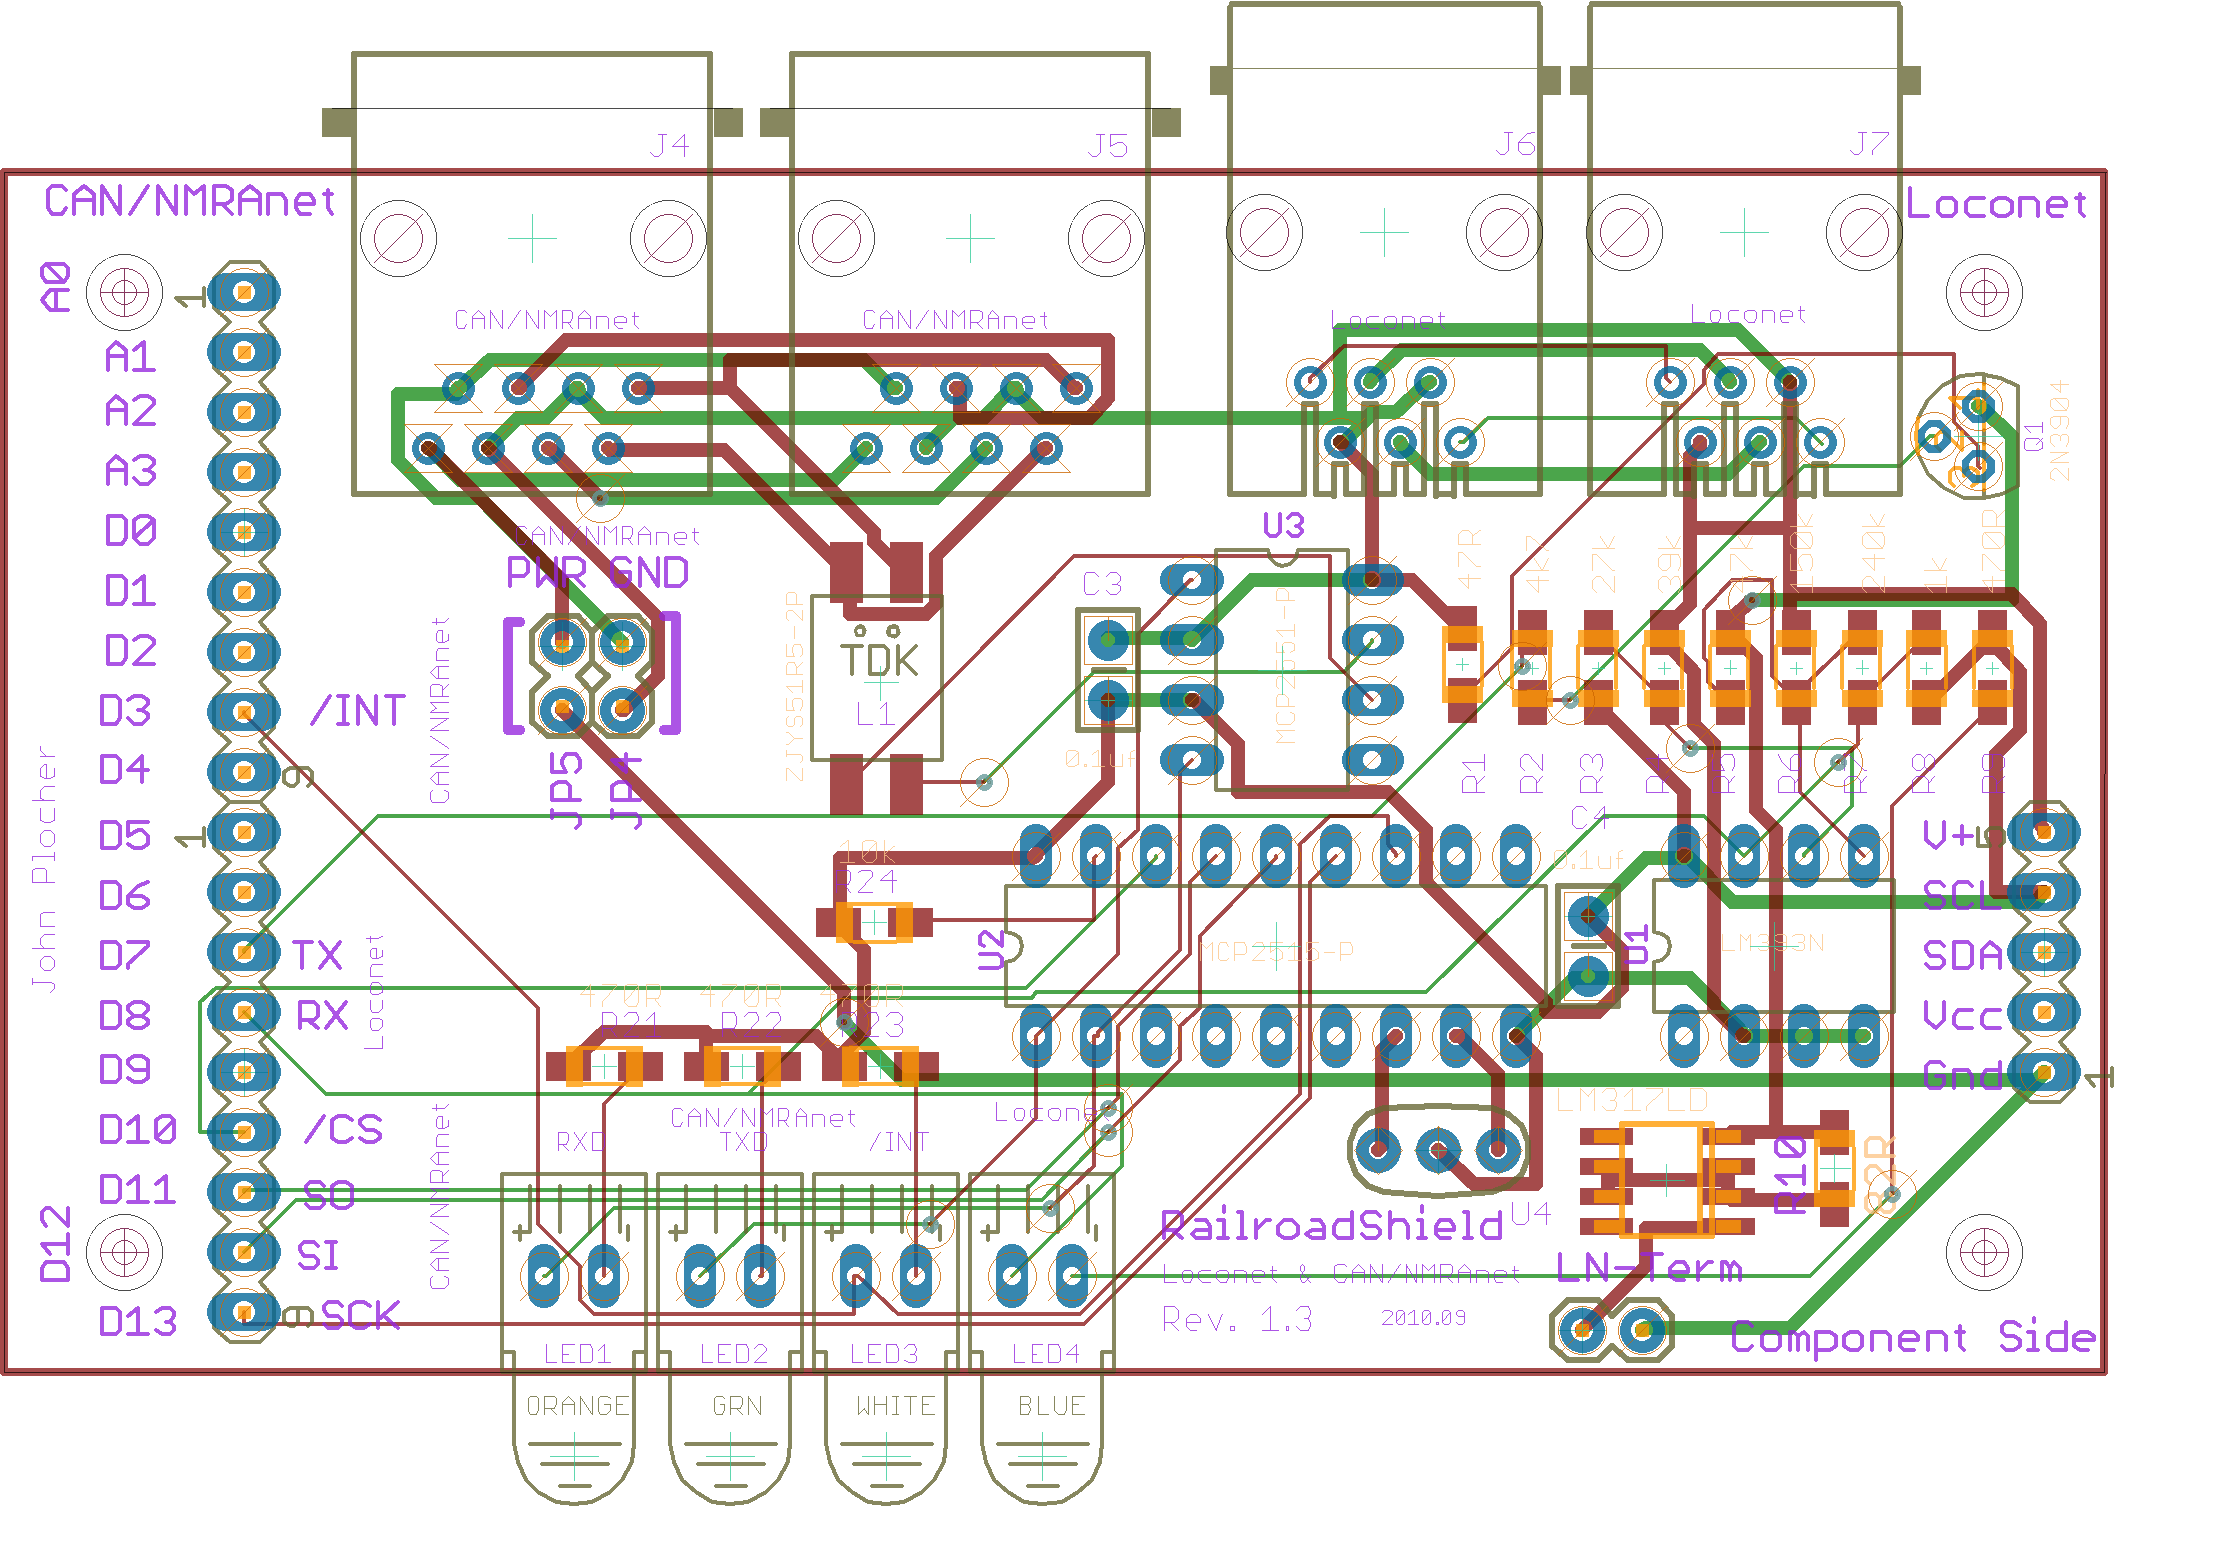
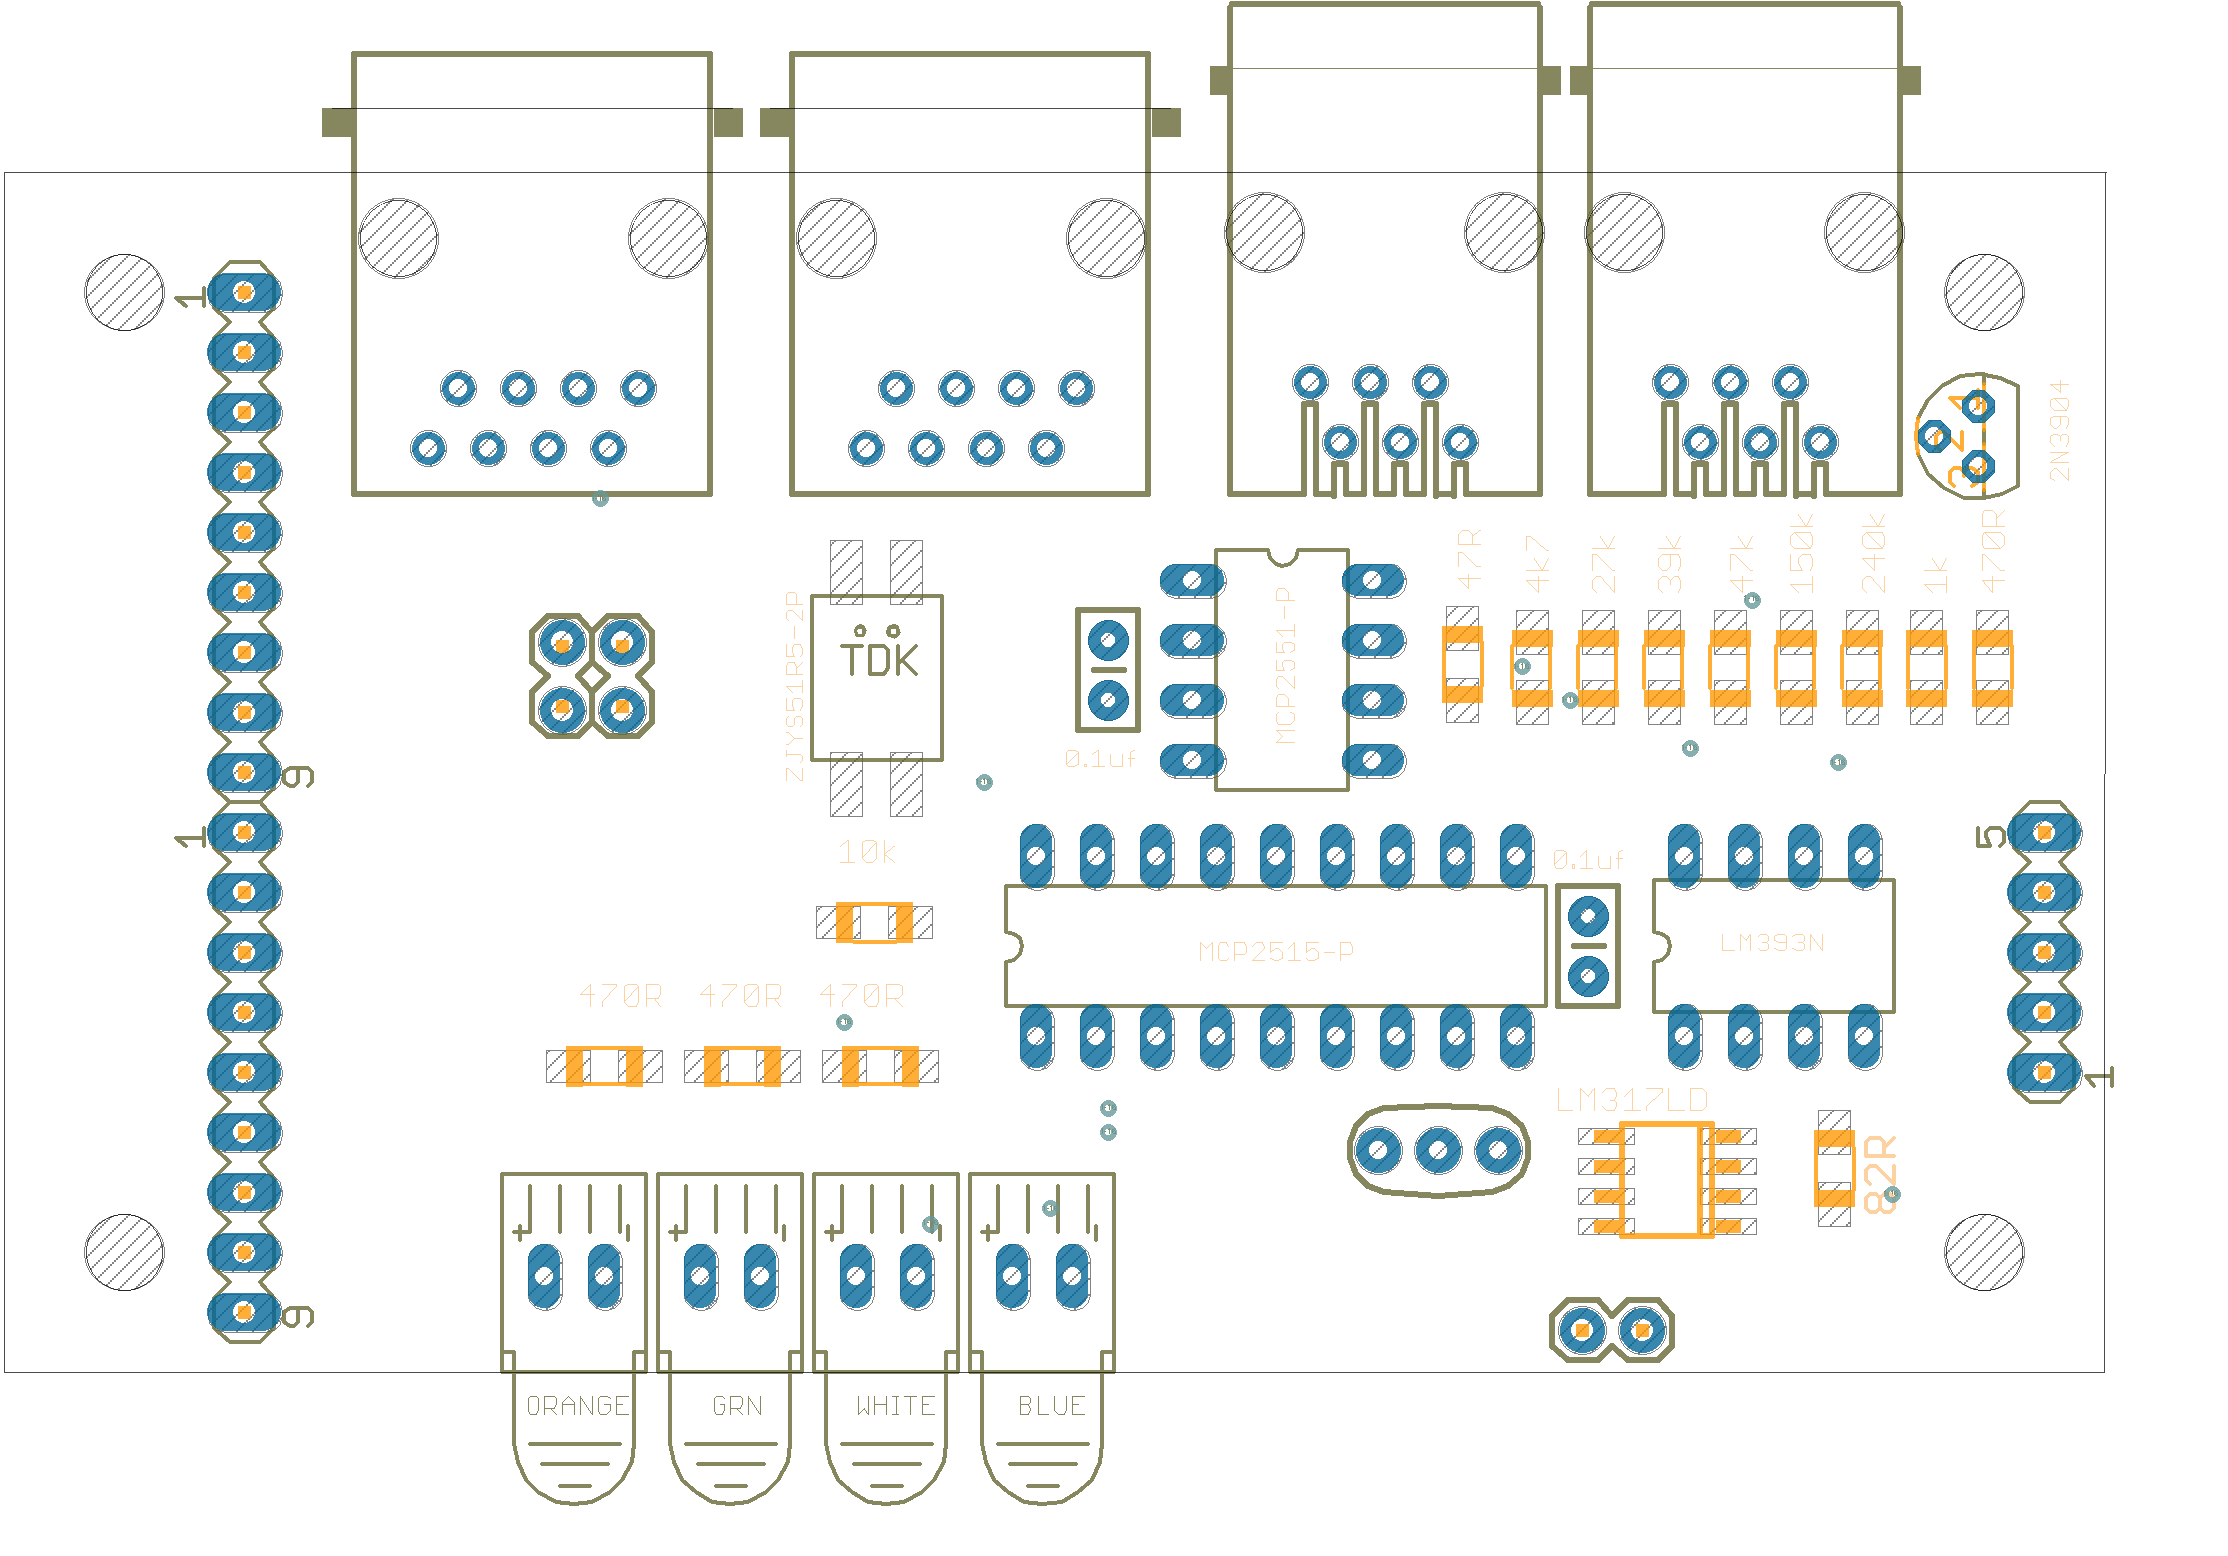
RailroadShield Version 1.3
First built: 2010-09
|
|
|
UNPUBLISHED
RailroadShield Version 1.2
First built: 2010-07

|
|
|

UNPUBLISHED
RailroadShield Version 1.1
First built: 2010-06
UPDATE I ordered 10x boards from SeeedStudio I also placed a Mouser order for all the parts except for the LM317LD, which nobody has in stock and the ‘duino headers, which I order from SAMTEK The board cost $4, the parts come to $30 + shipping. UPDATE The boards came in and I’ve built up one for testing - the LEDs and Loconet parts work, and I’m trying to understand the openLCB code…
|
|
|

UNPUBLISHED
RailroadShield Version 1.0
First built: 2010-06
Initial experimentation - breadboard friendly layout

|
|
|


UNPUBLISHED
Documentation
A community prototyping board to help with the bringup and maturation of OpenLCB.
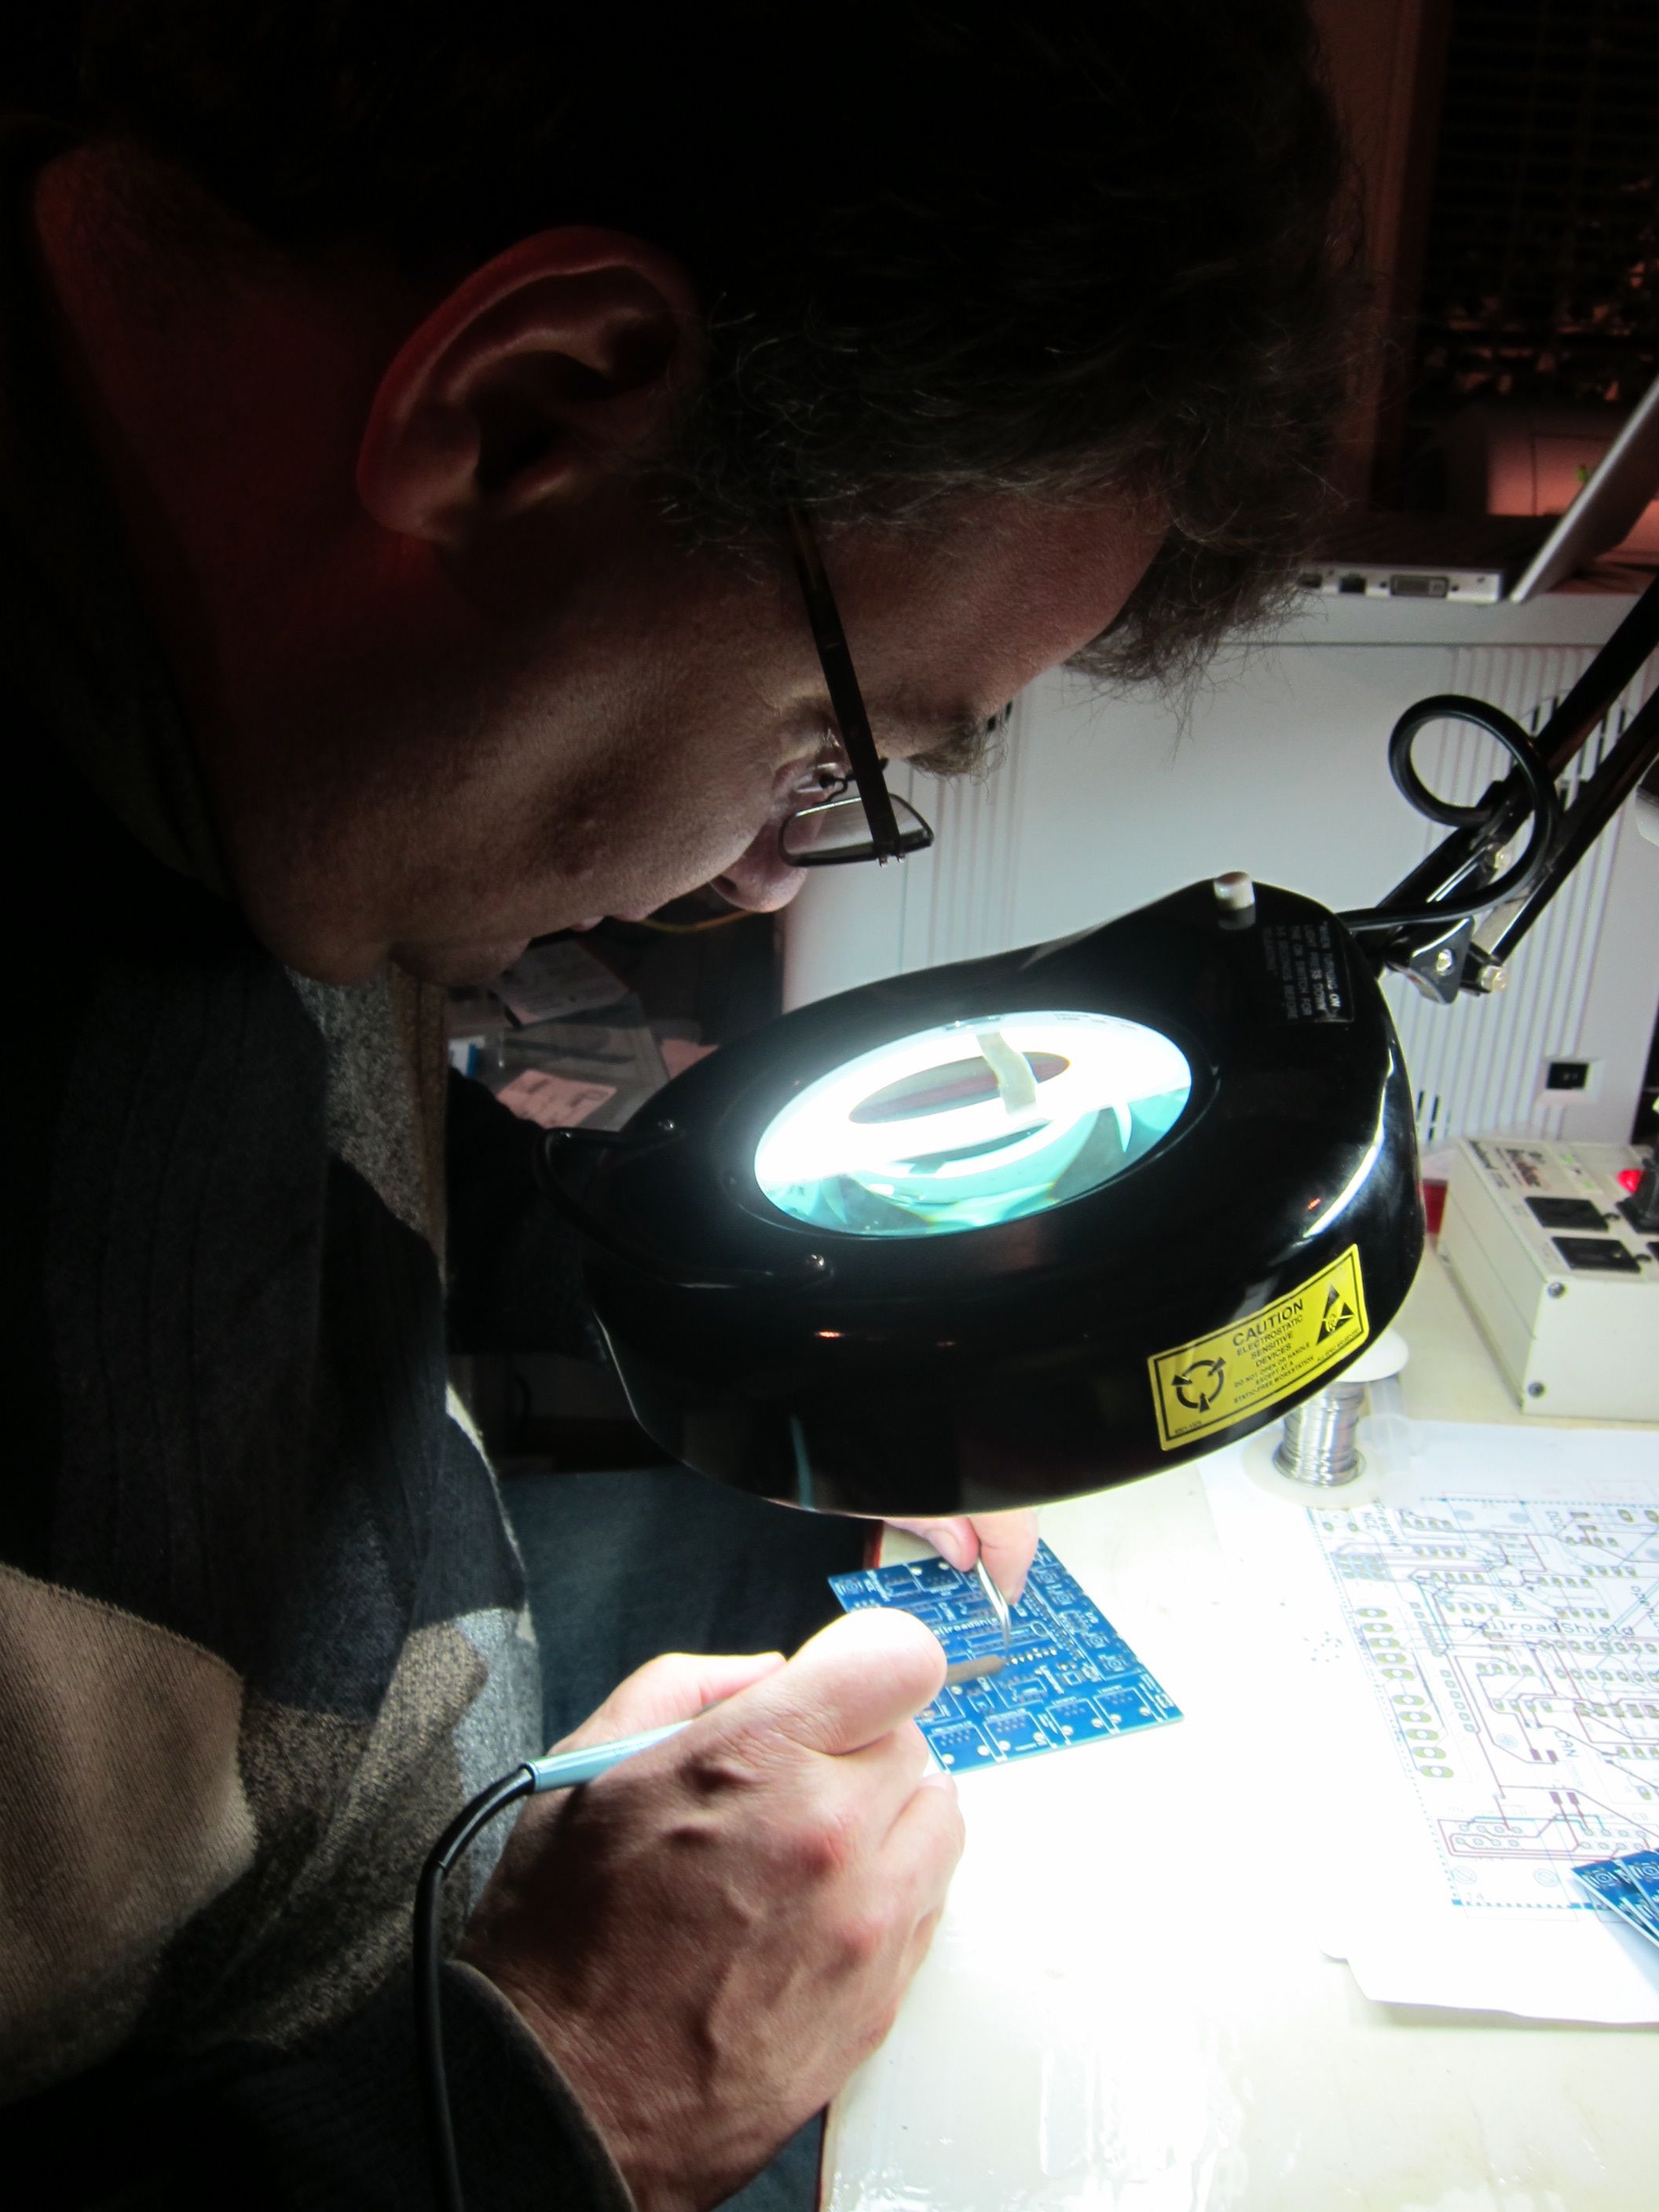
Status: Prototypes fab’d and assembled, runs simple OpenLCB sketches, more testing underway in the OpenLCB community…
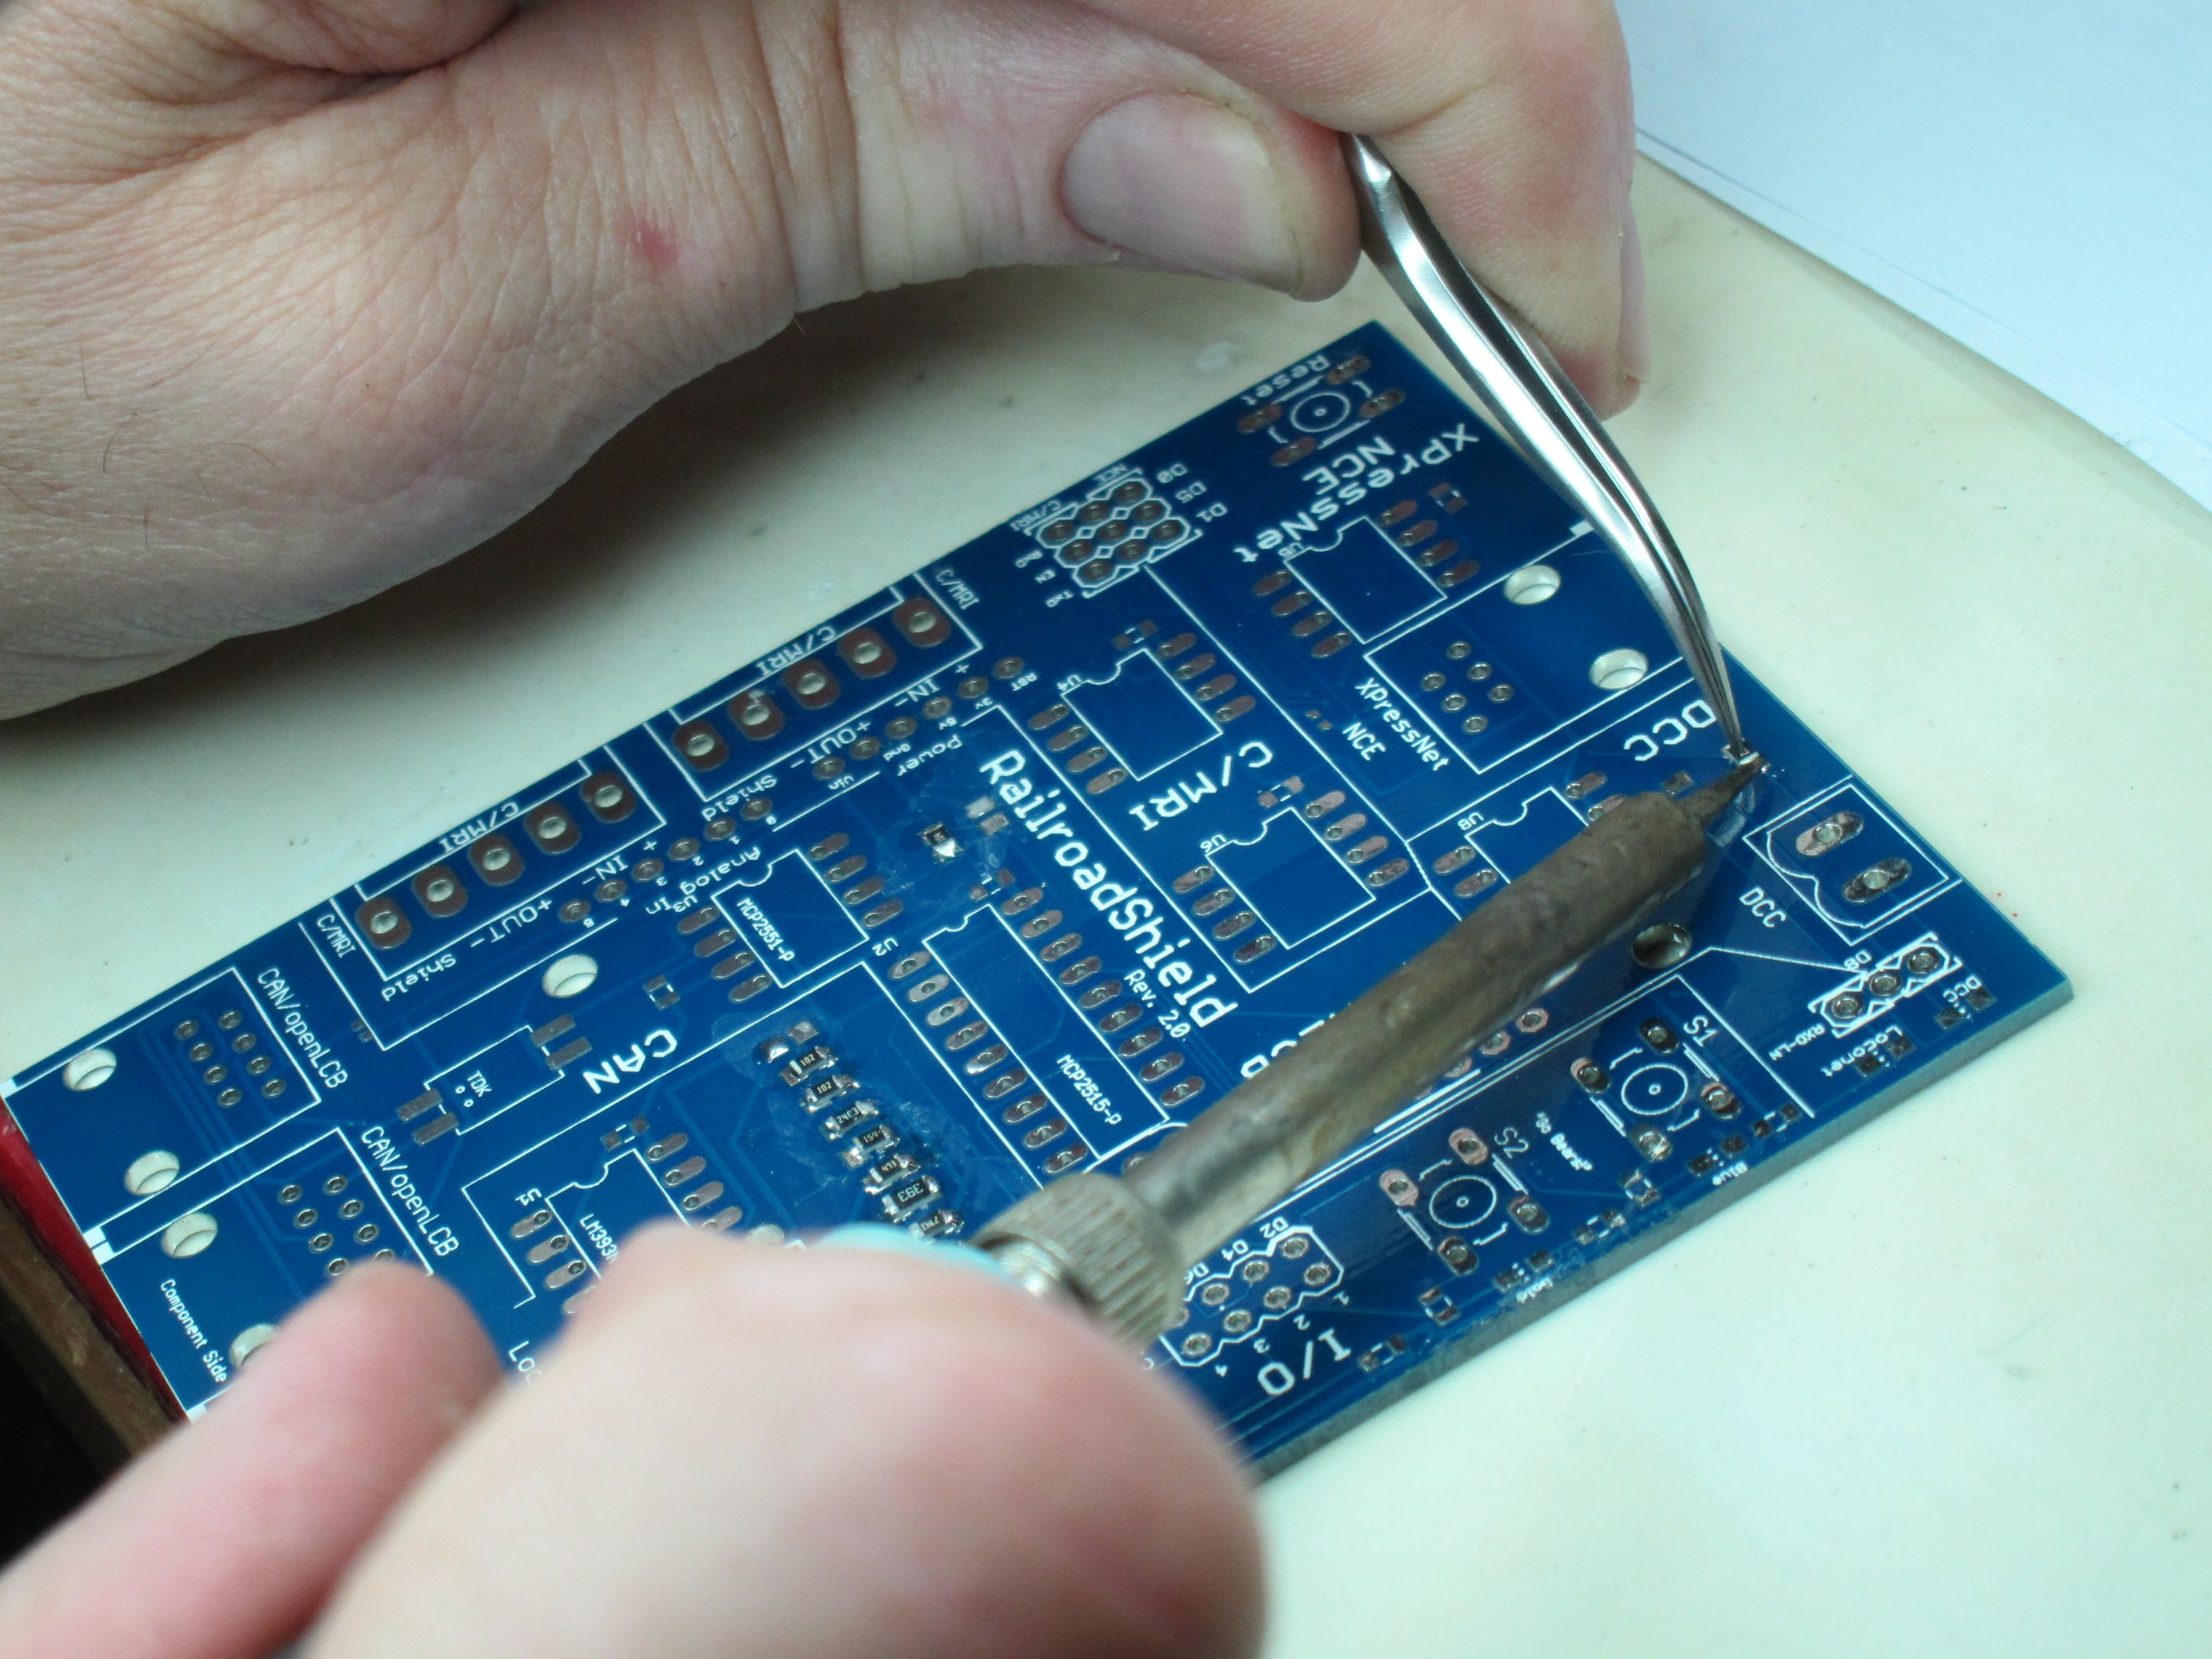
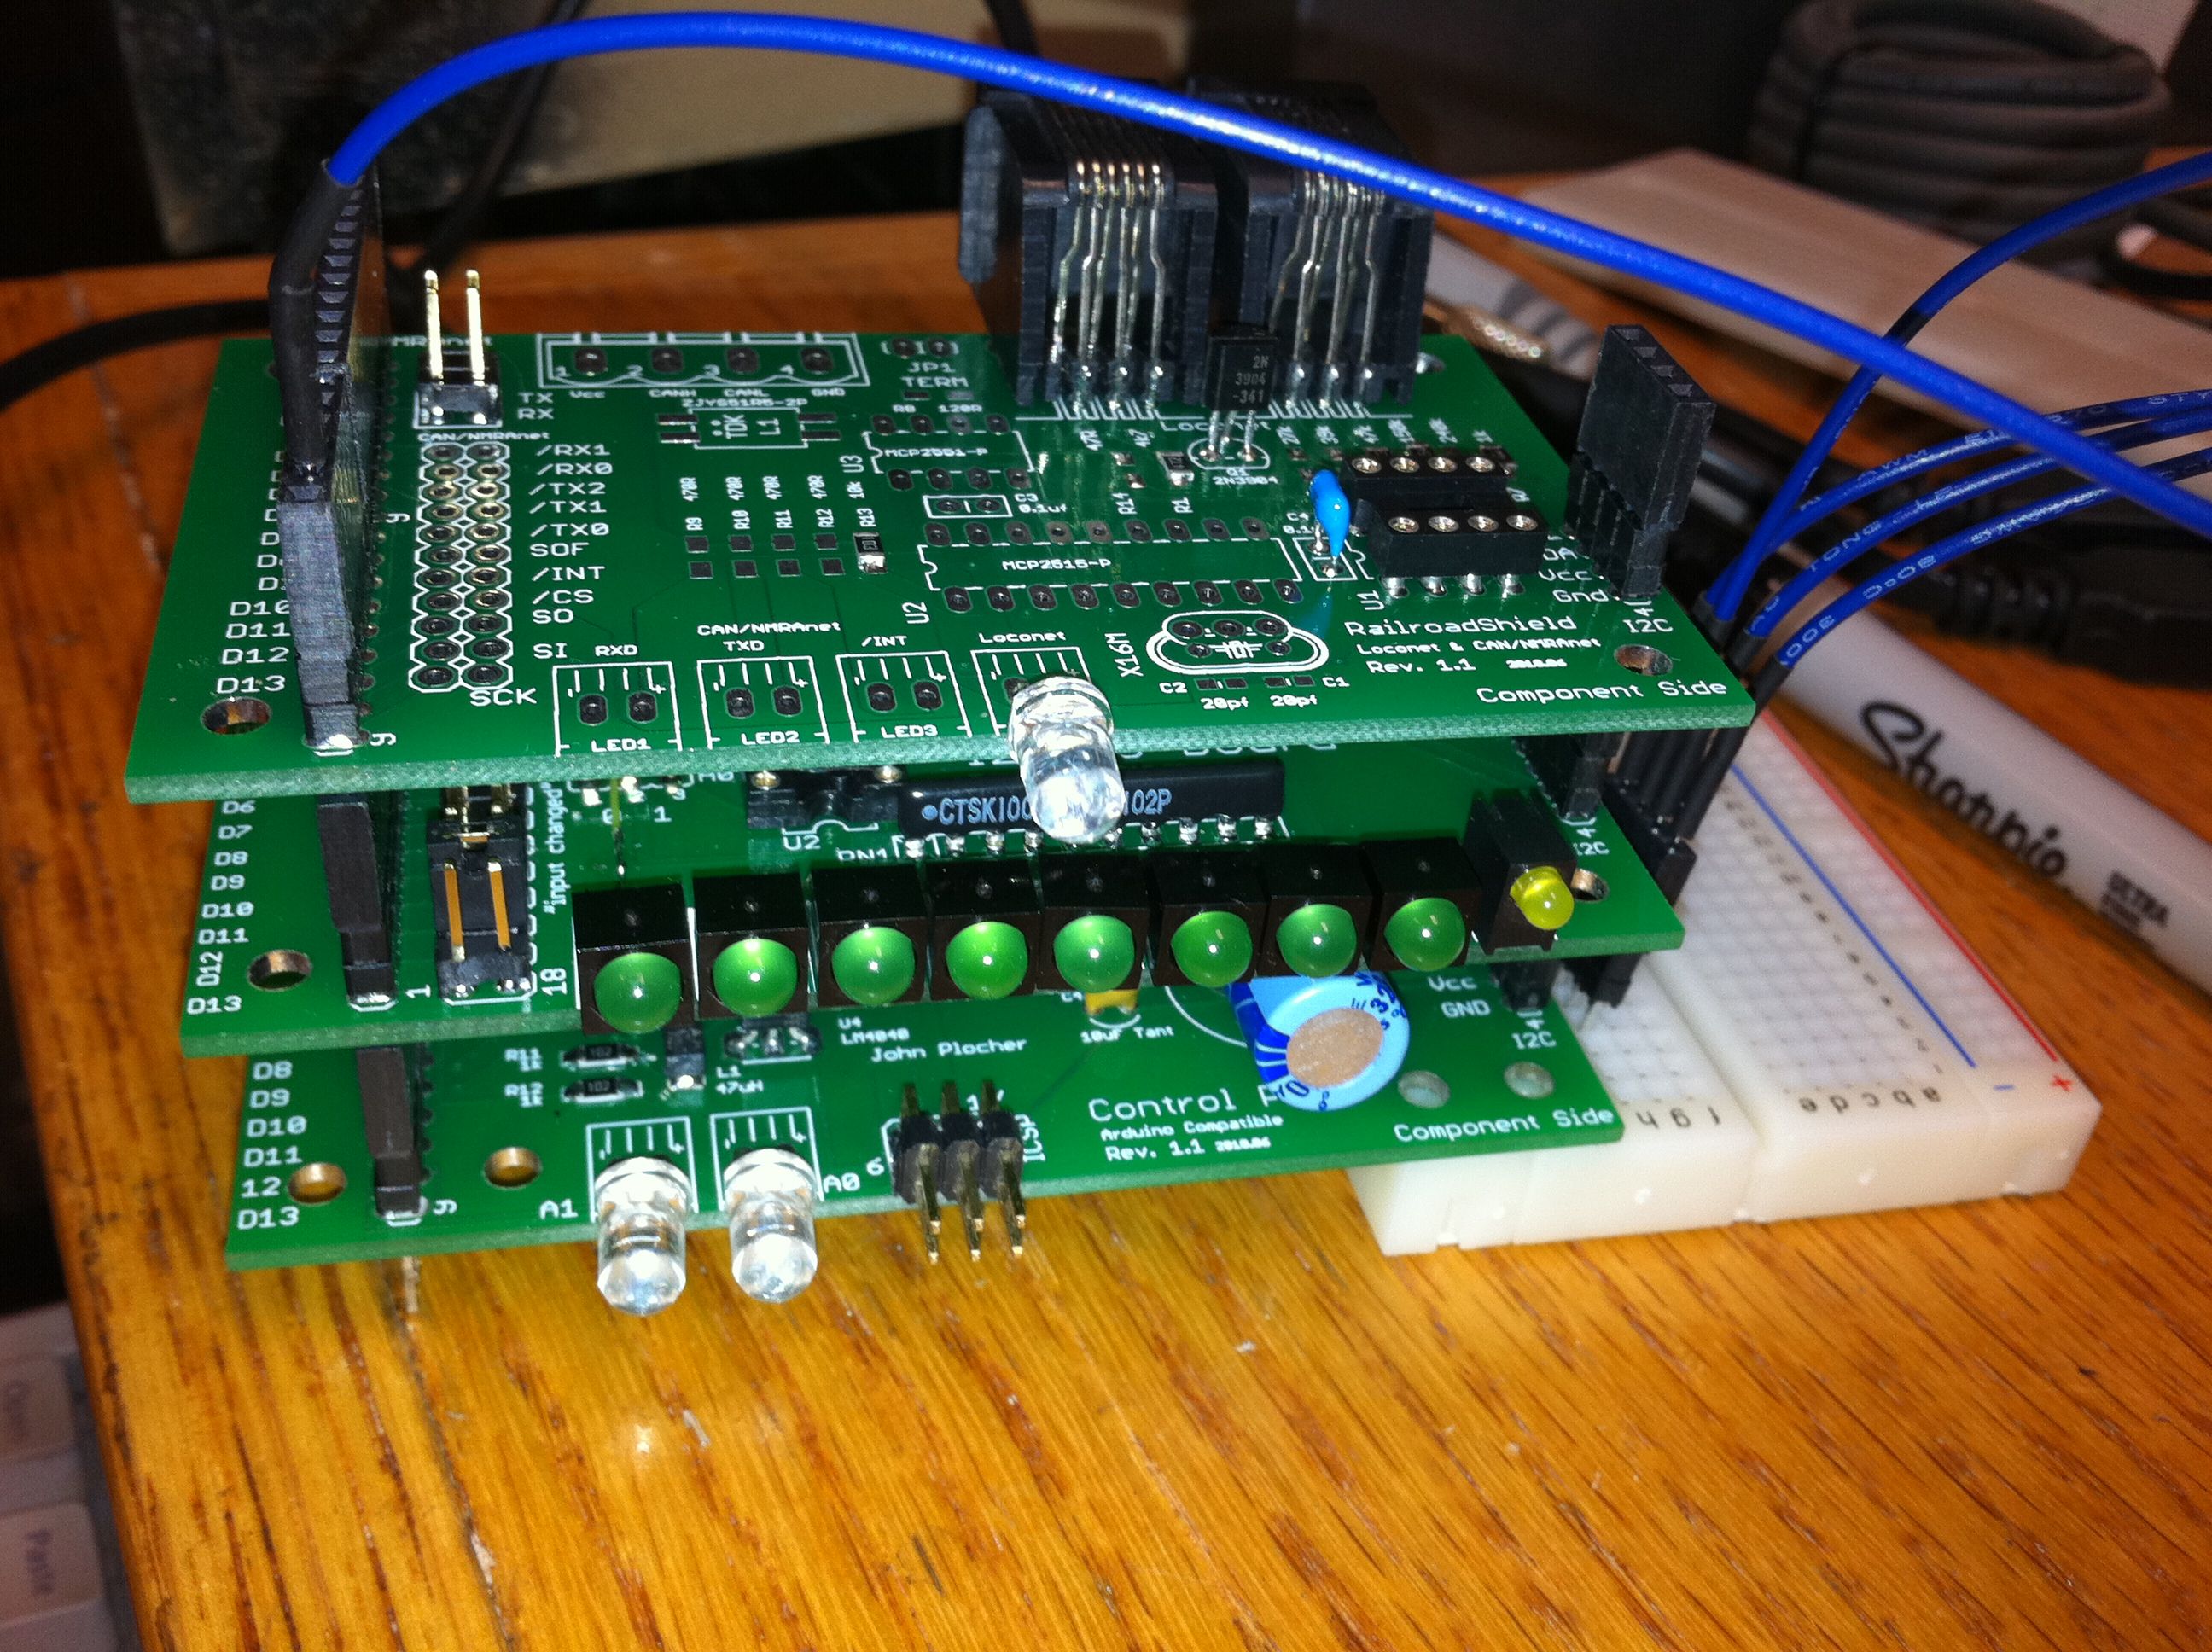
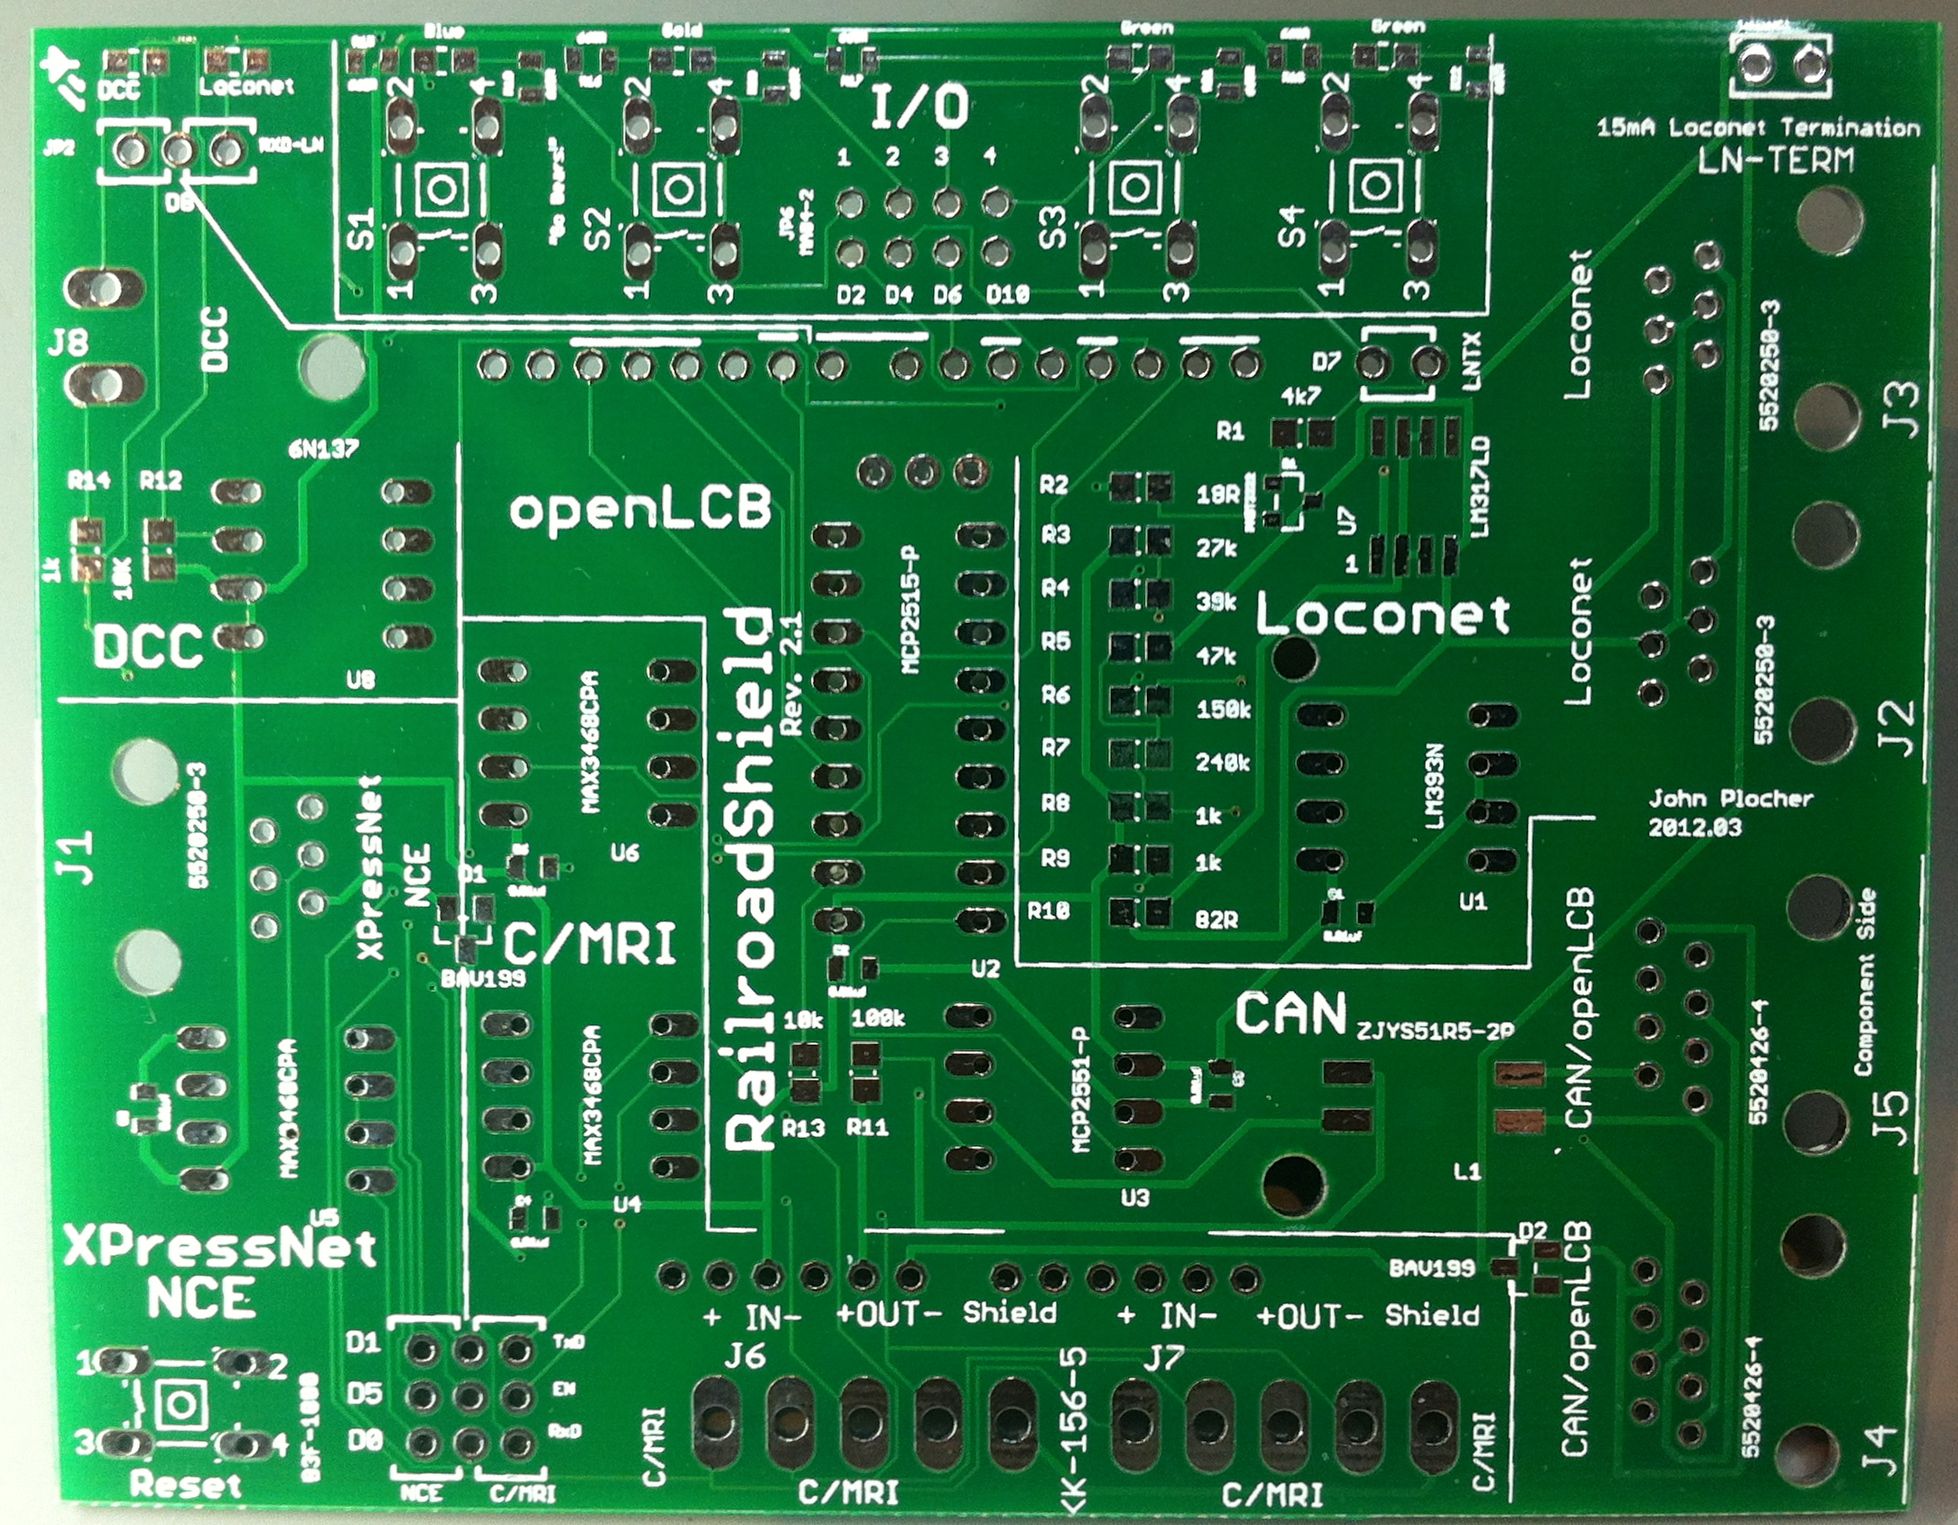
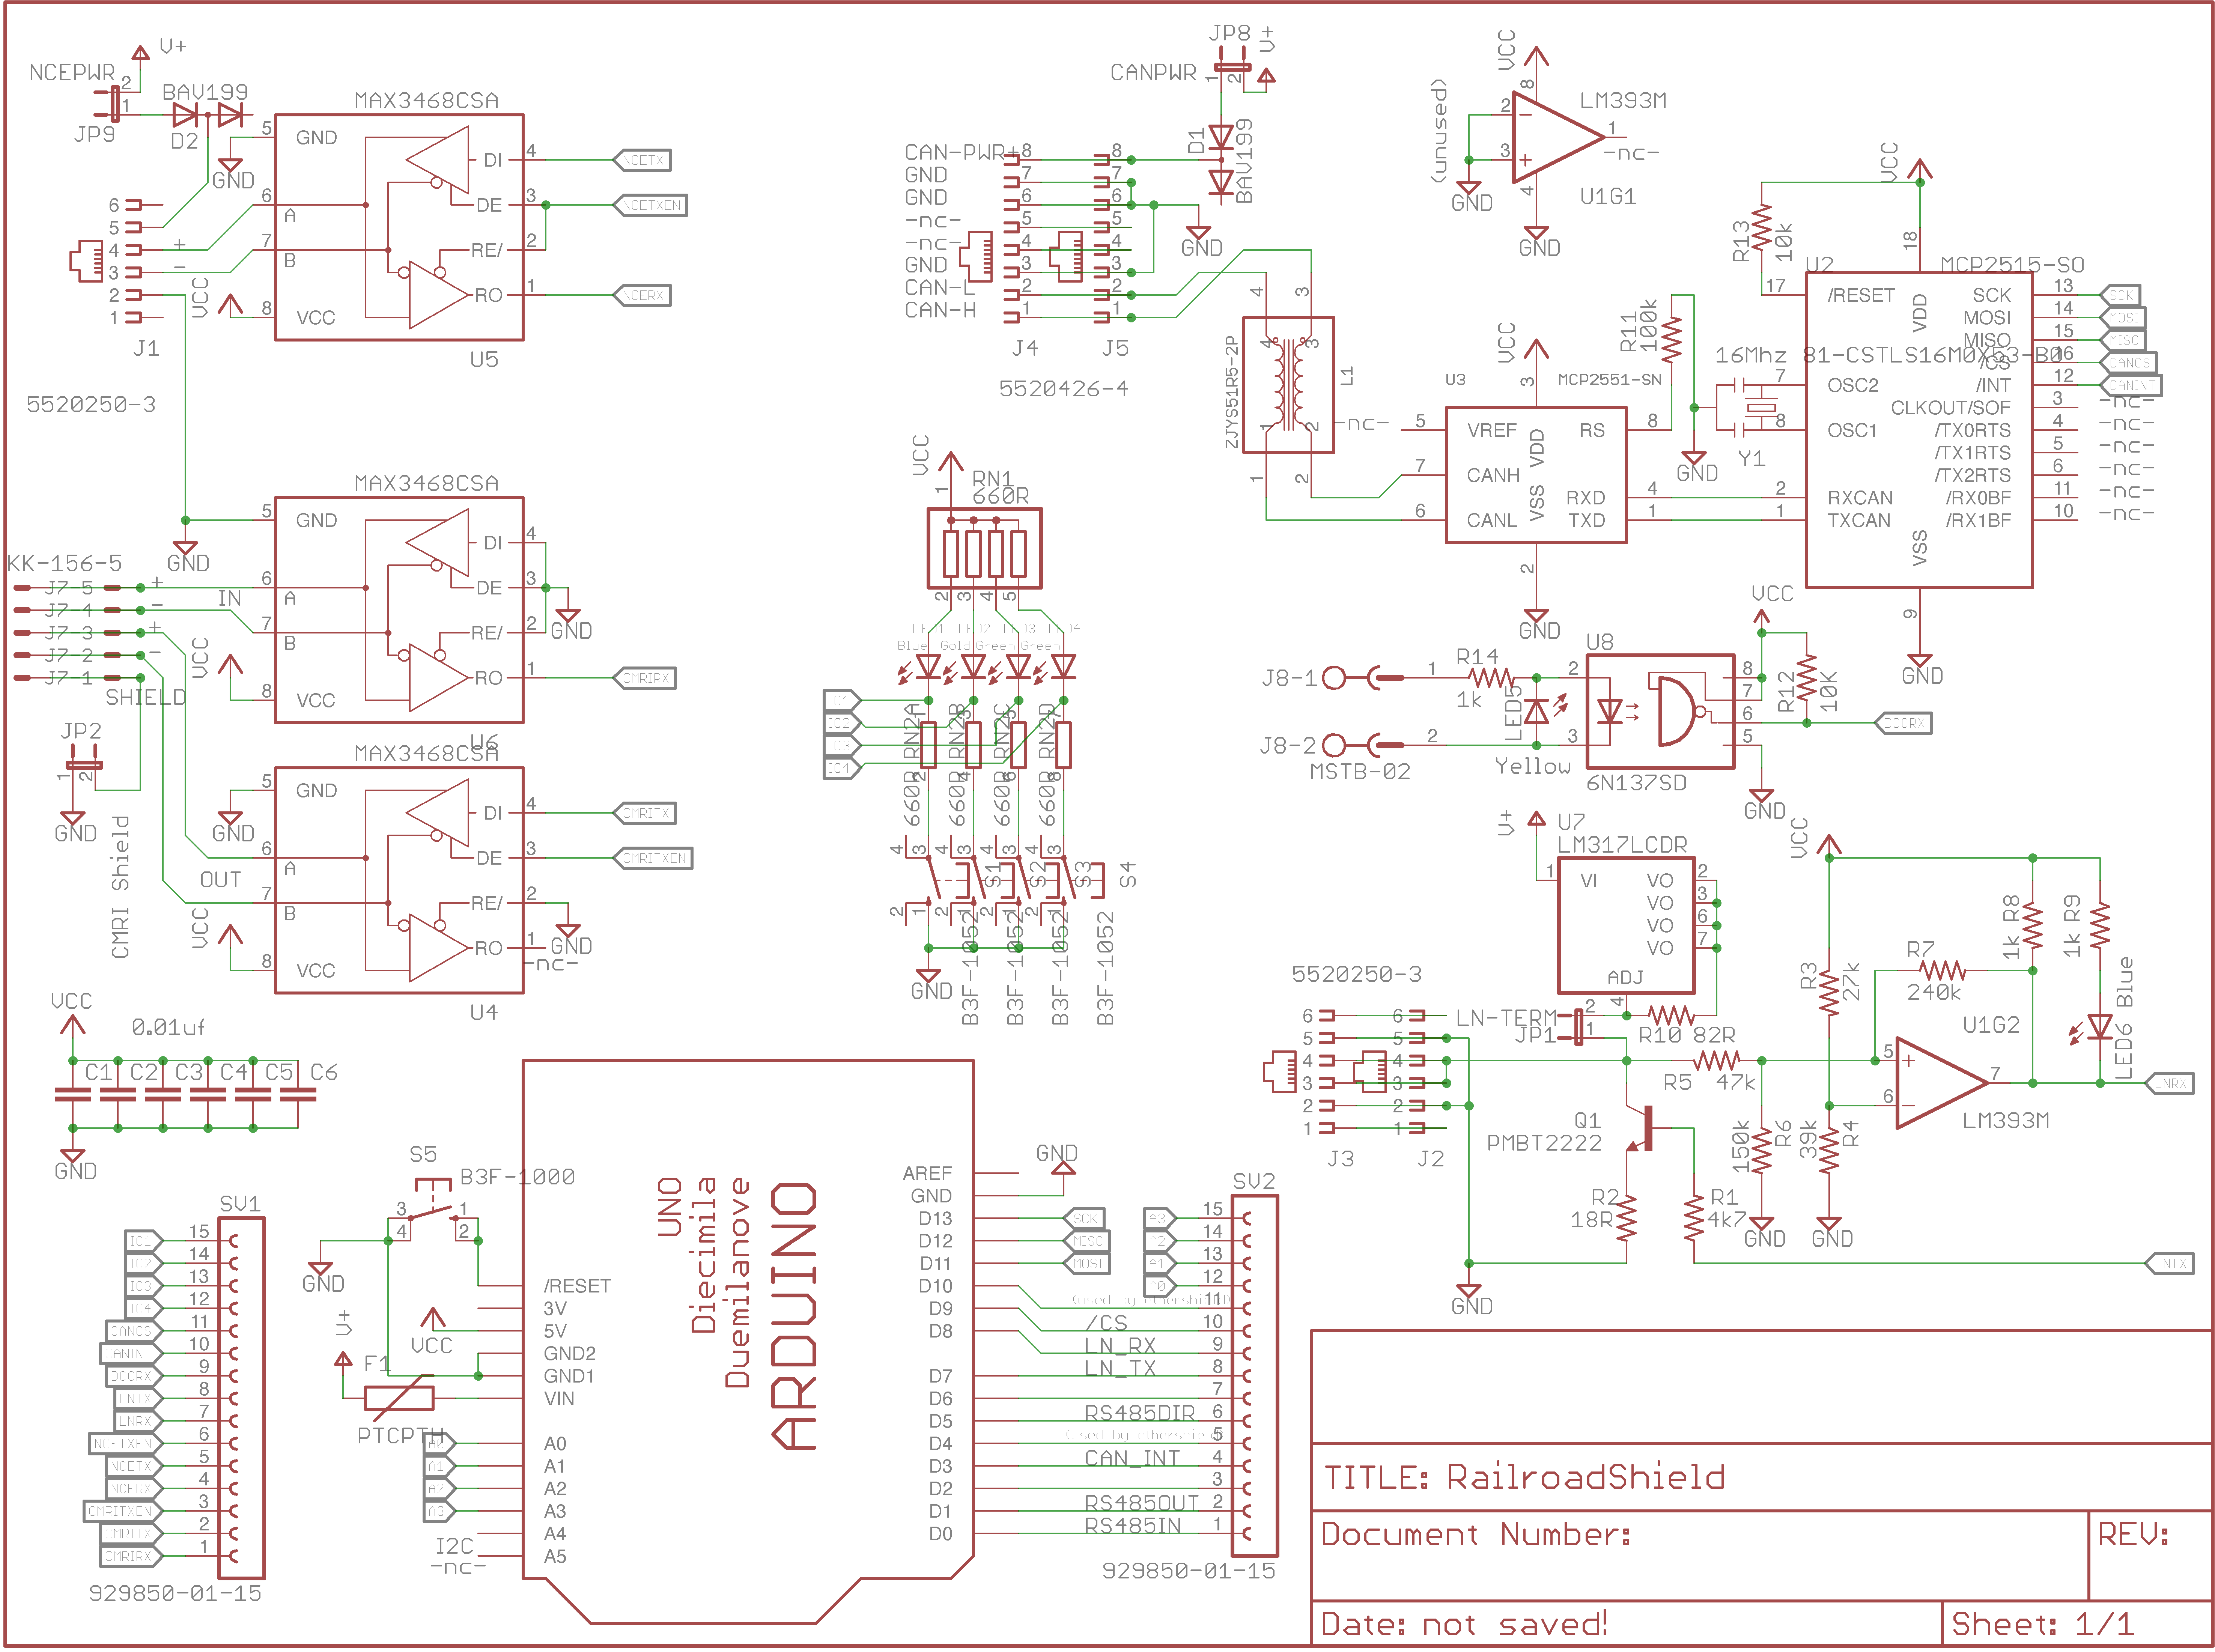
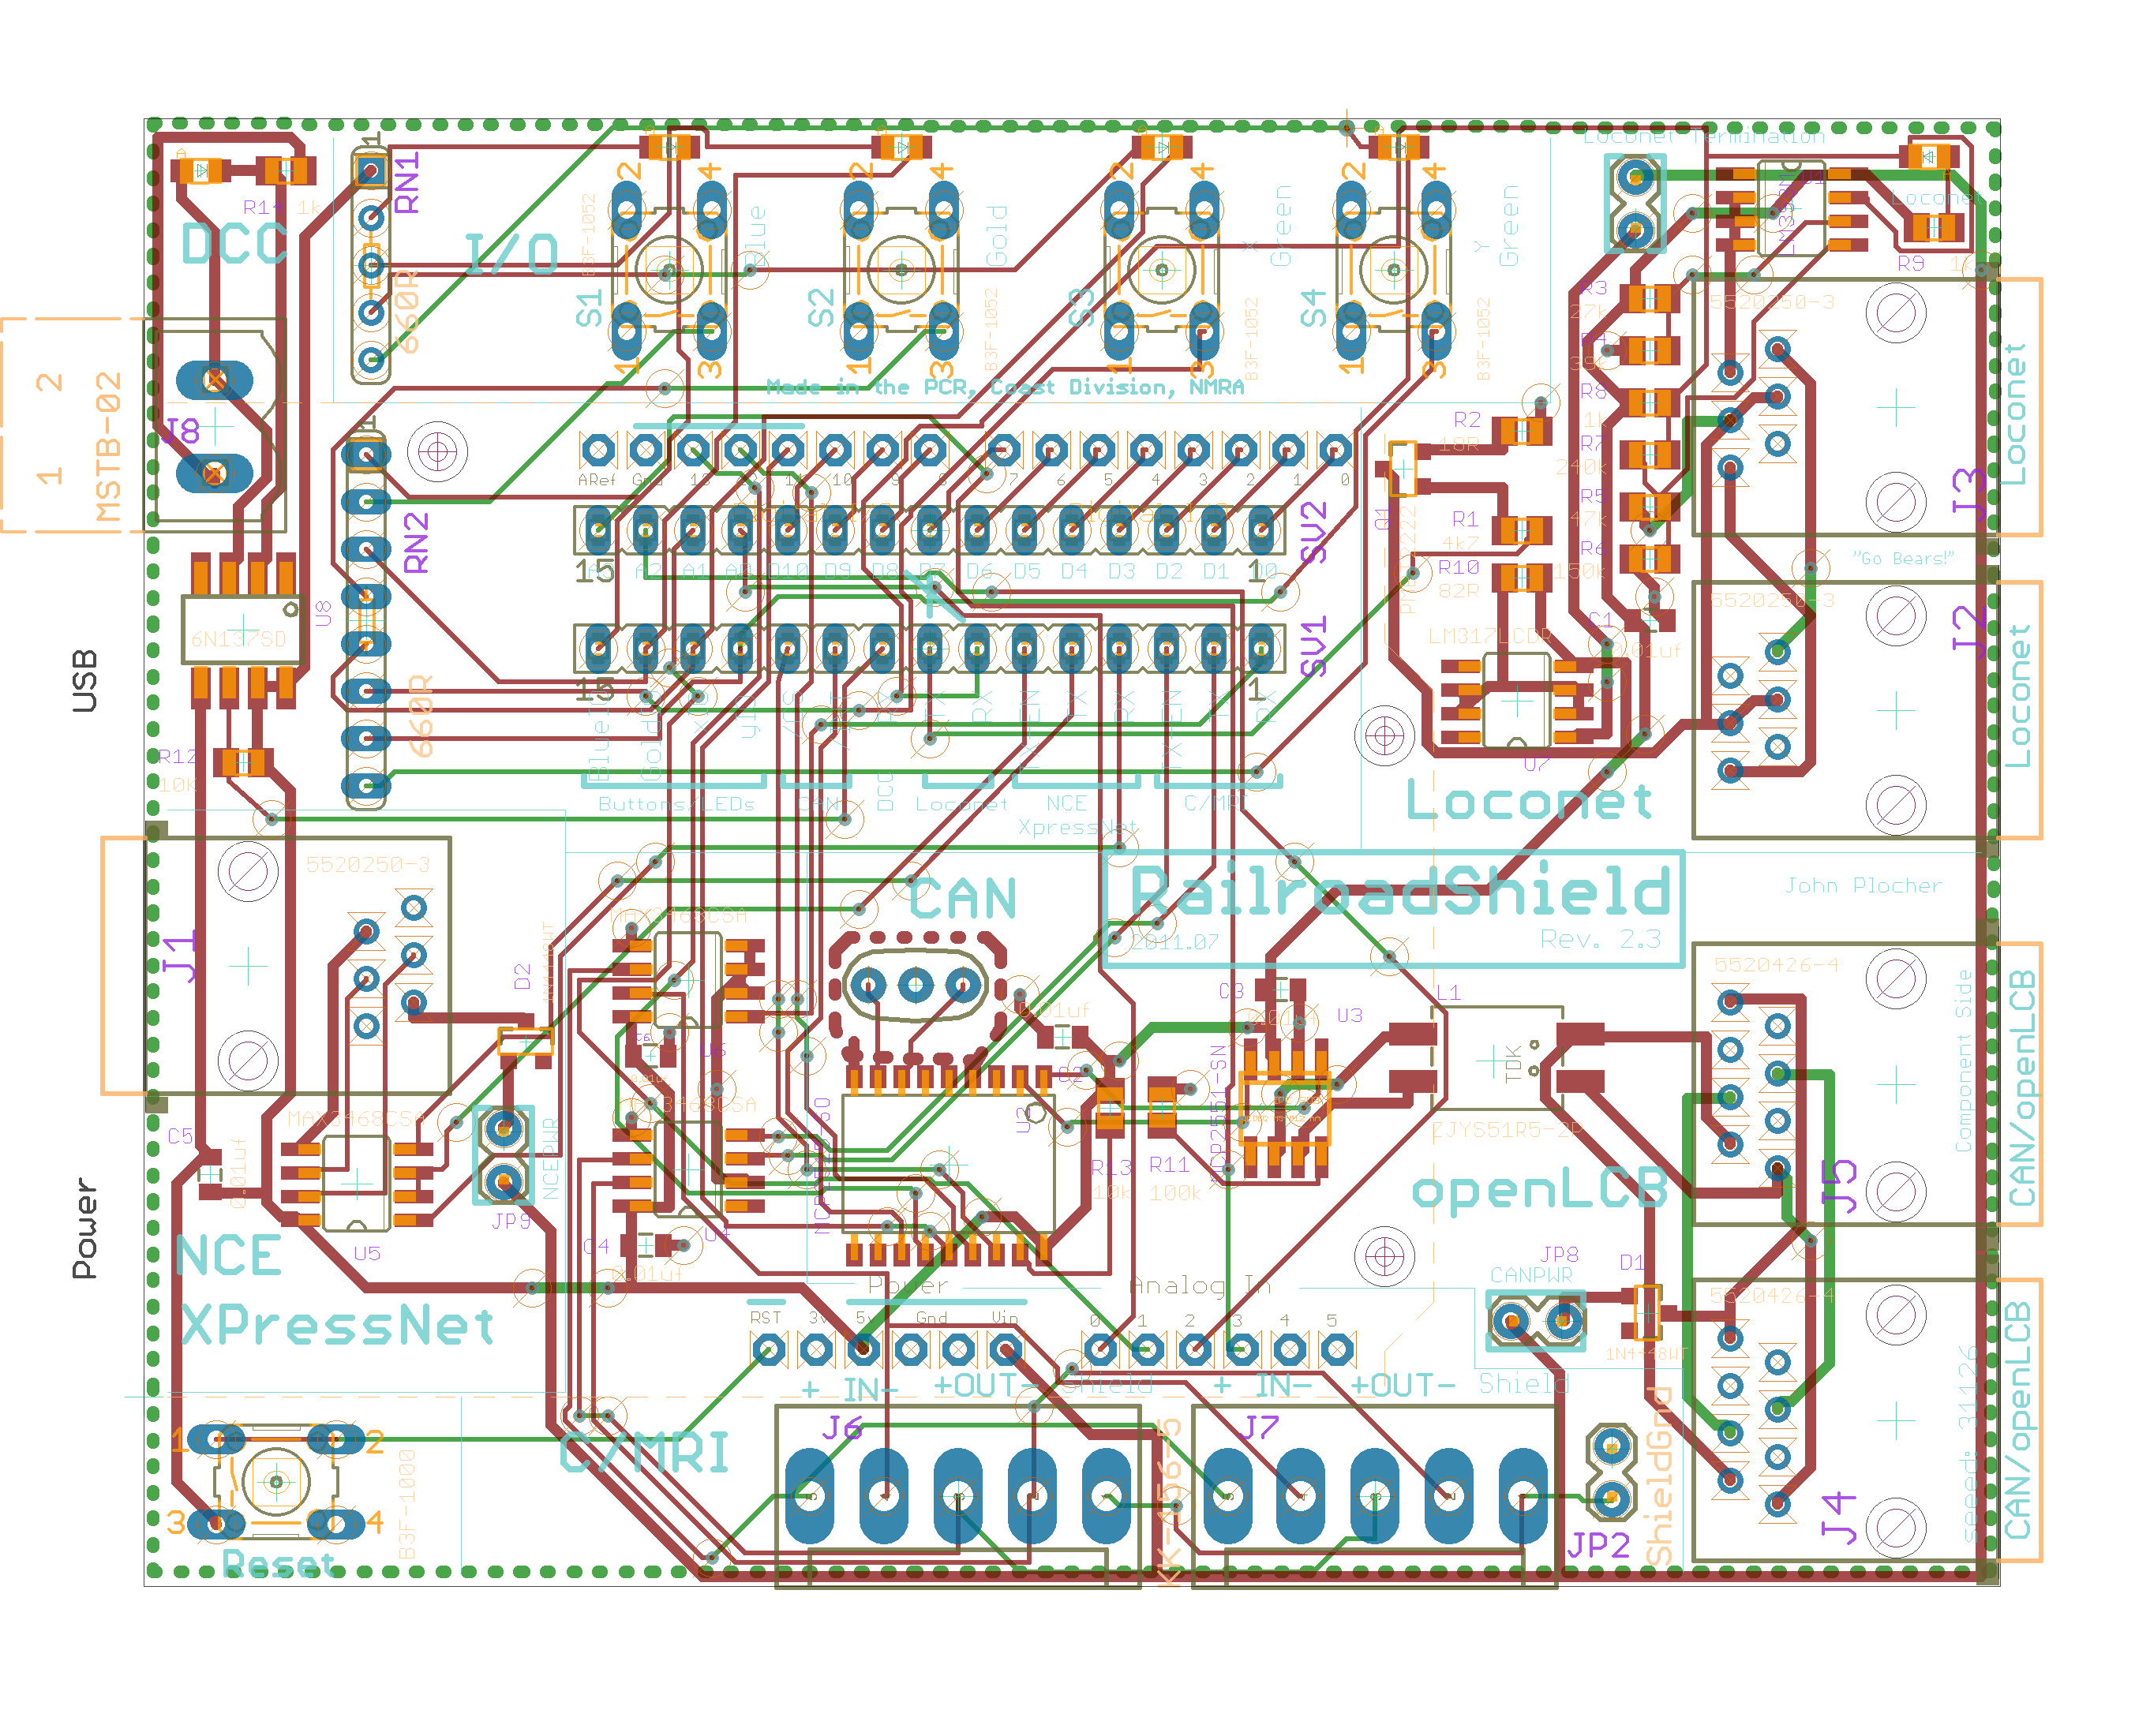
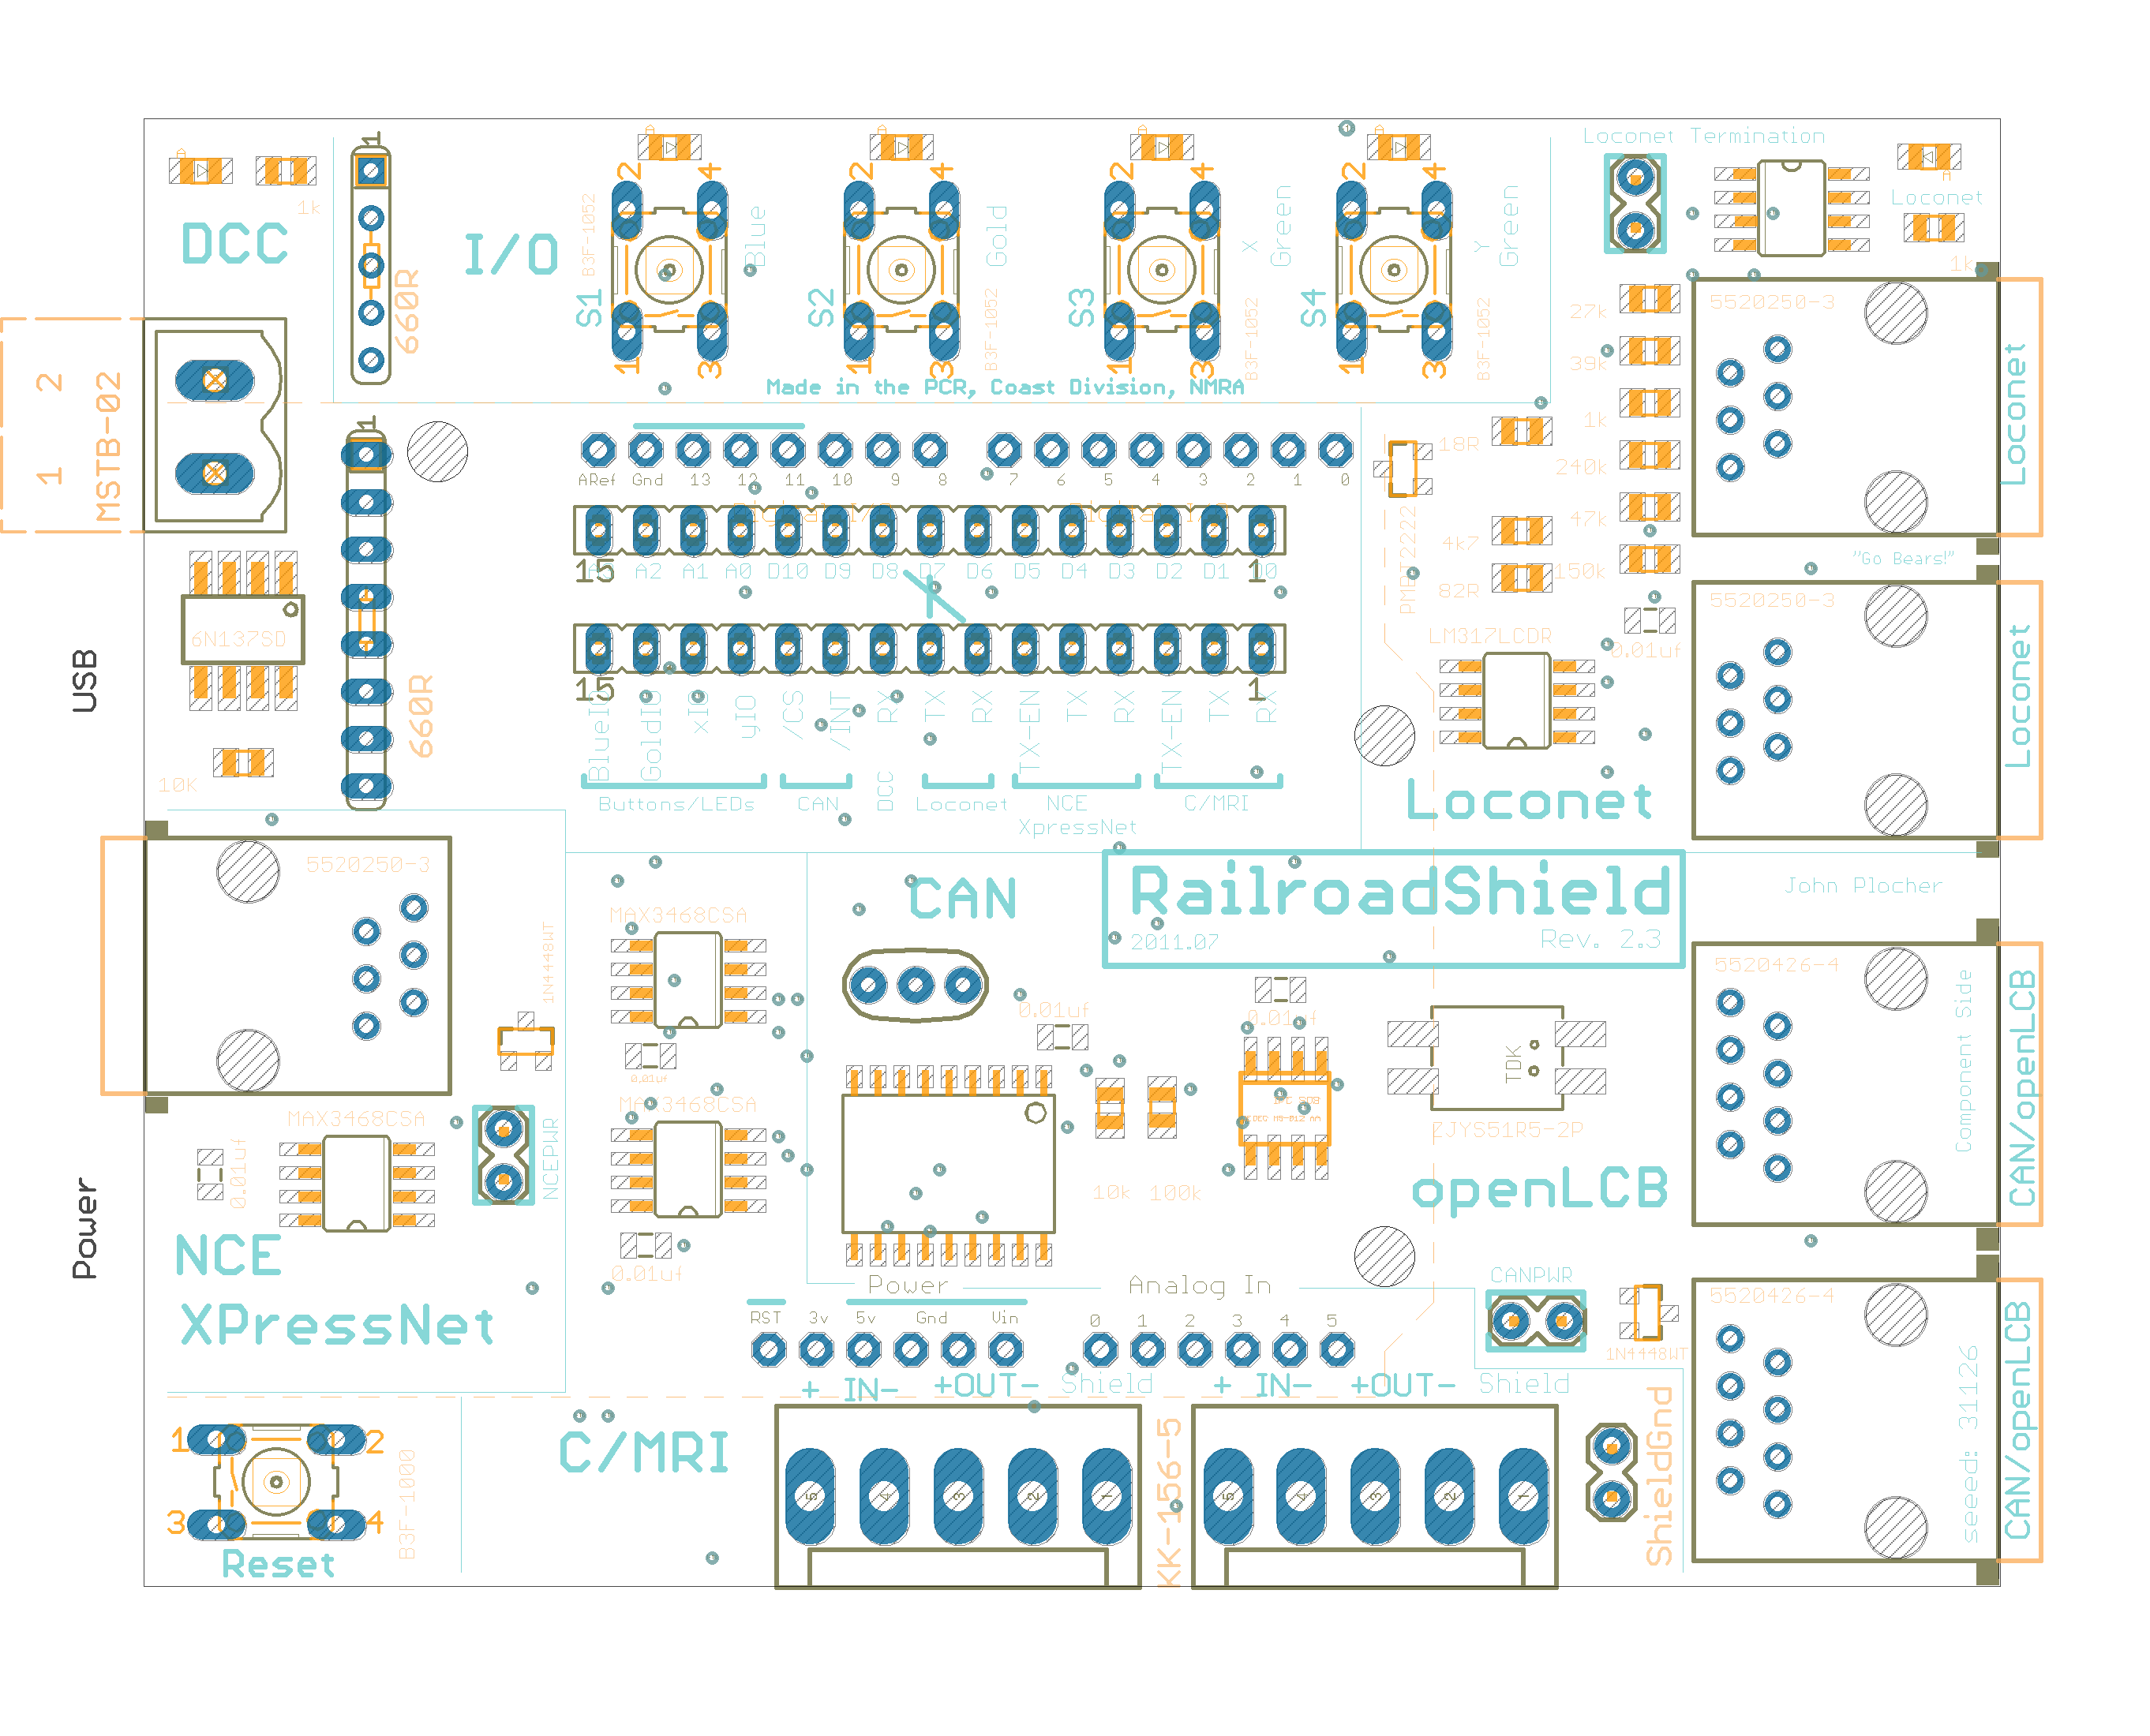
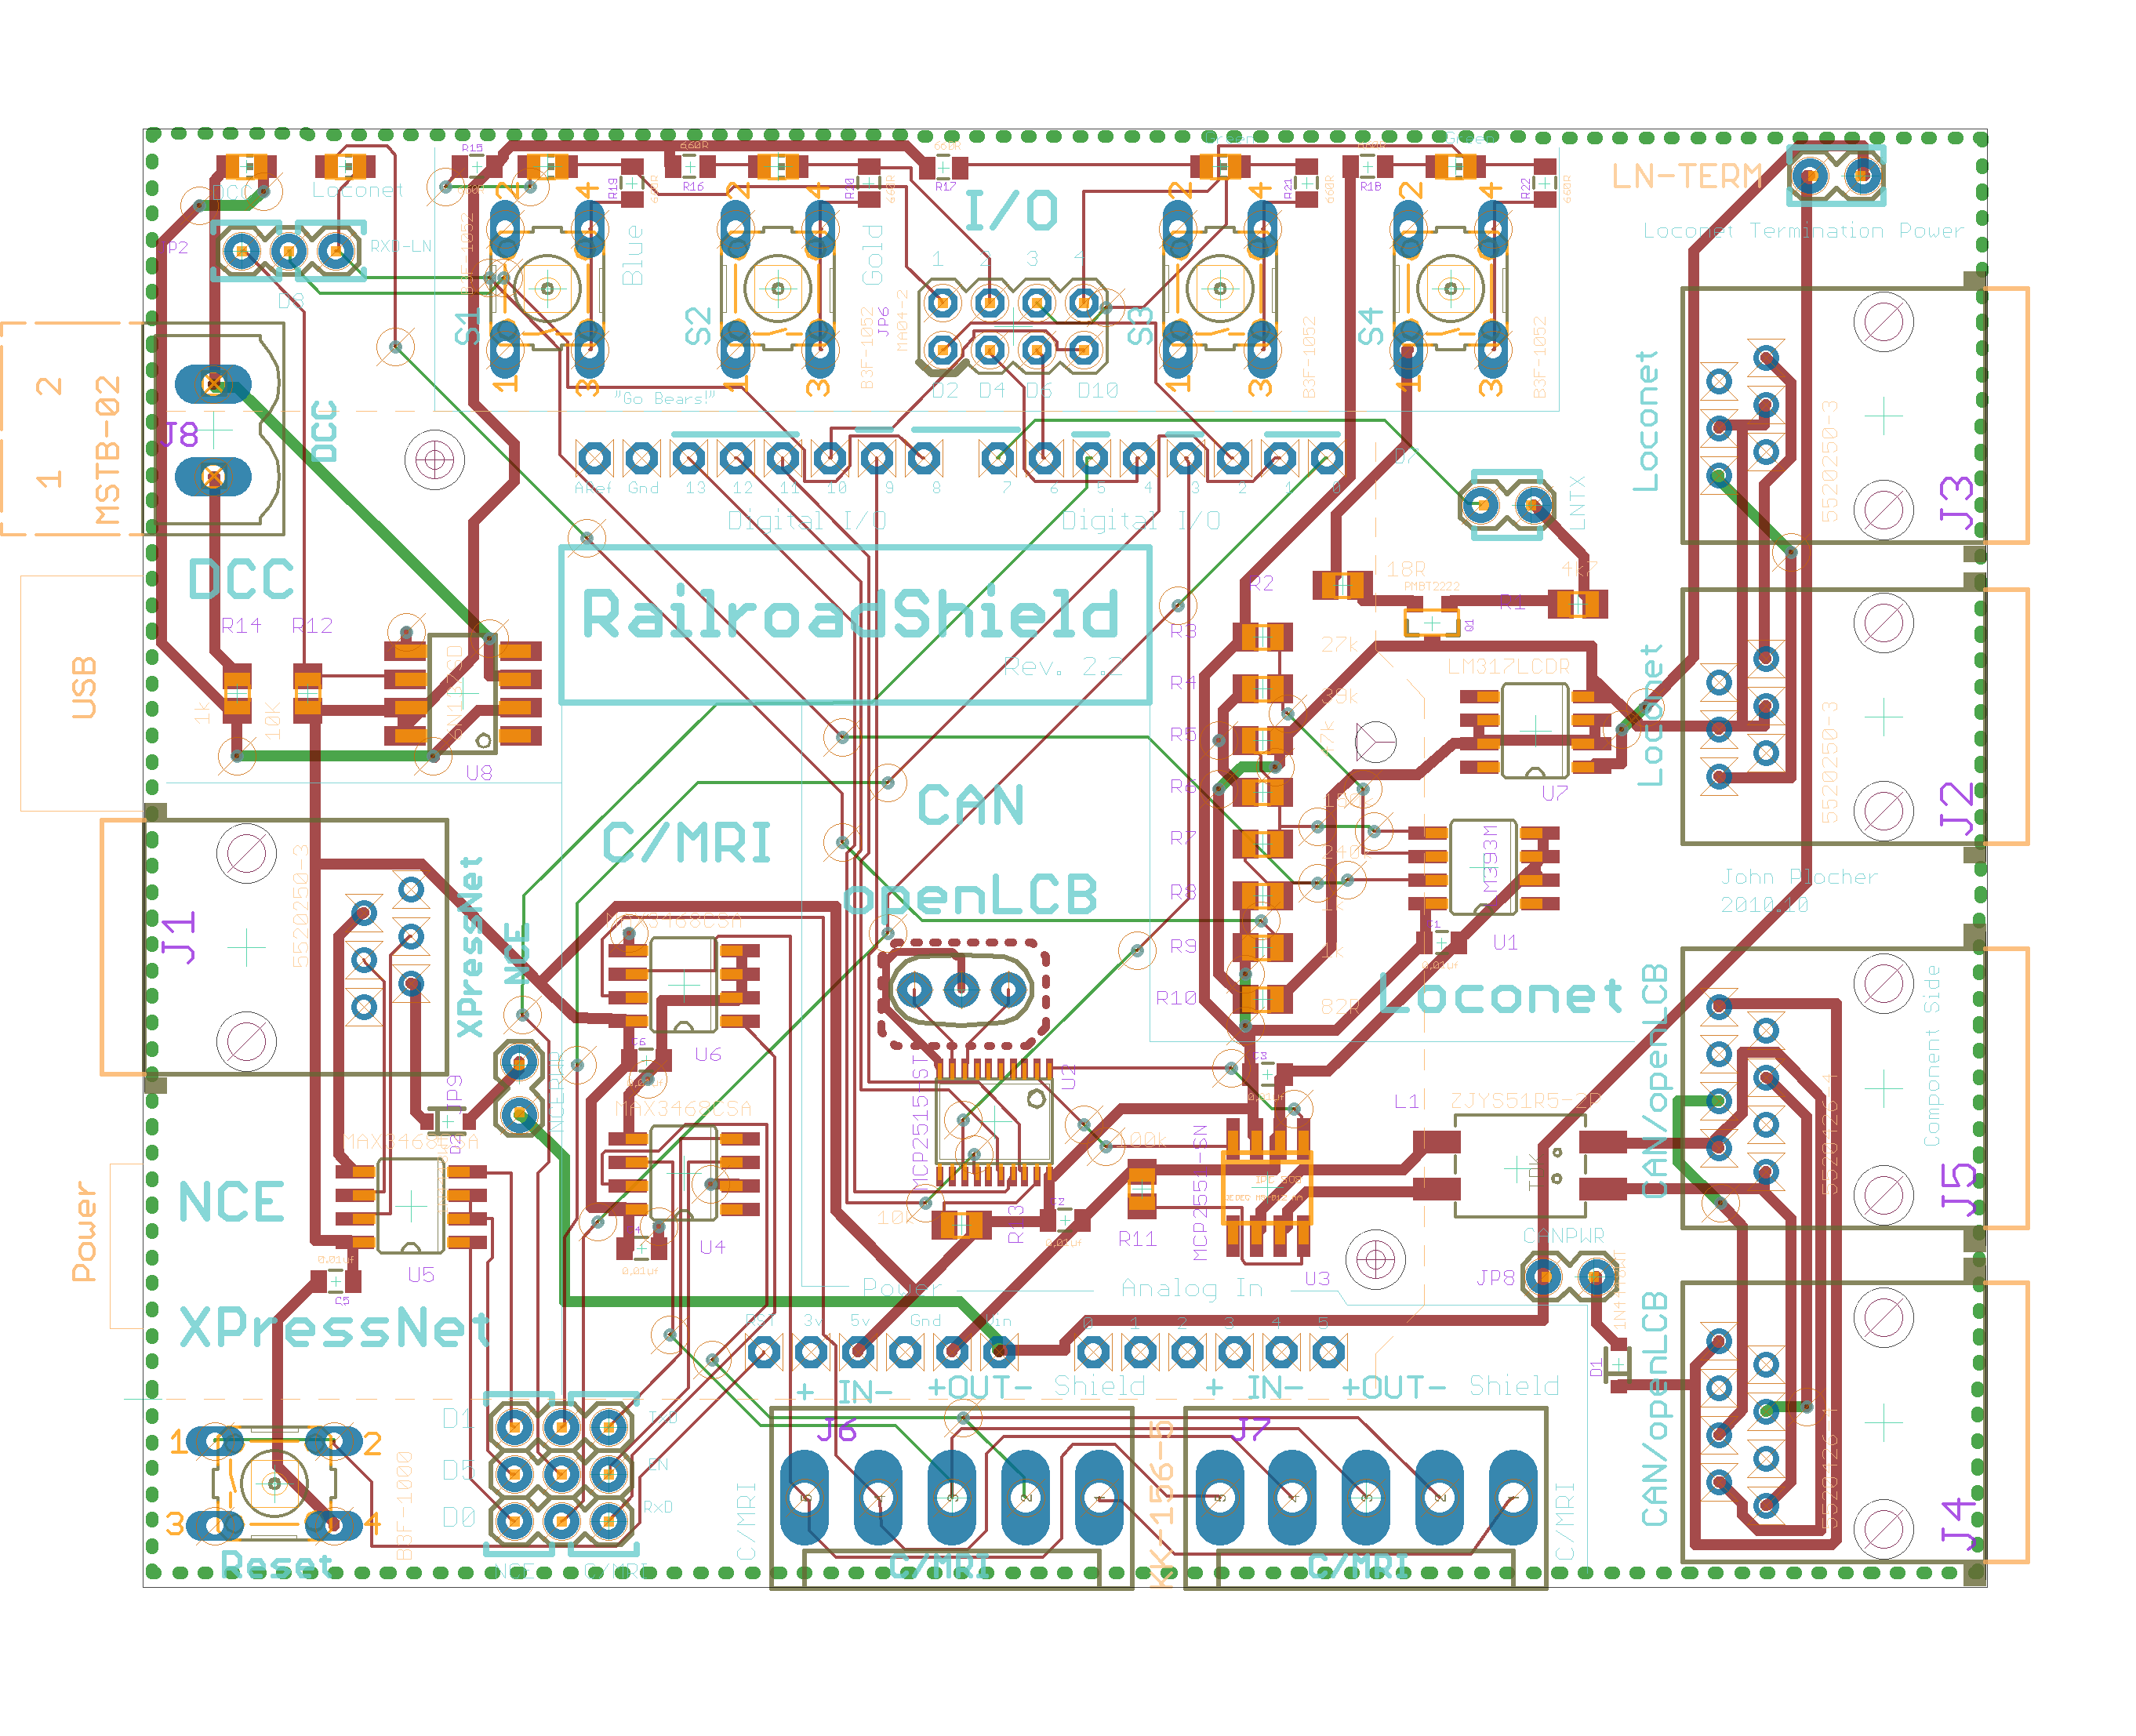
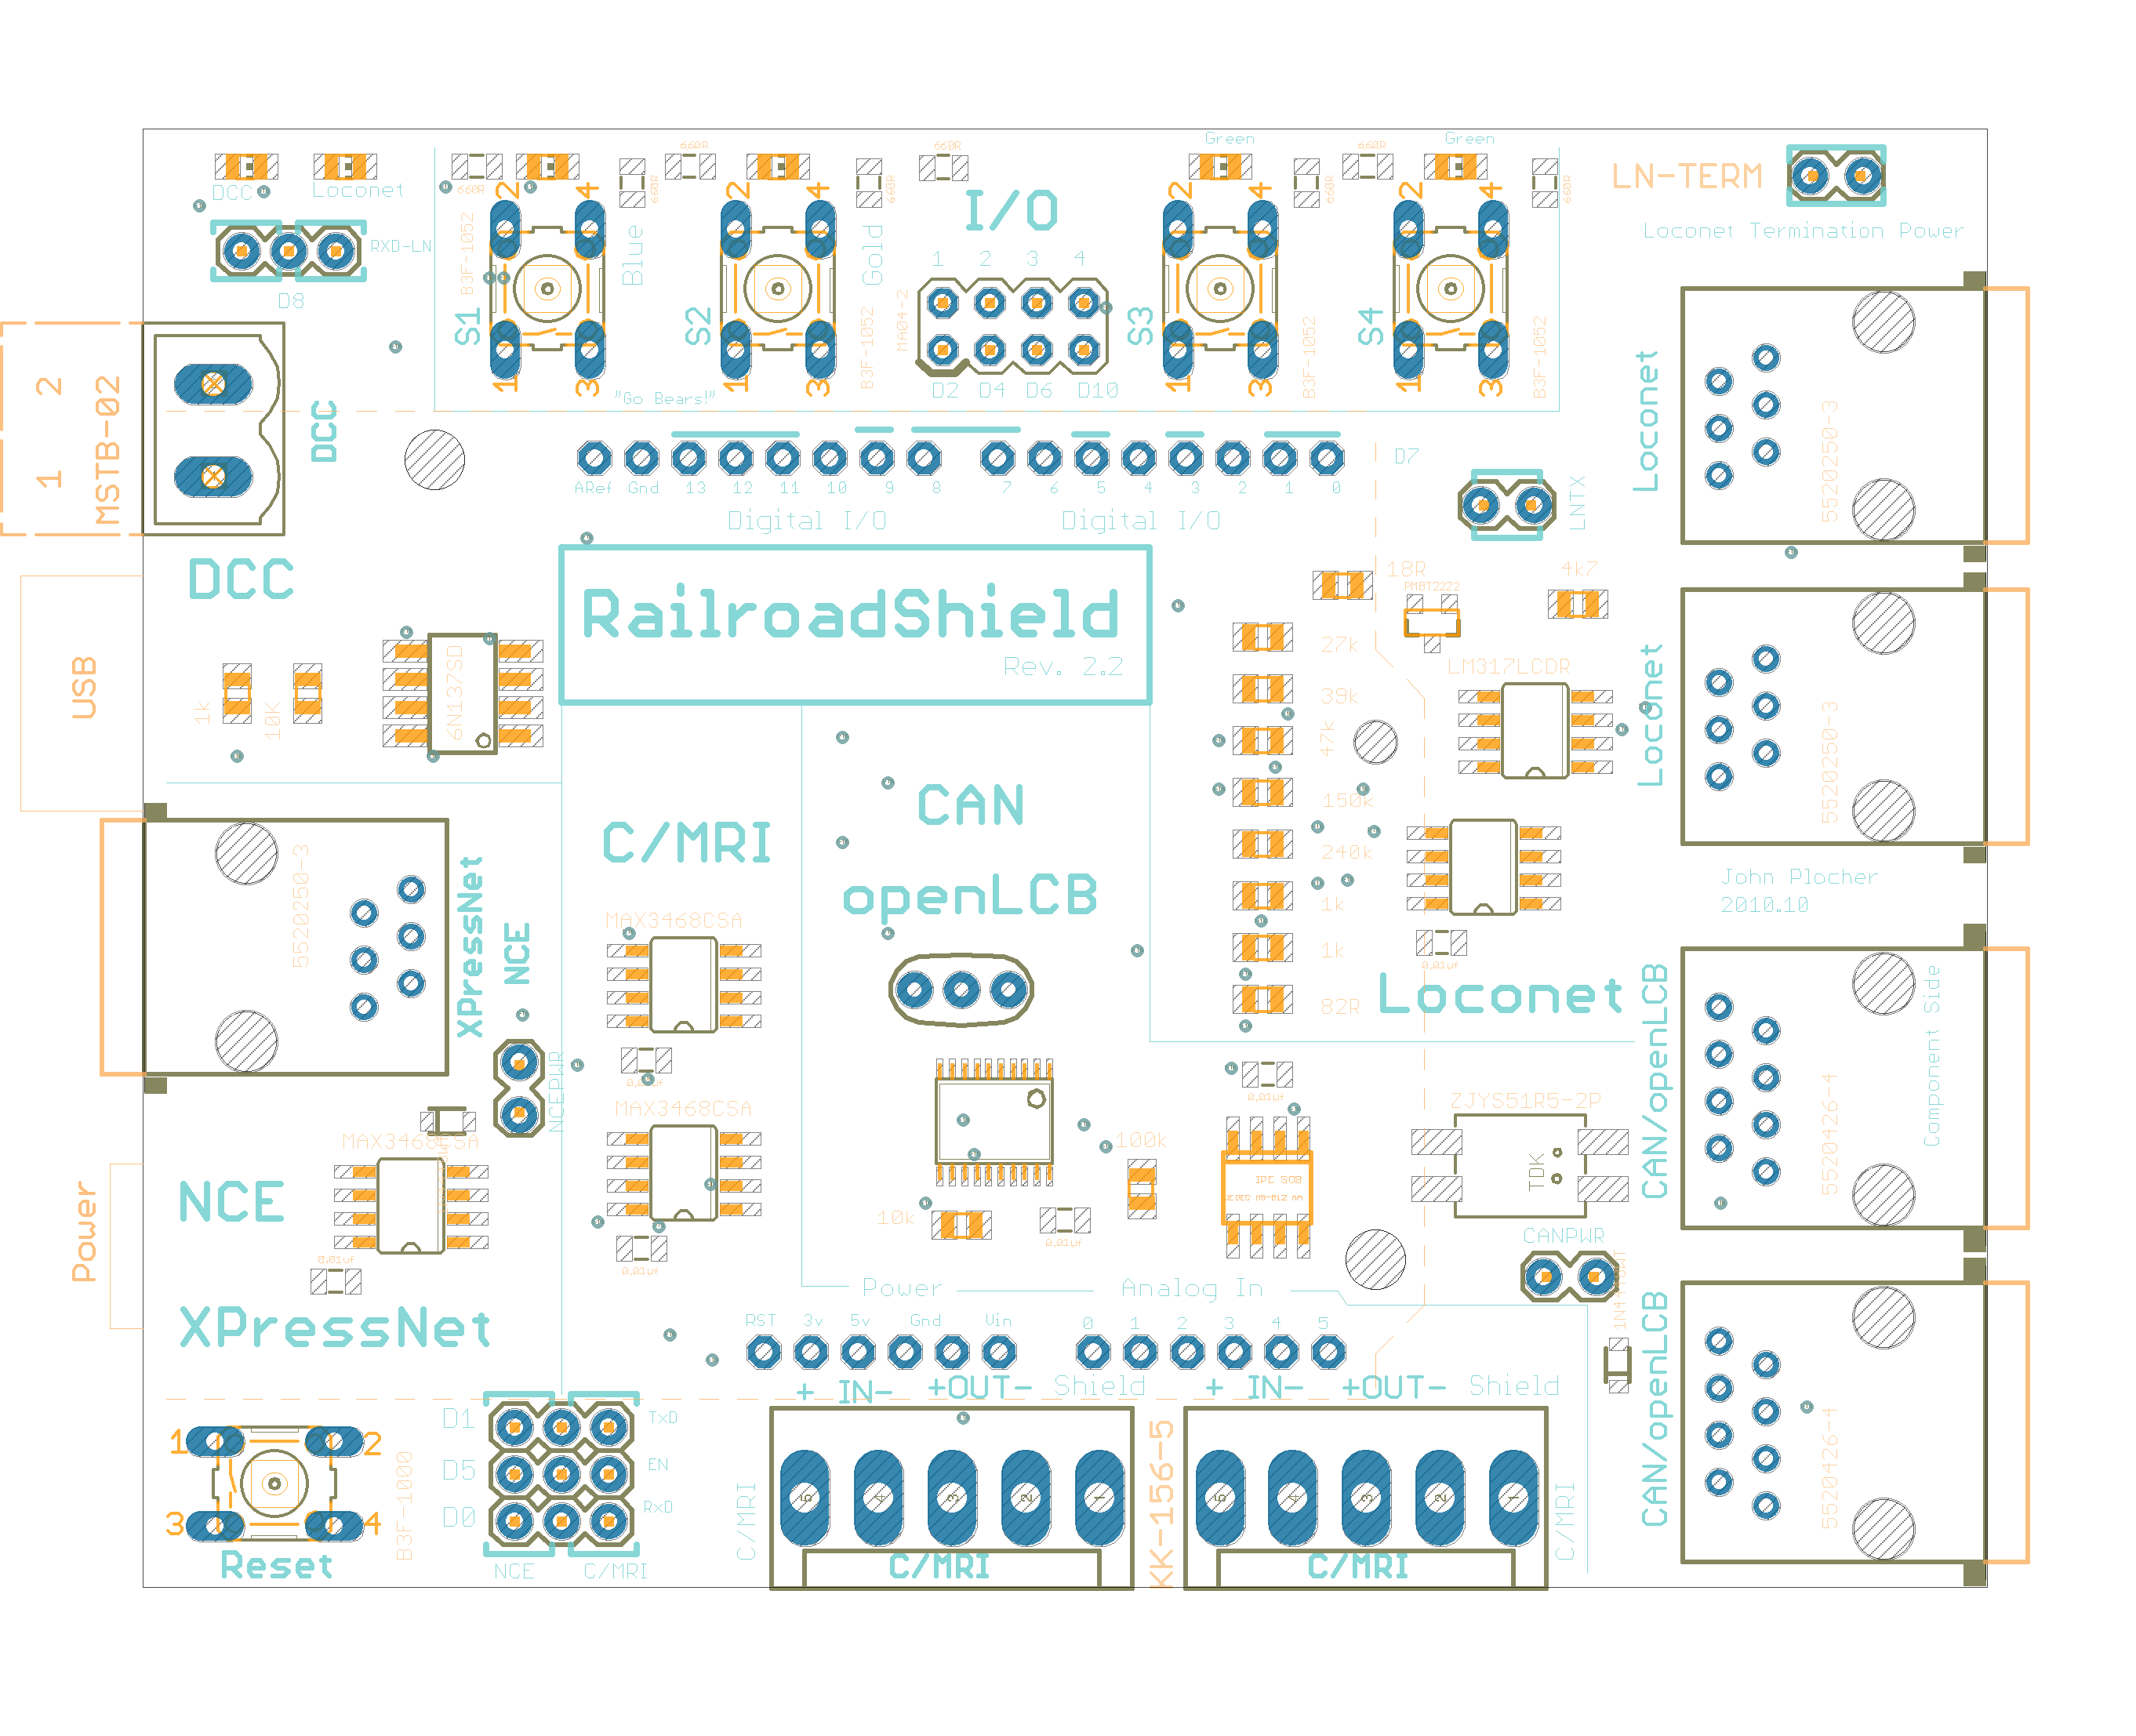
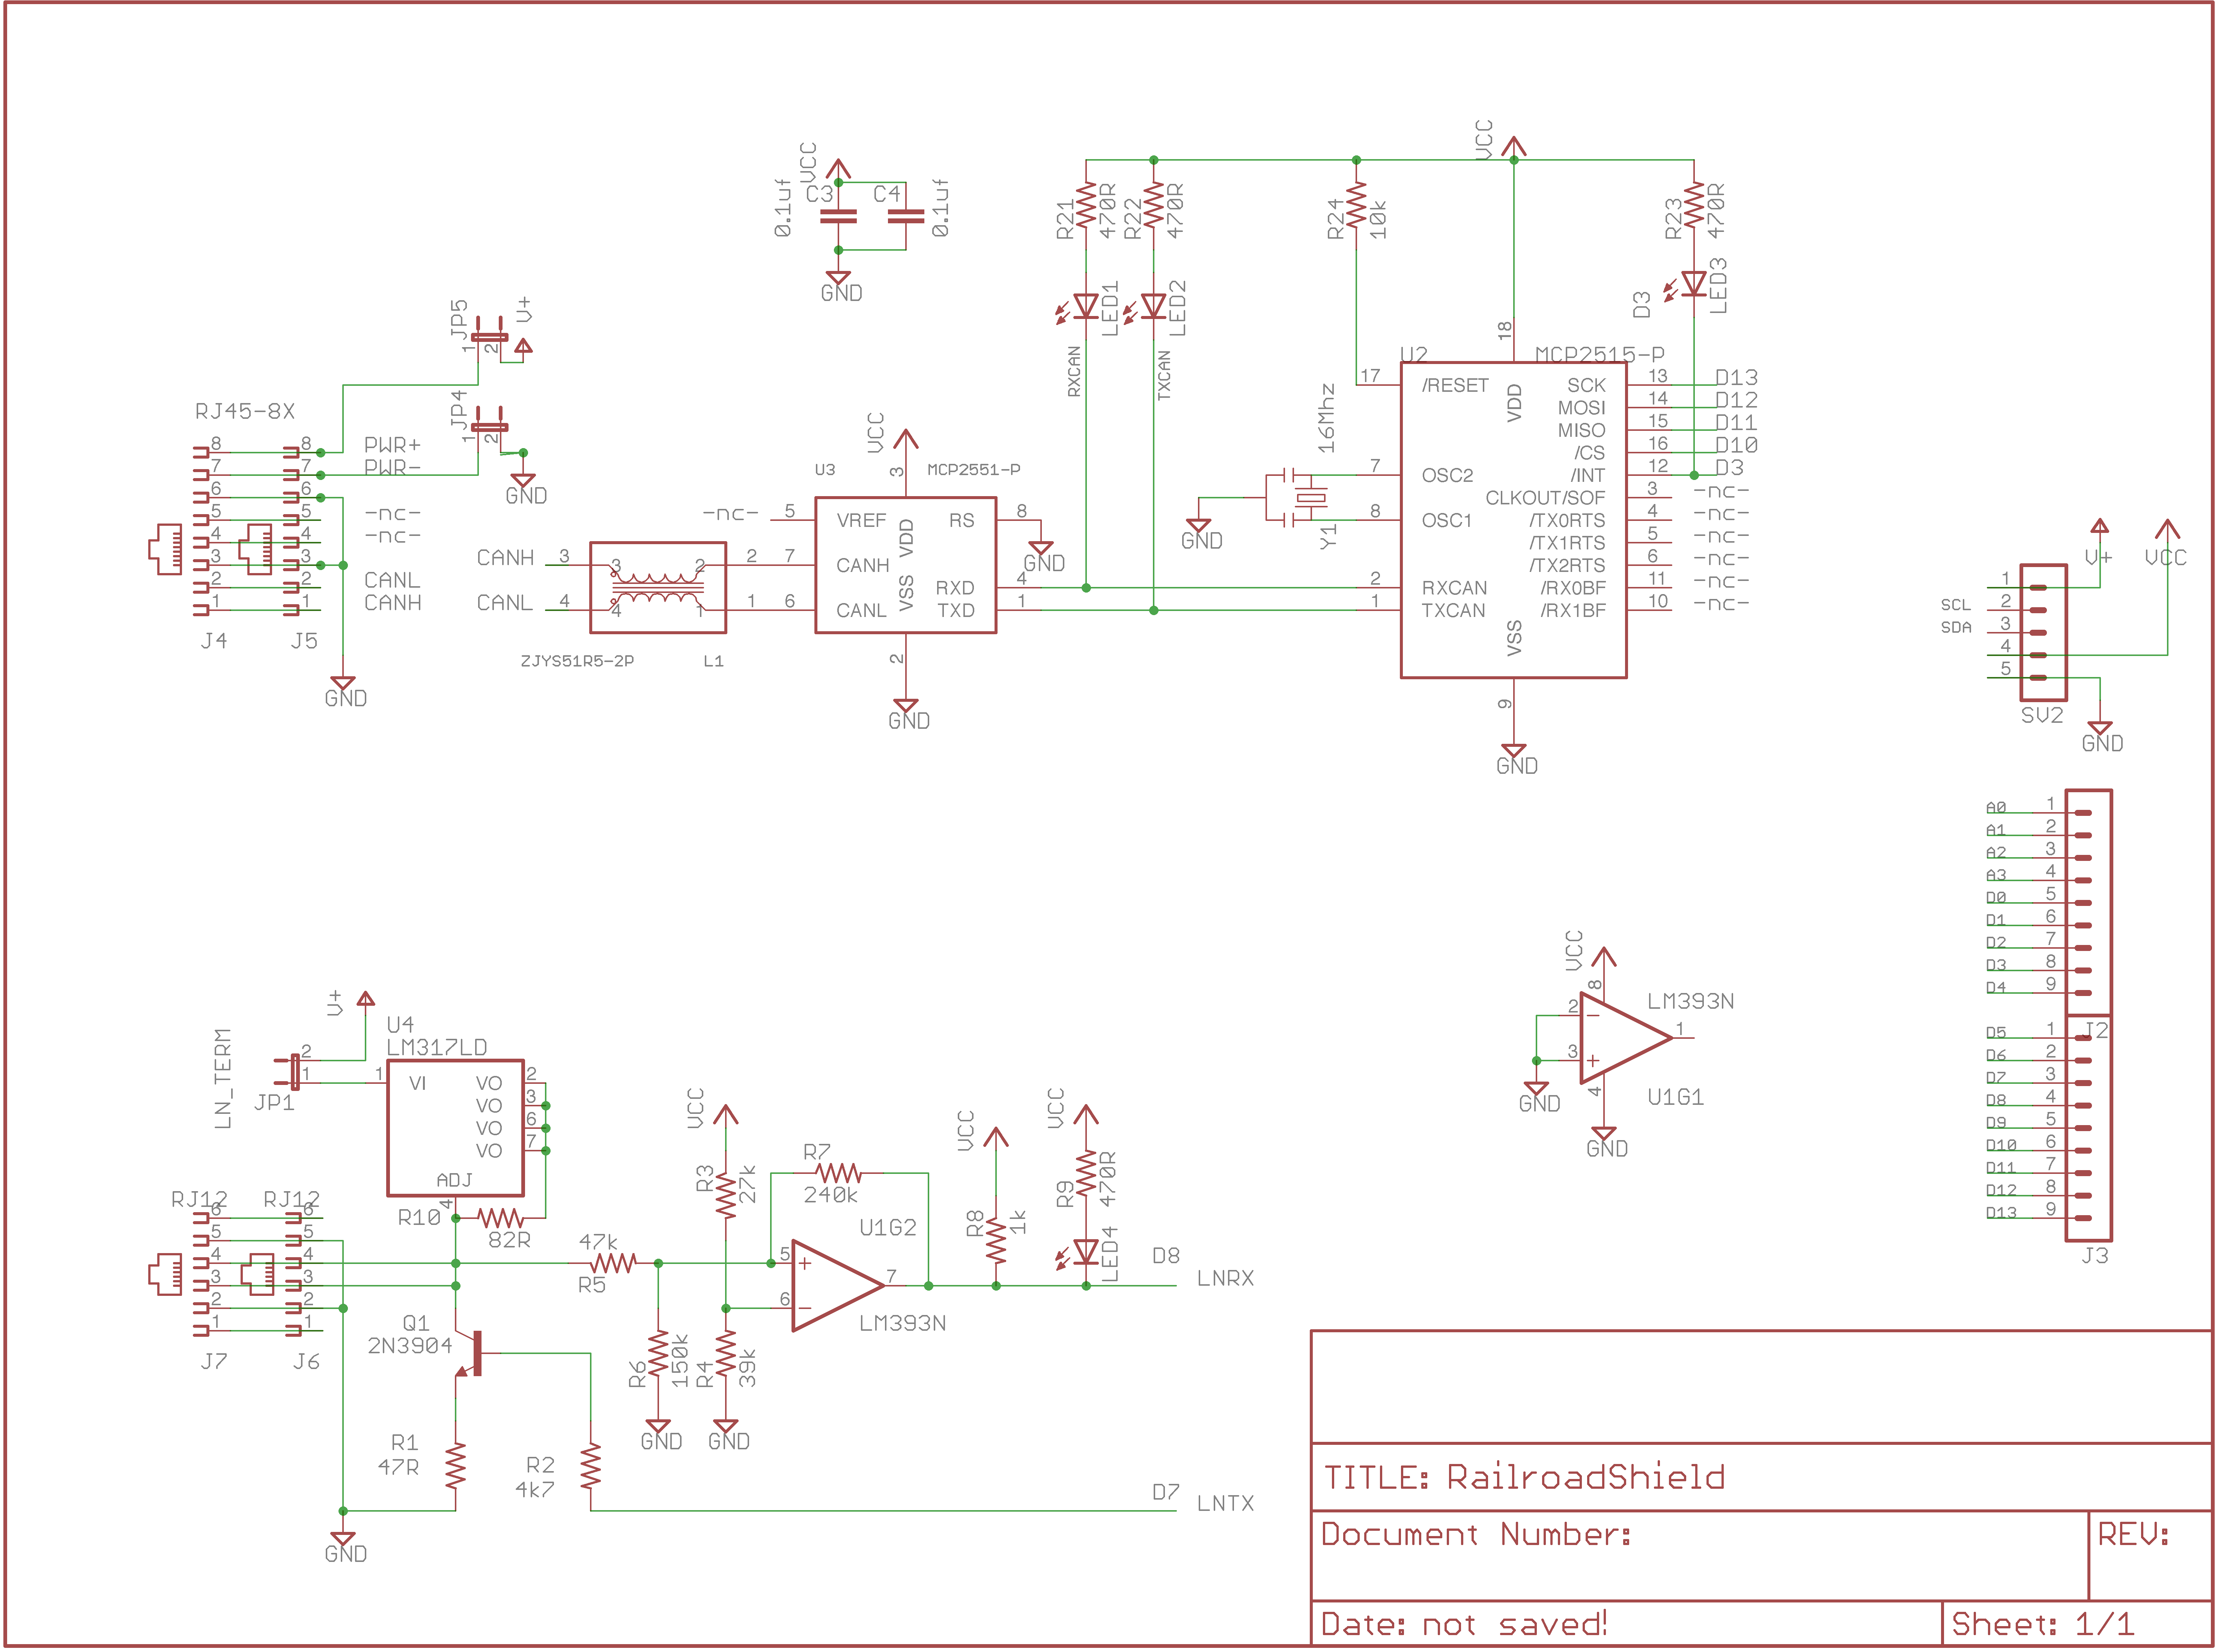
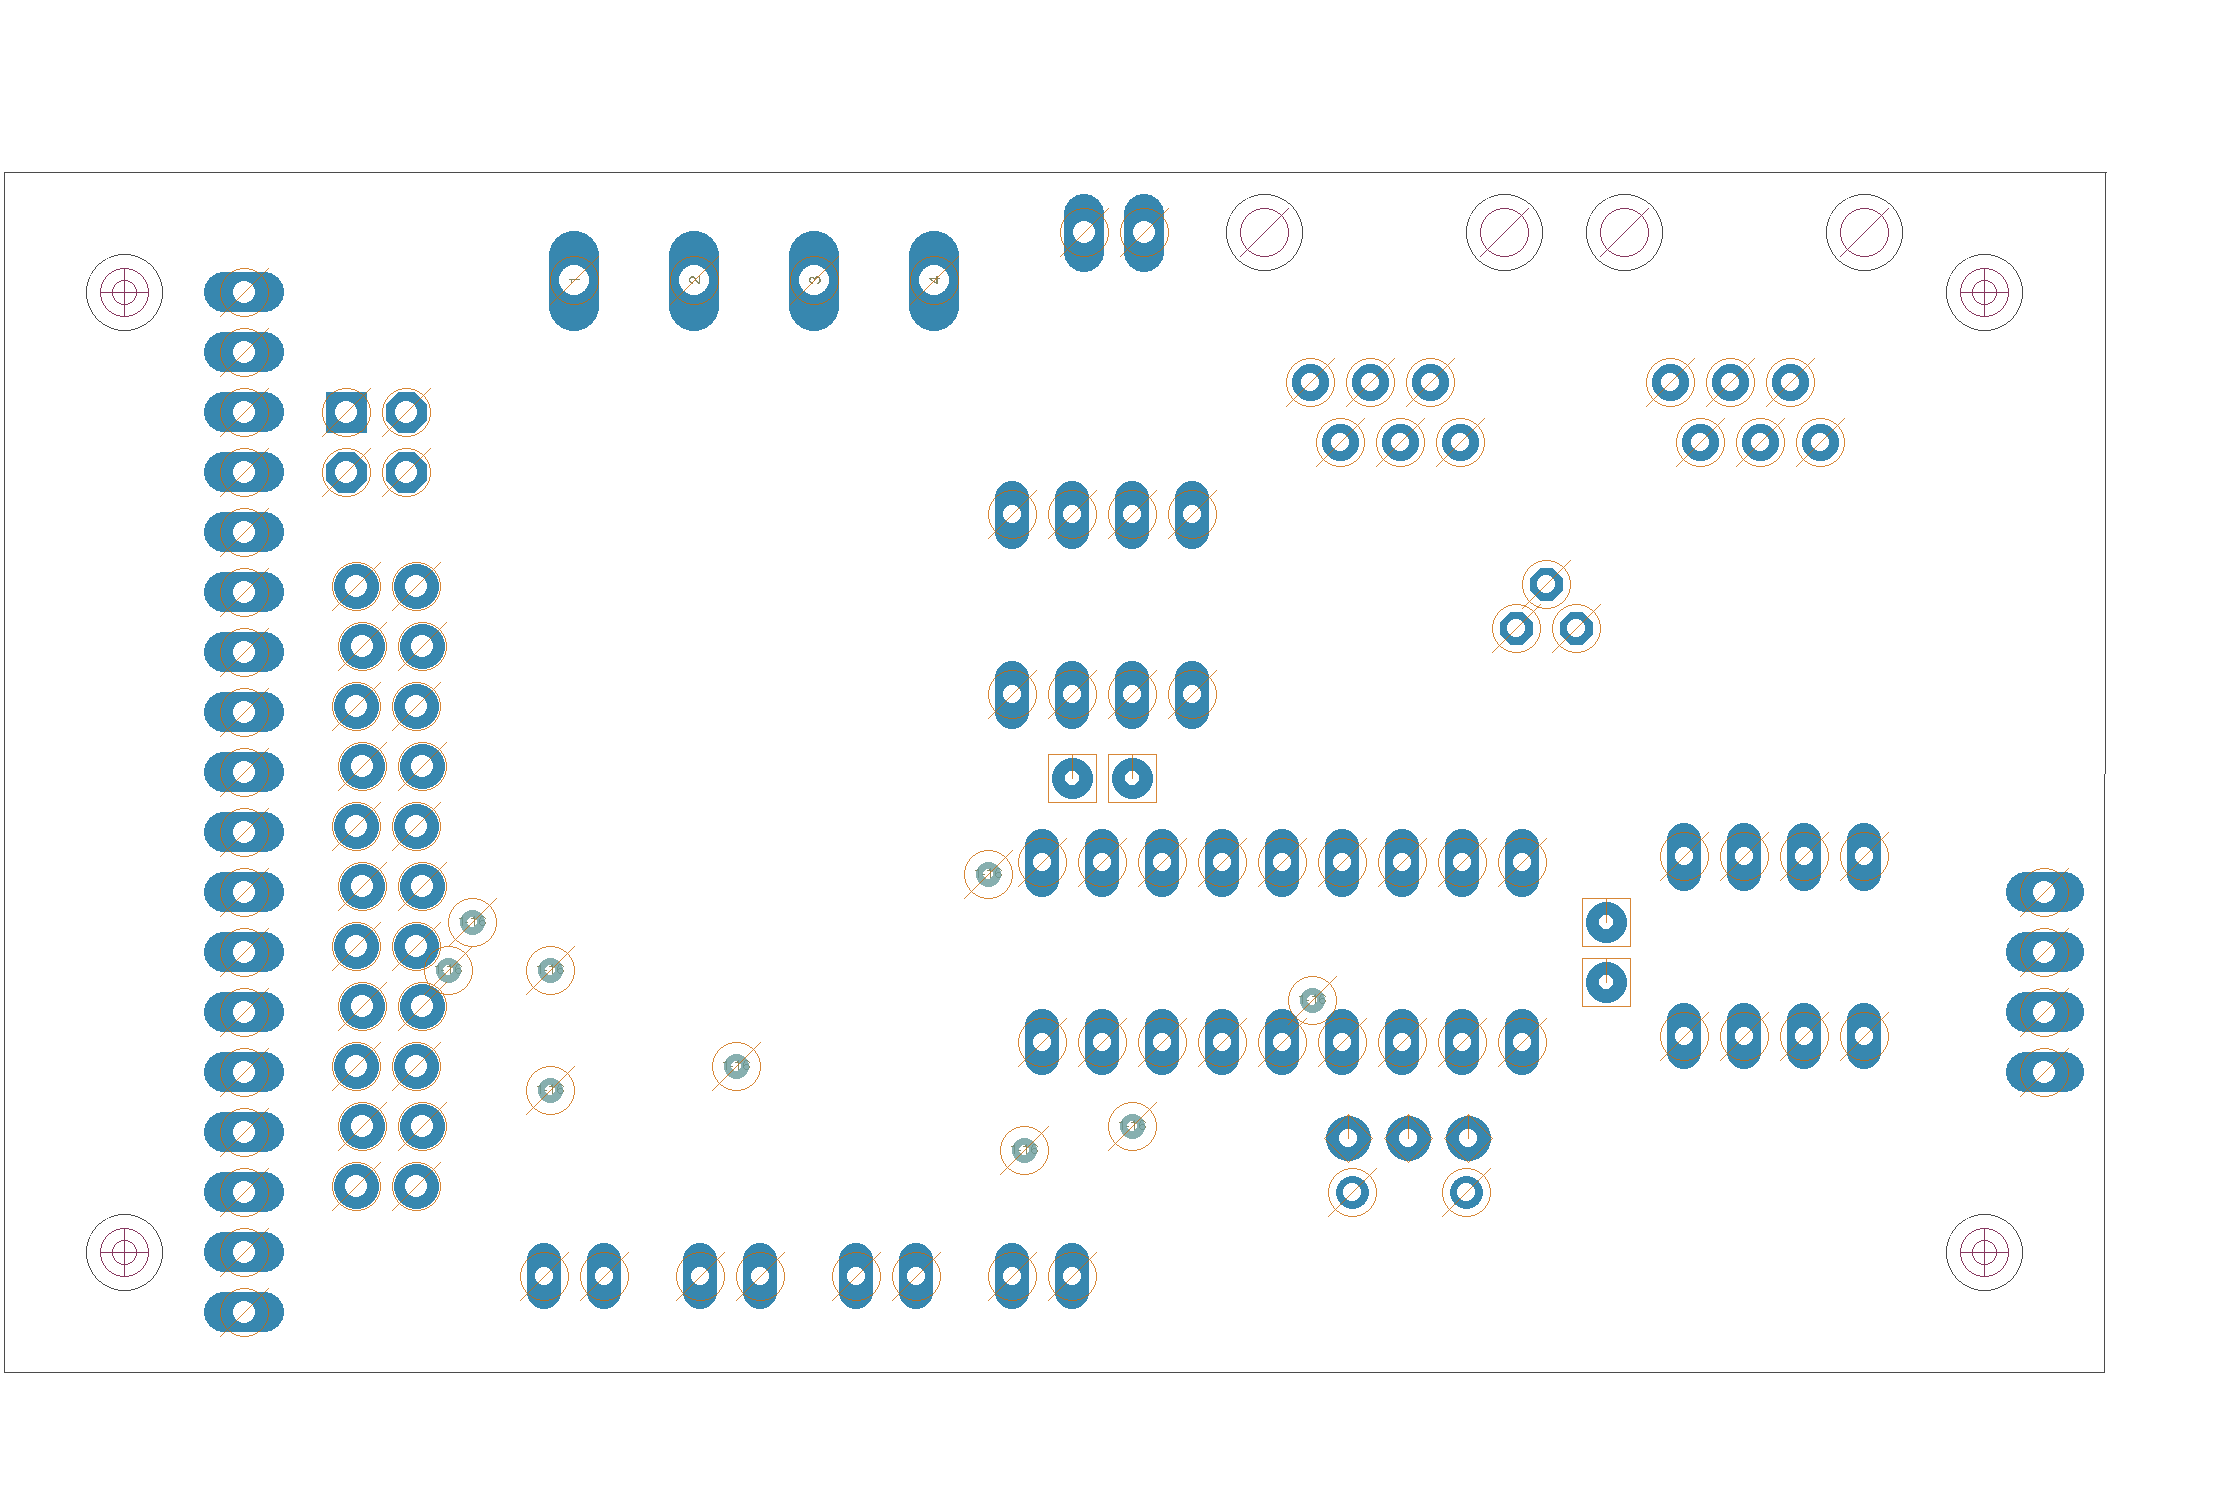
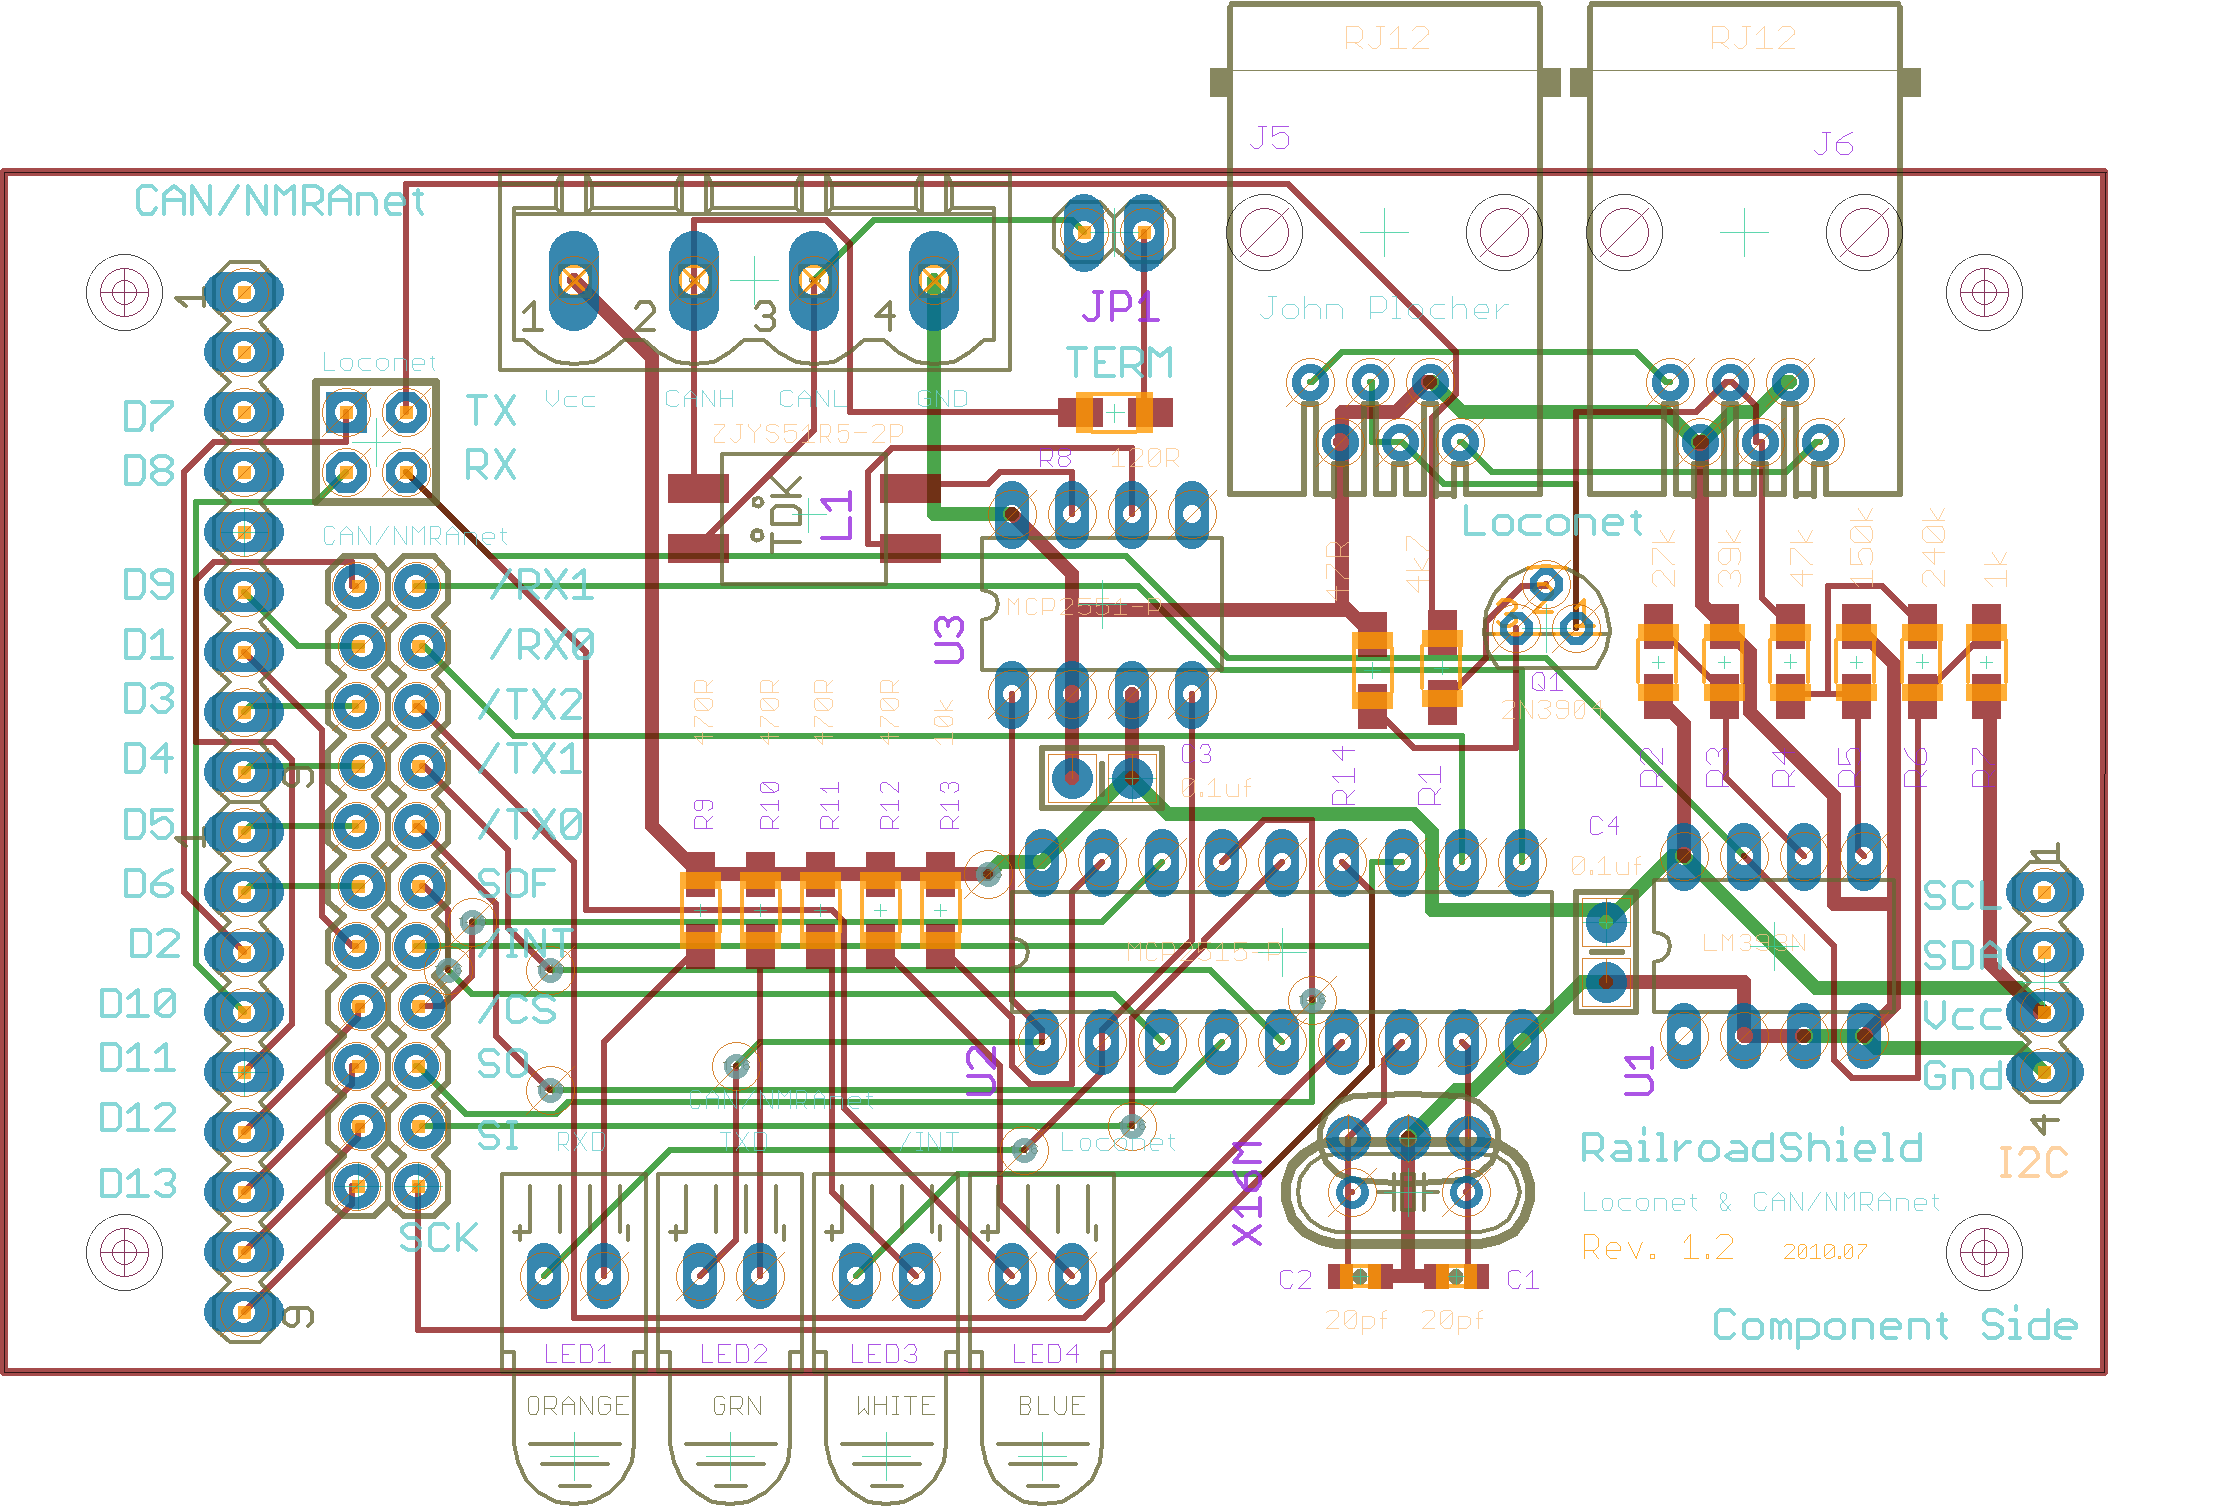
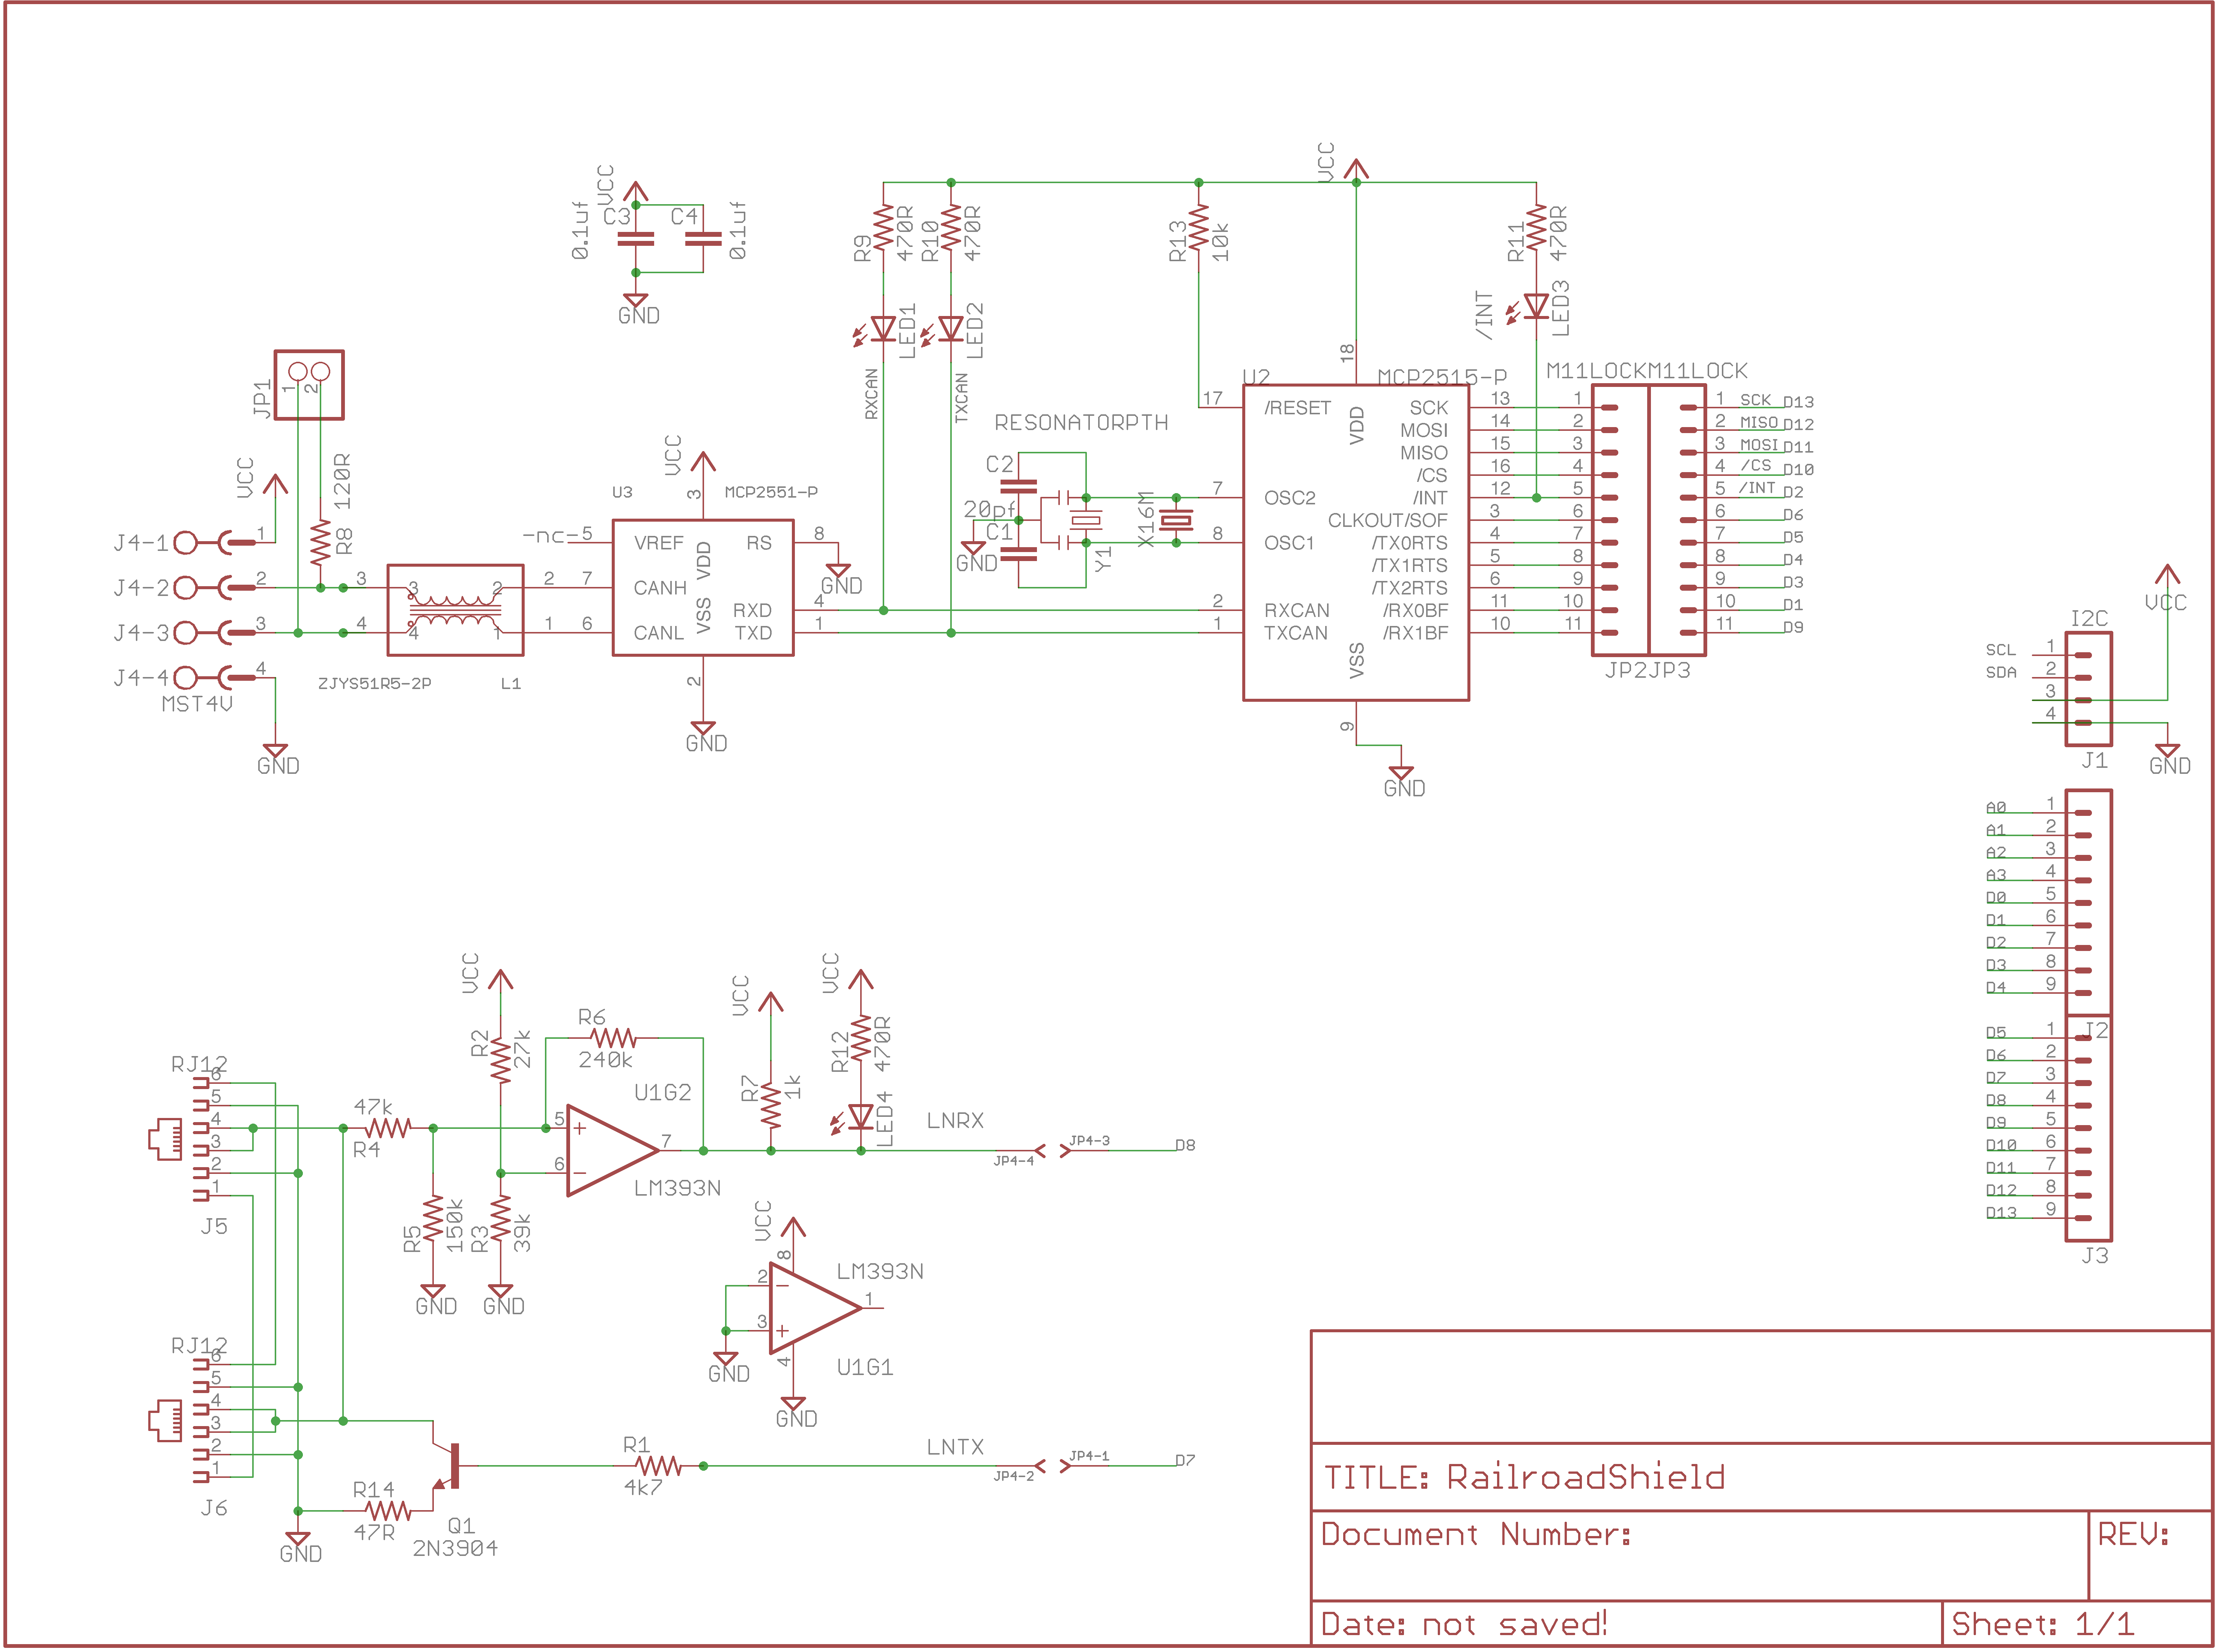
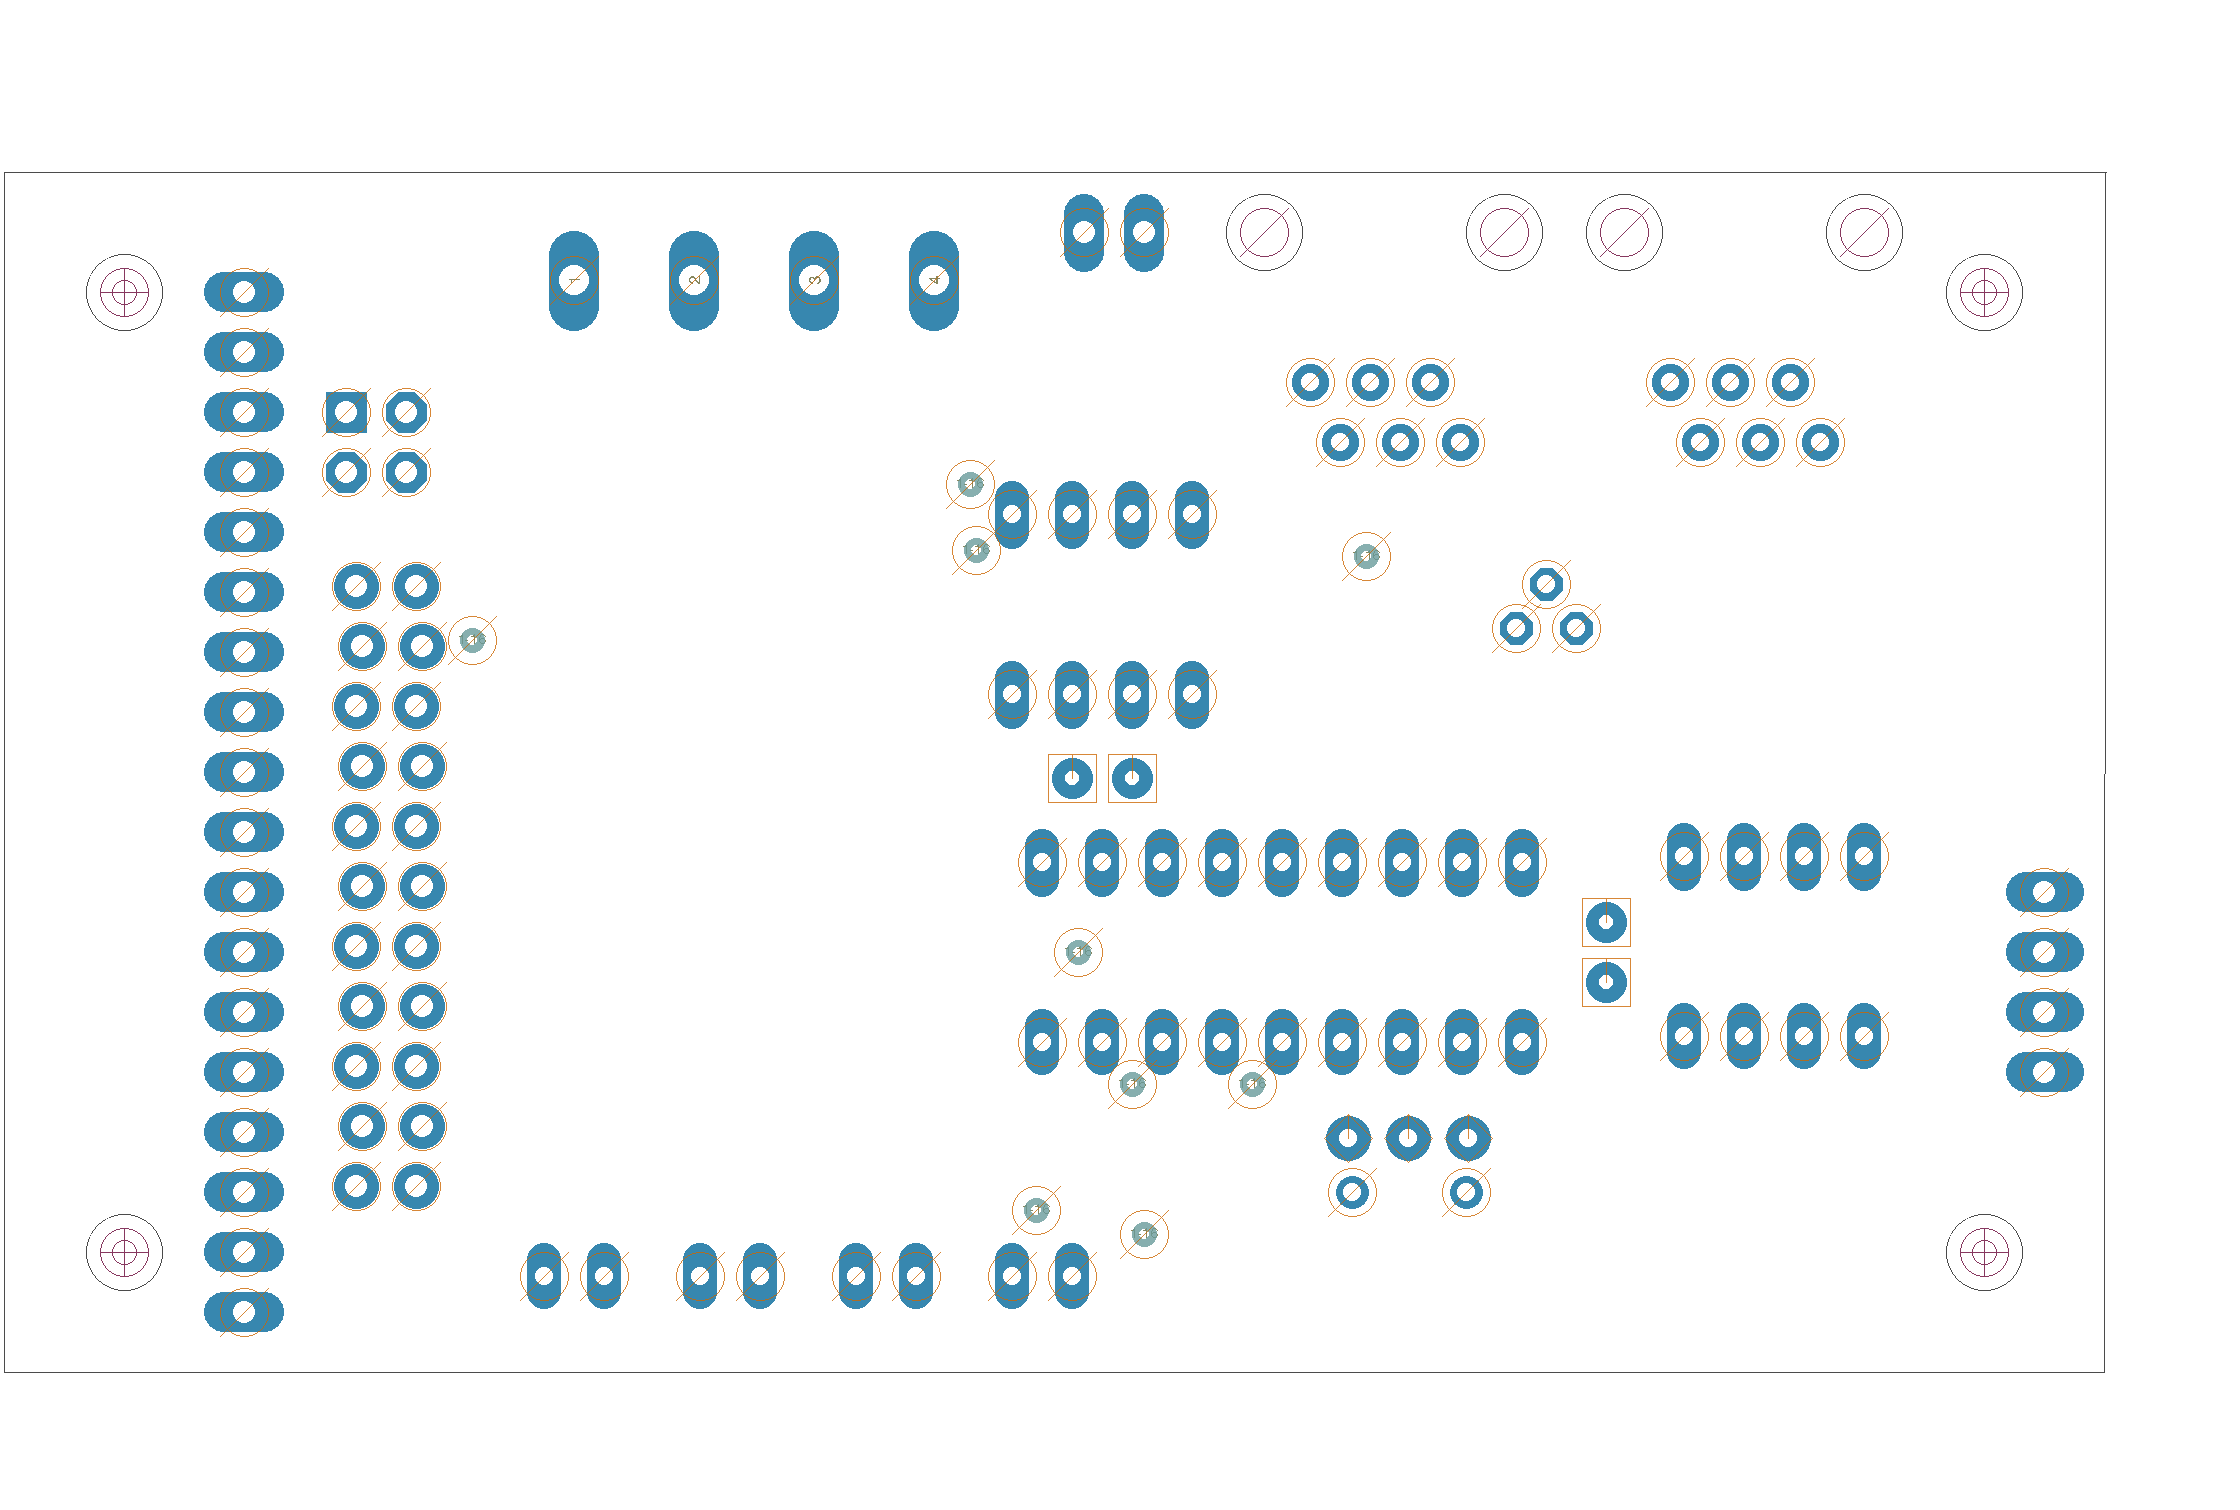
This project is an Arduino shield for Loconet, CAN and [http://www.olcb.org/ OpenLCB] experimentation. It is based on an earlier set of experiments that only supported CAN and Loconet as part of a custom ‘duino stack which was used to build a [[ControlPoint]] demo for the PCR Coast Division meet early in September, 2010.
I also spun solderless breadboard versions of the CANBusBreadboard and LoconetBreadboard; the Loconet board works fine, but I have not yet (2010) built and tested the CAN board.
The prototype served its purpose - it helped prove out the design pattern of a local control point node that uses a local Loconet to monitor occupancy detectors, turnouts and other “vital” logic as well as control signals associated with the interlocking. I built a small handful of 8- and 16-bit I2C based I/O expander boards (think mini-C/MRI) to make interfacing with control panels and LEDs easier, but the power draw of 30 to 60 LEDs - even at 10mA ea - is almost too much for the simple heatsinked 7805 linear regulator I designed into the main board. Better to use a distributed power supply design, which means another design/fab cycle and more boards in my junk drawer :-)
As in the real world, the control point passed Controls and Indications back and forth along a code line; in the 1.0 demo, I used OPC_PEER_XFER Loconet packets to emulate a code line; the next step is to use CAN/openLCB instead.
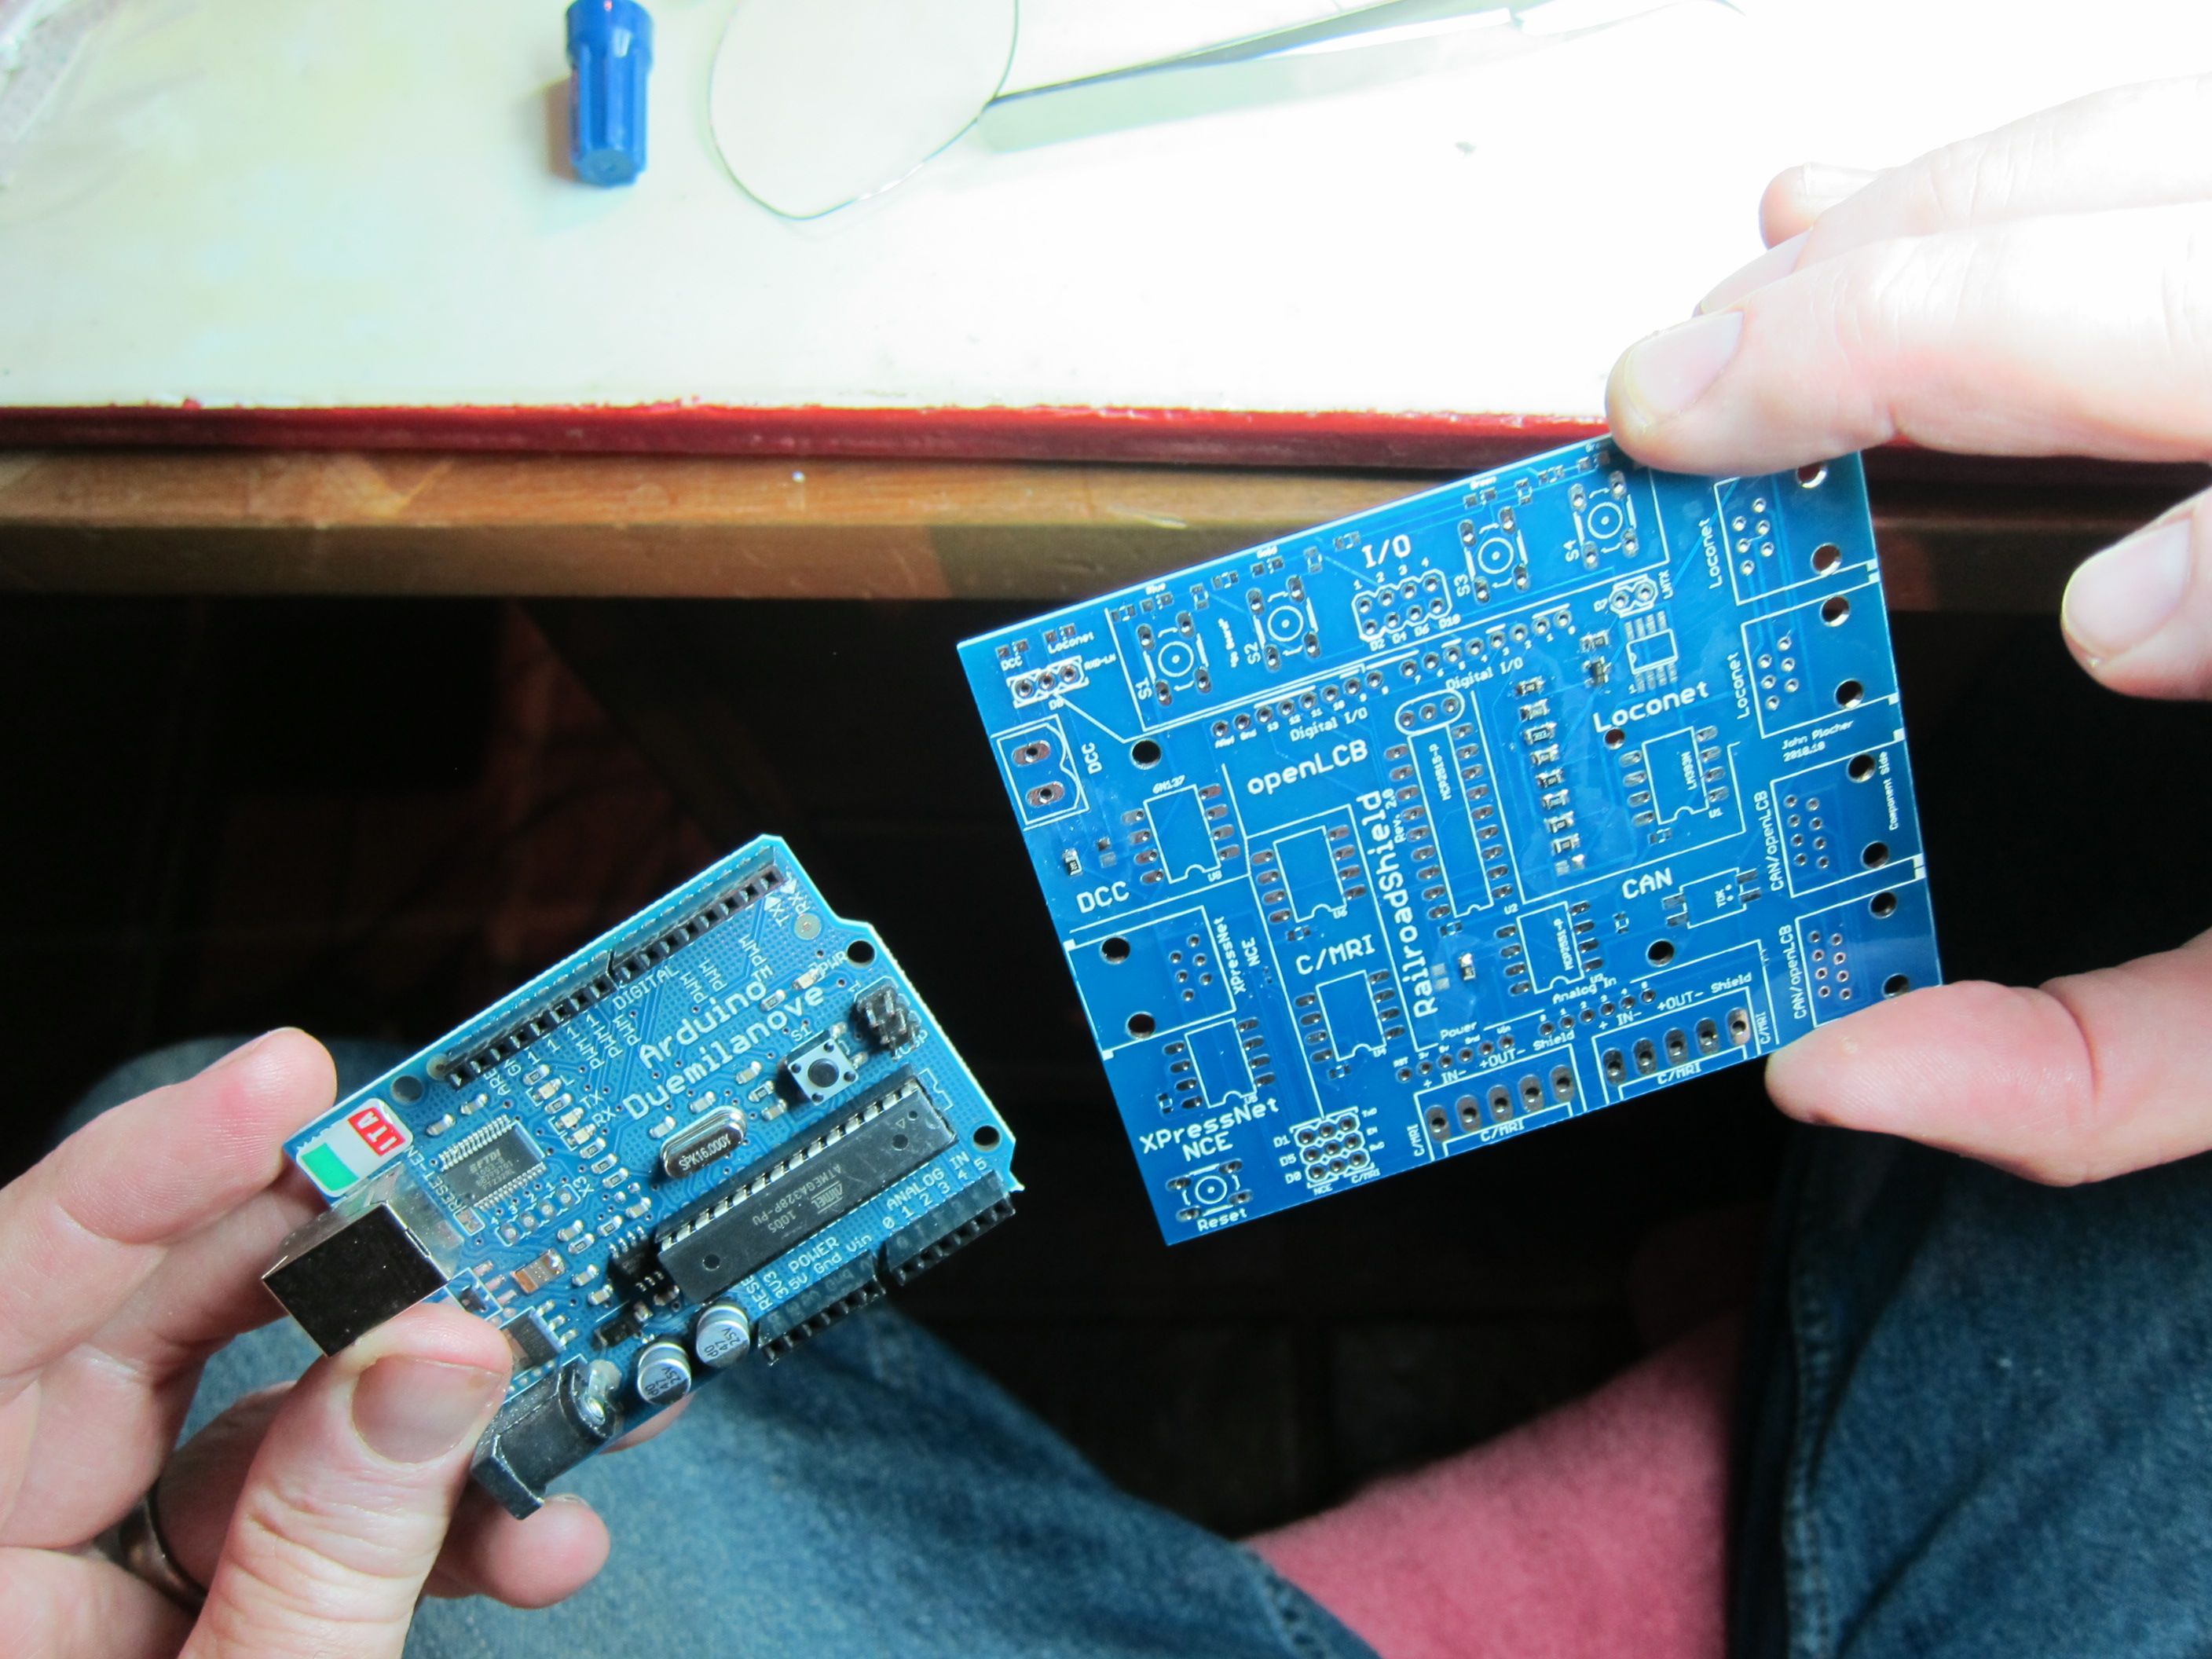
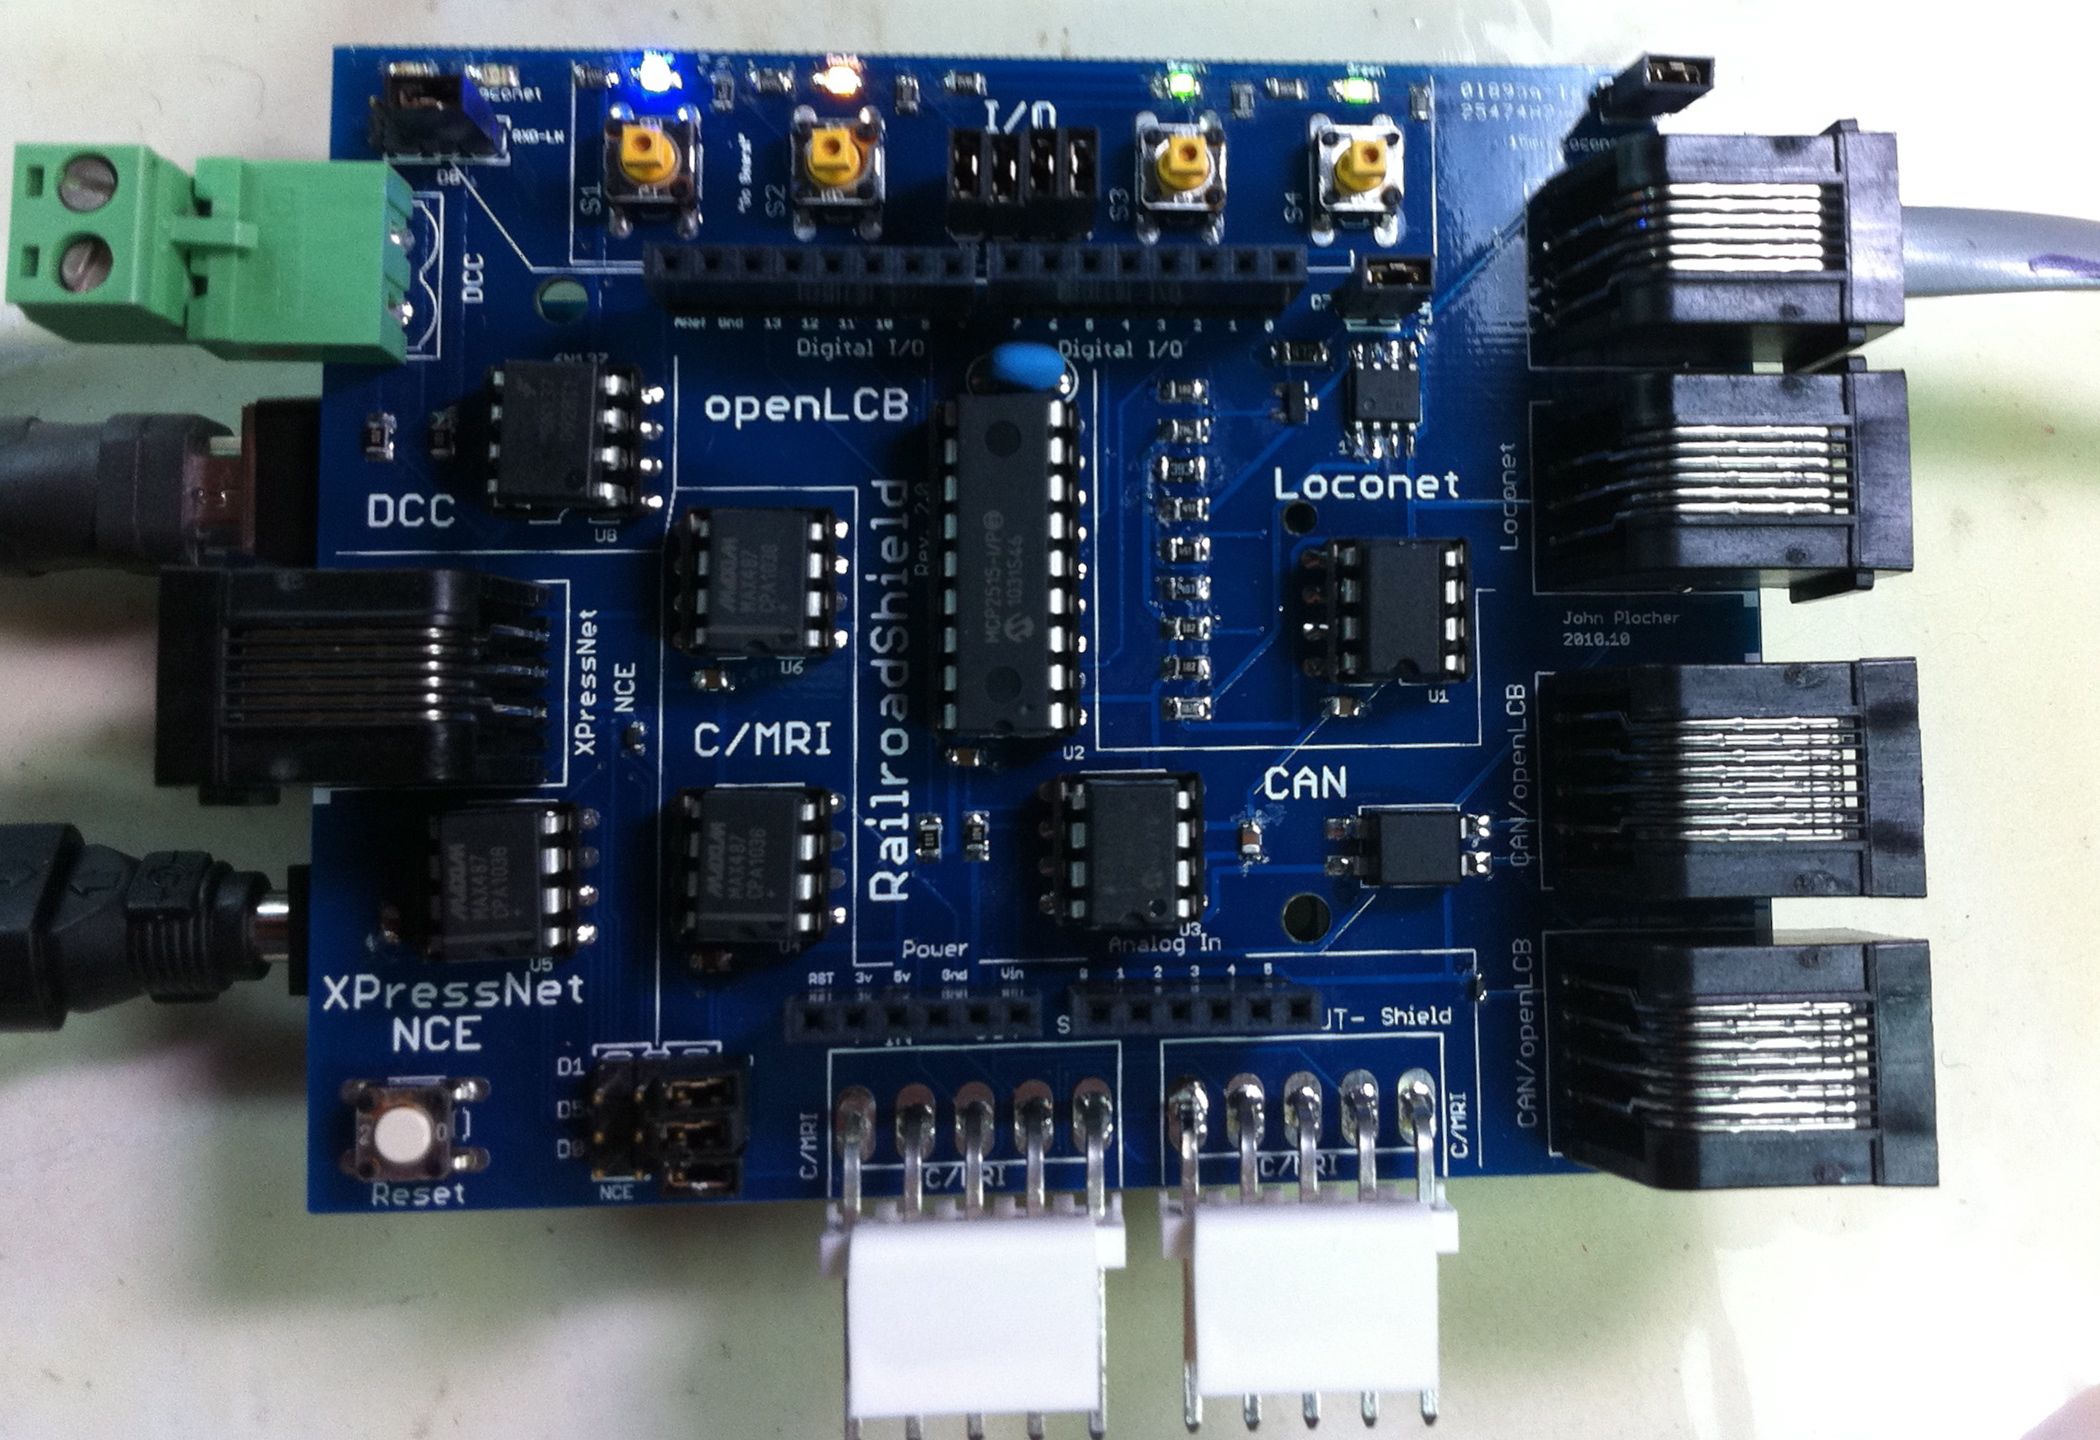
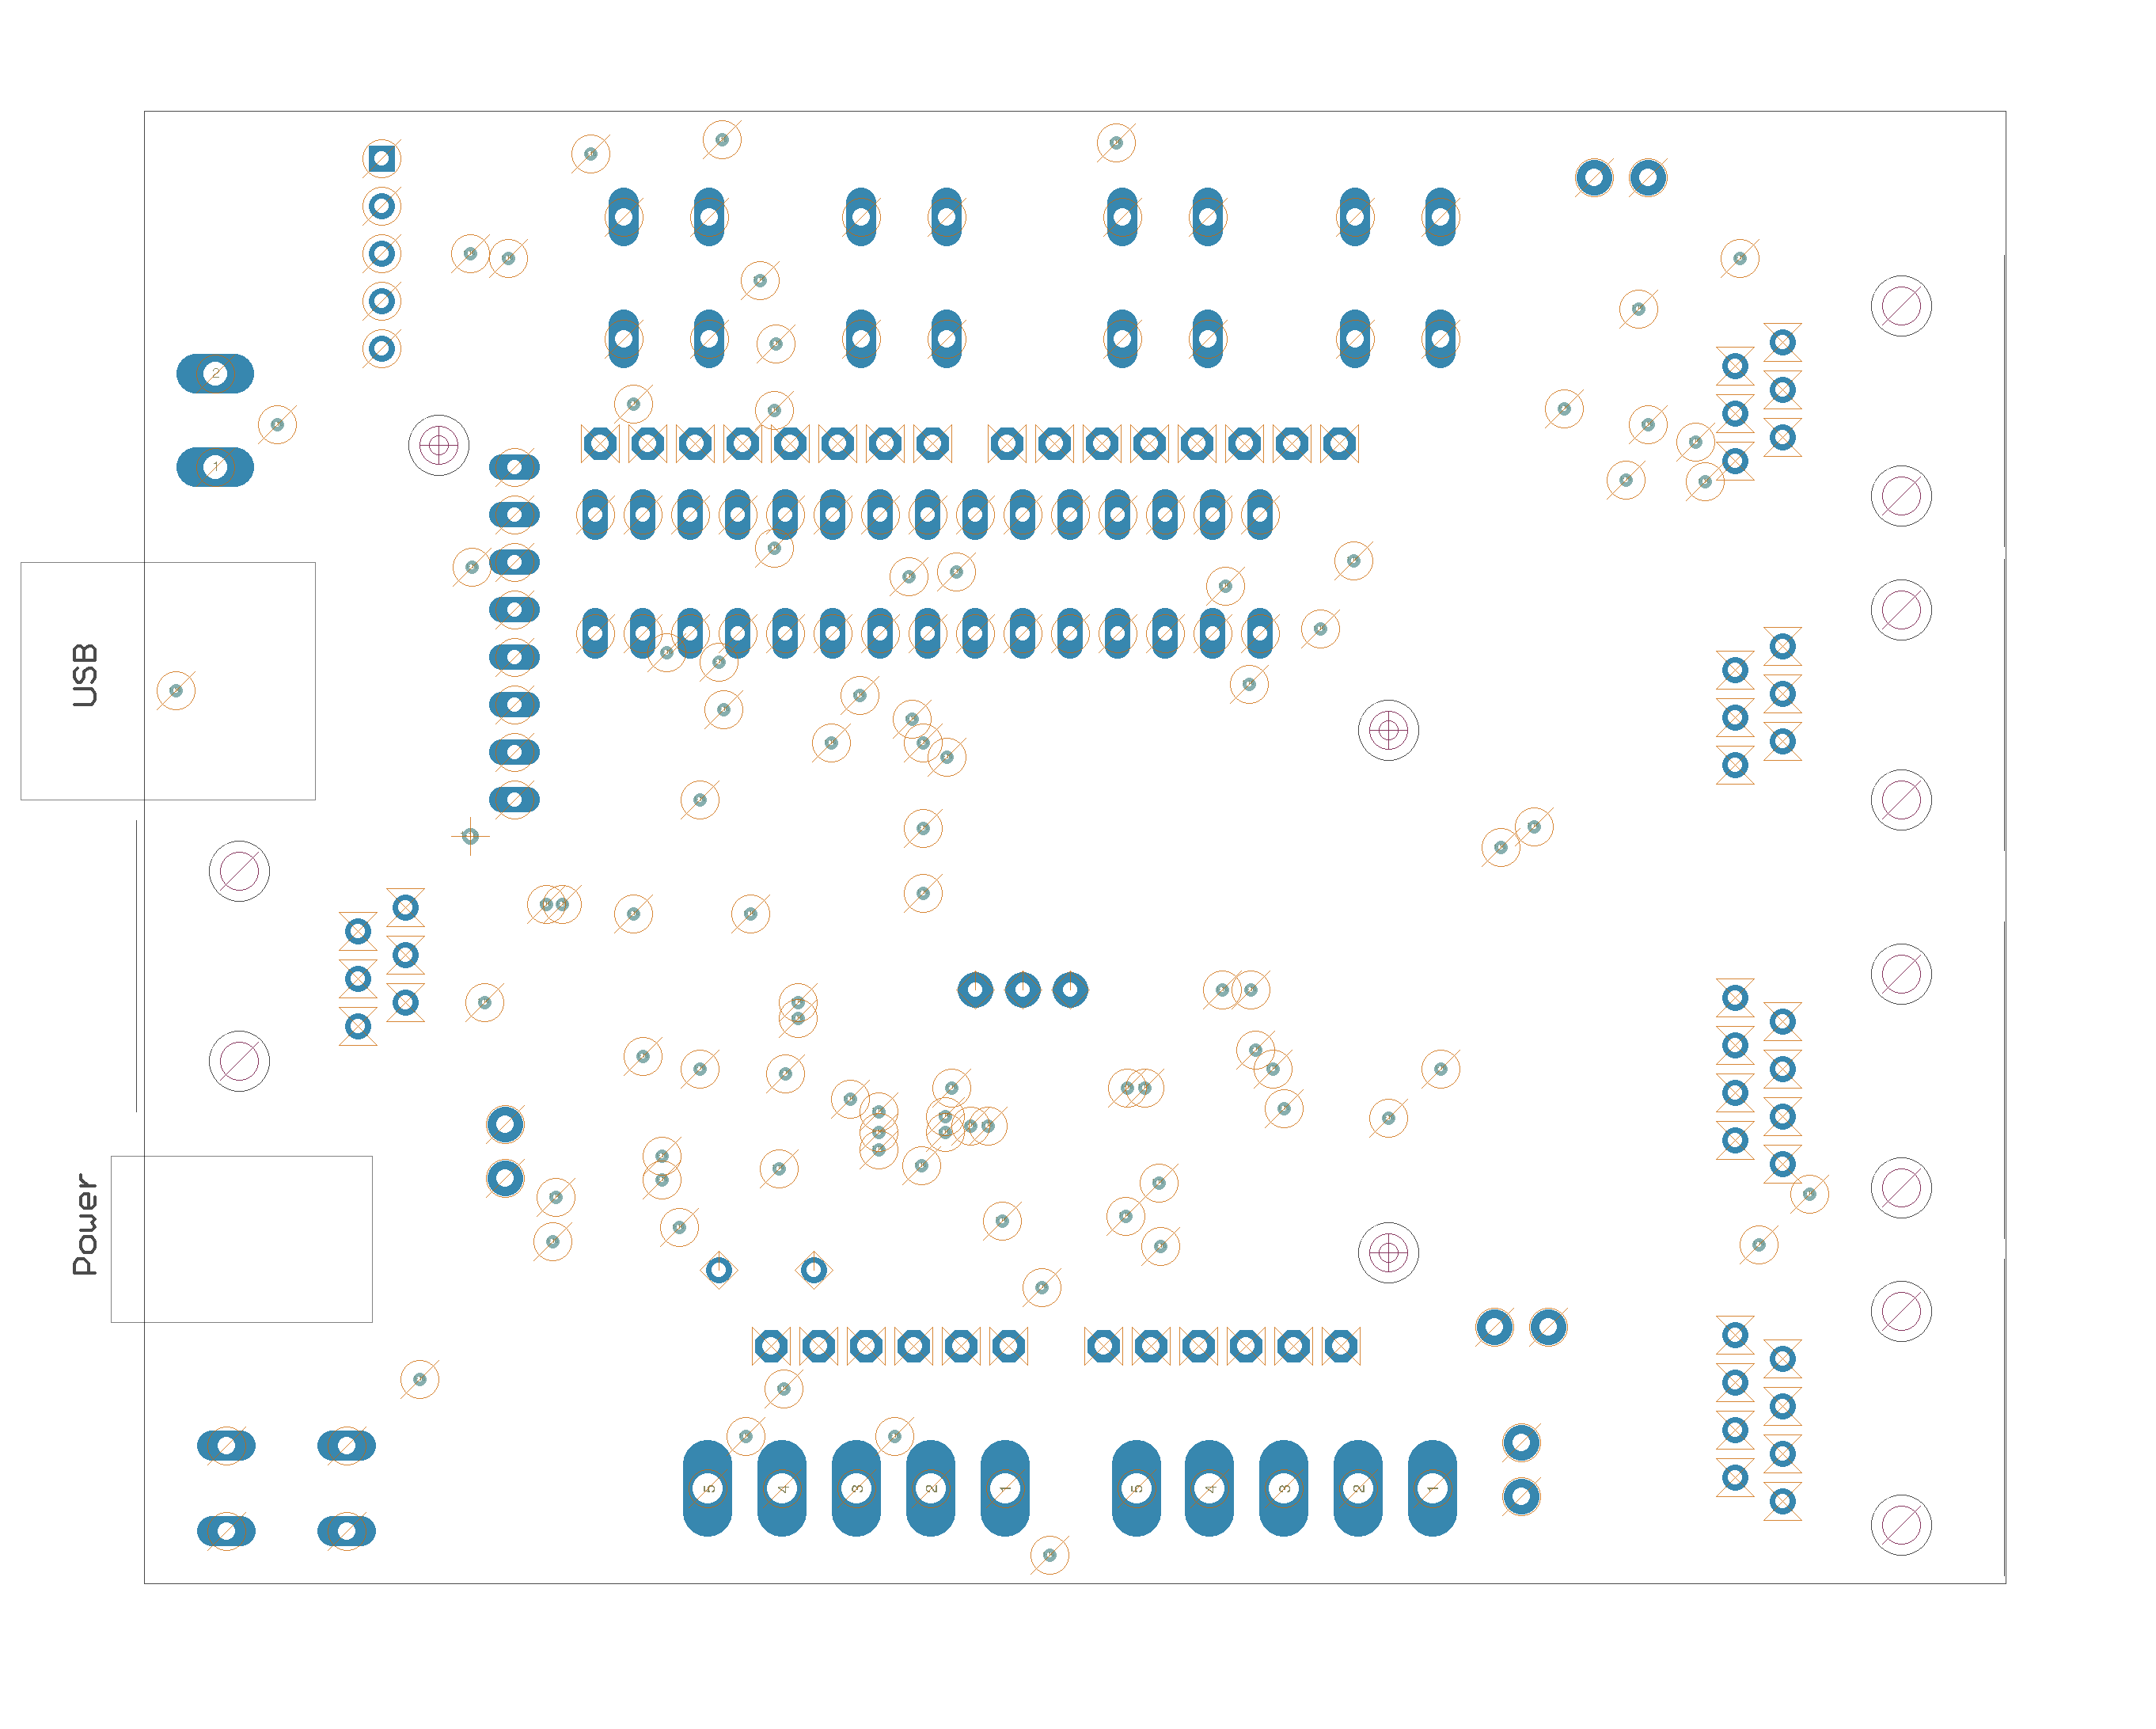
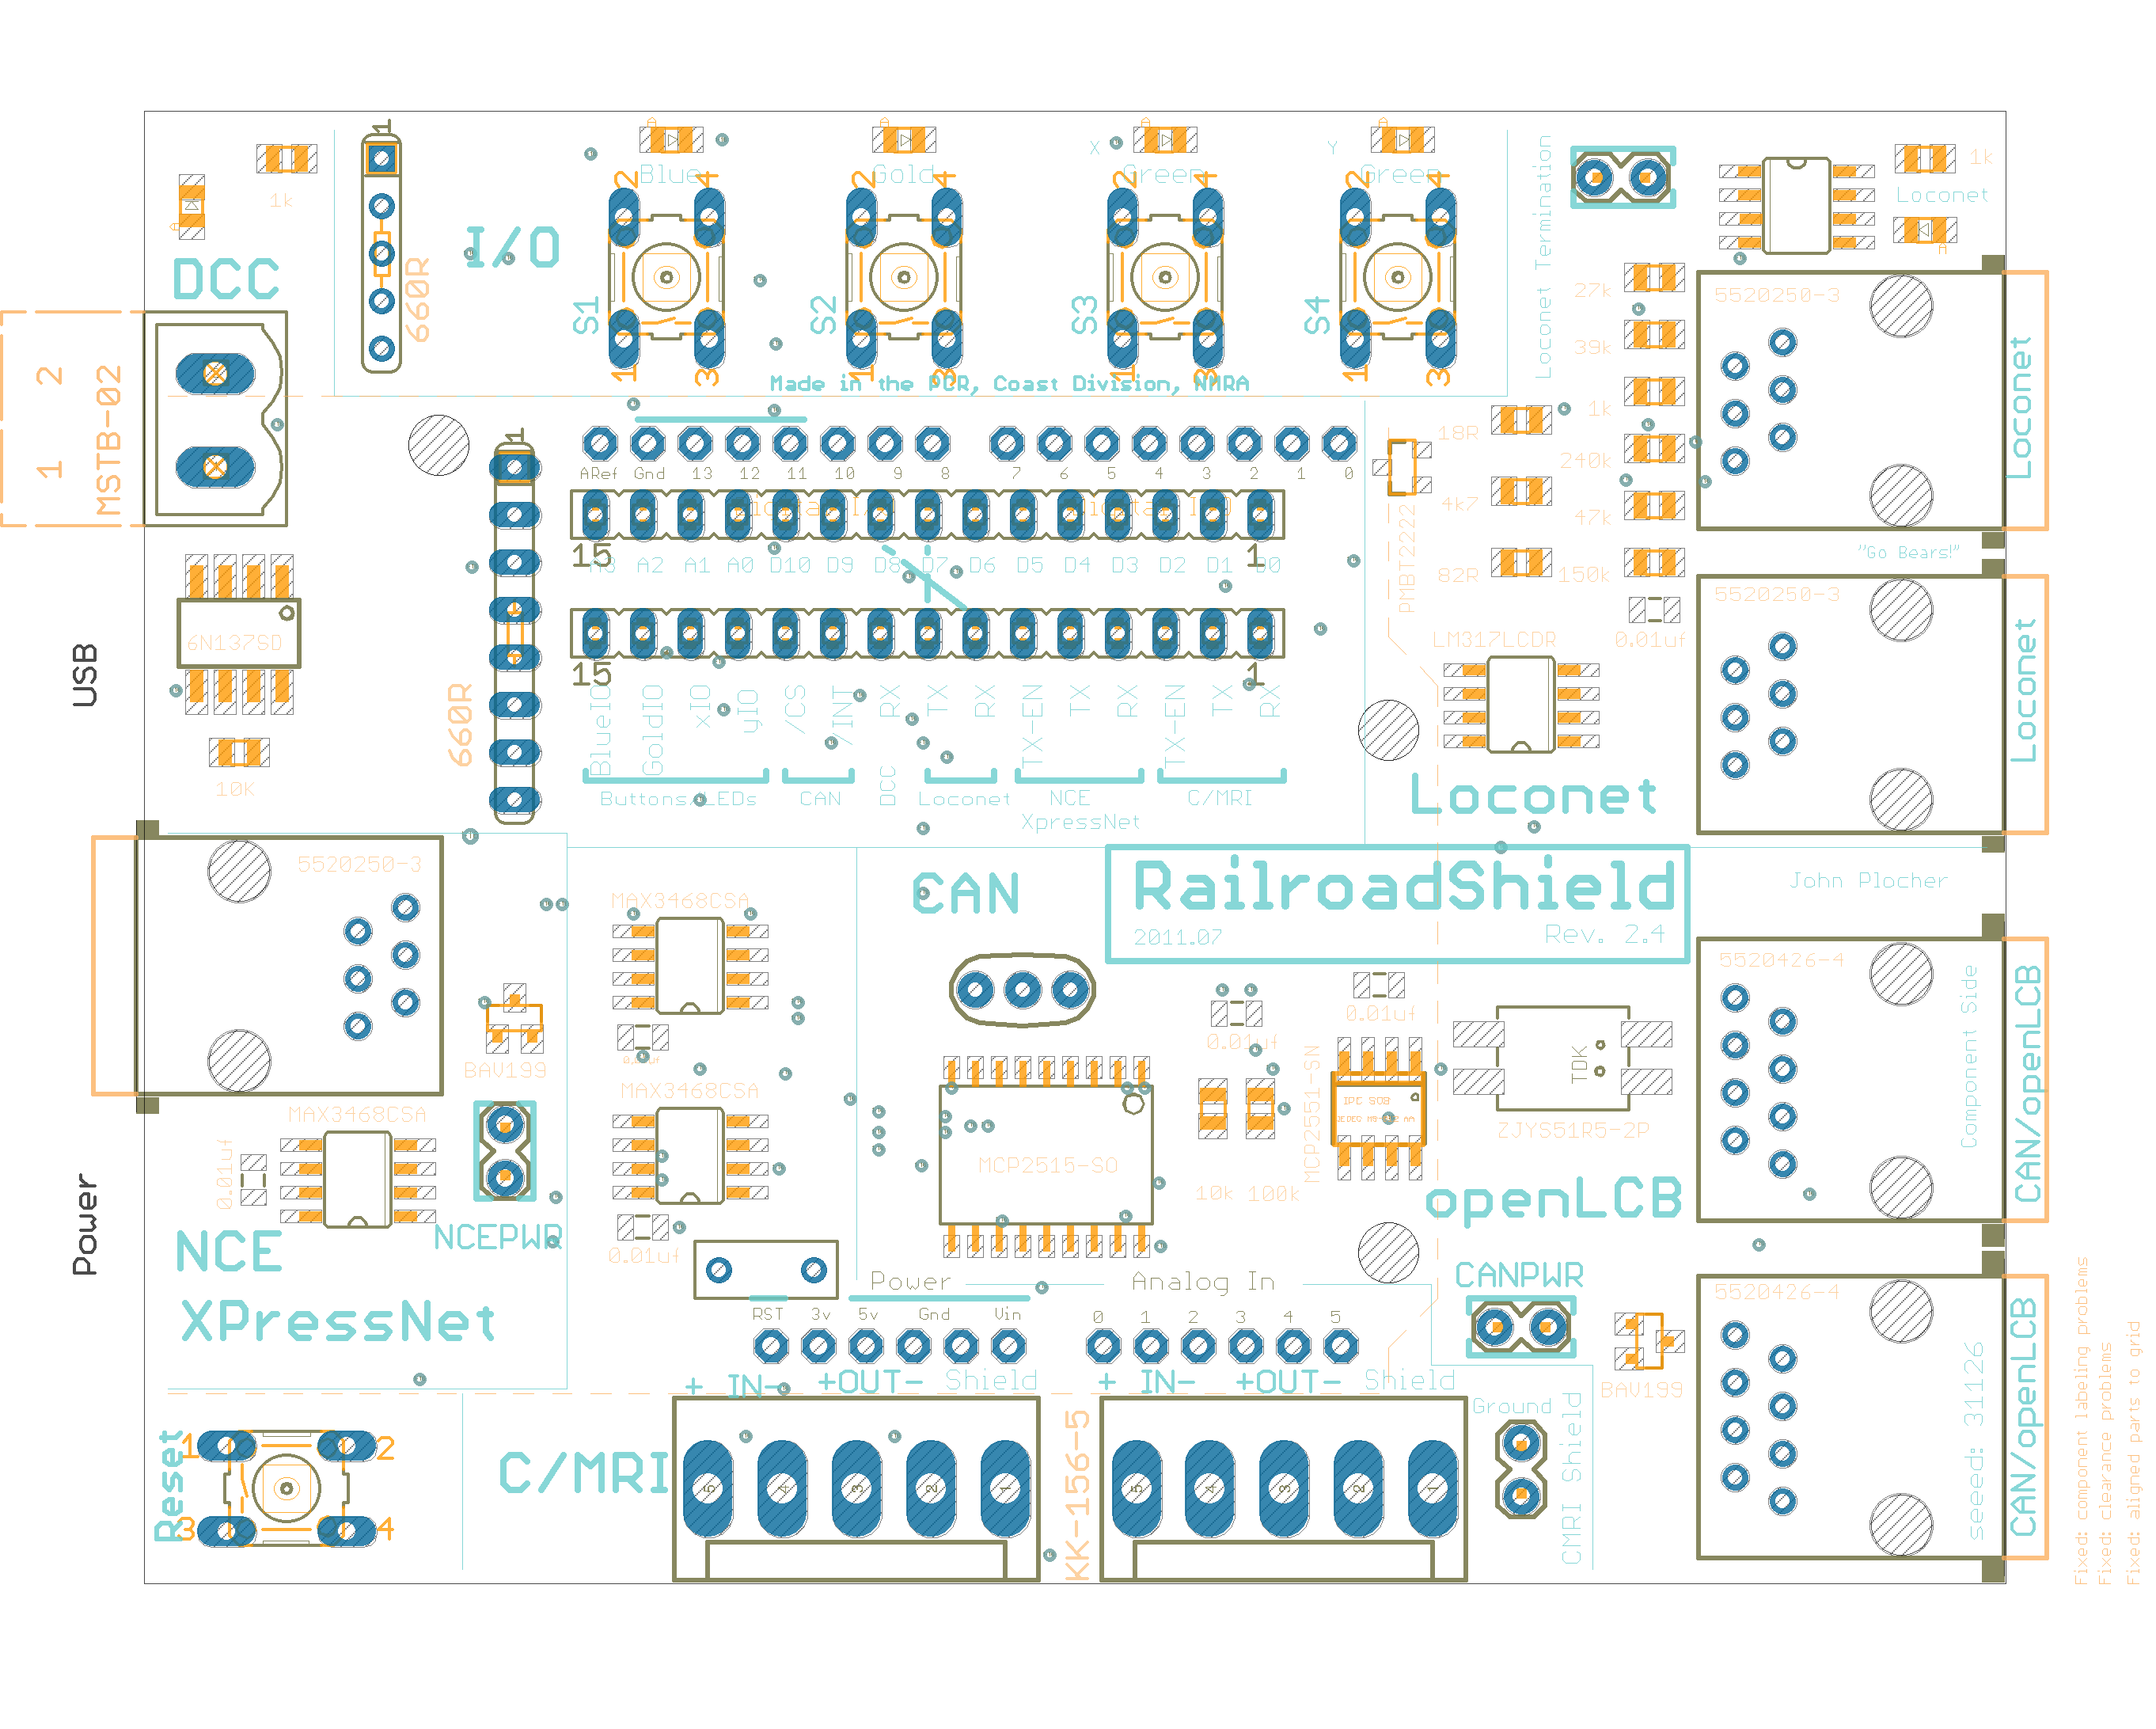
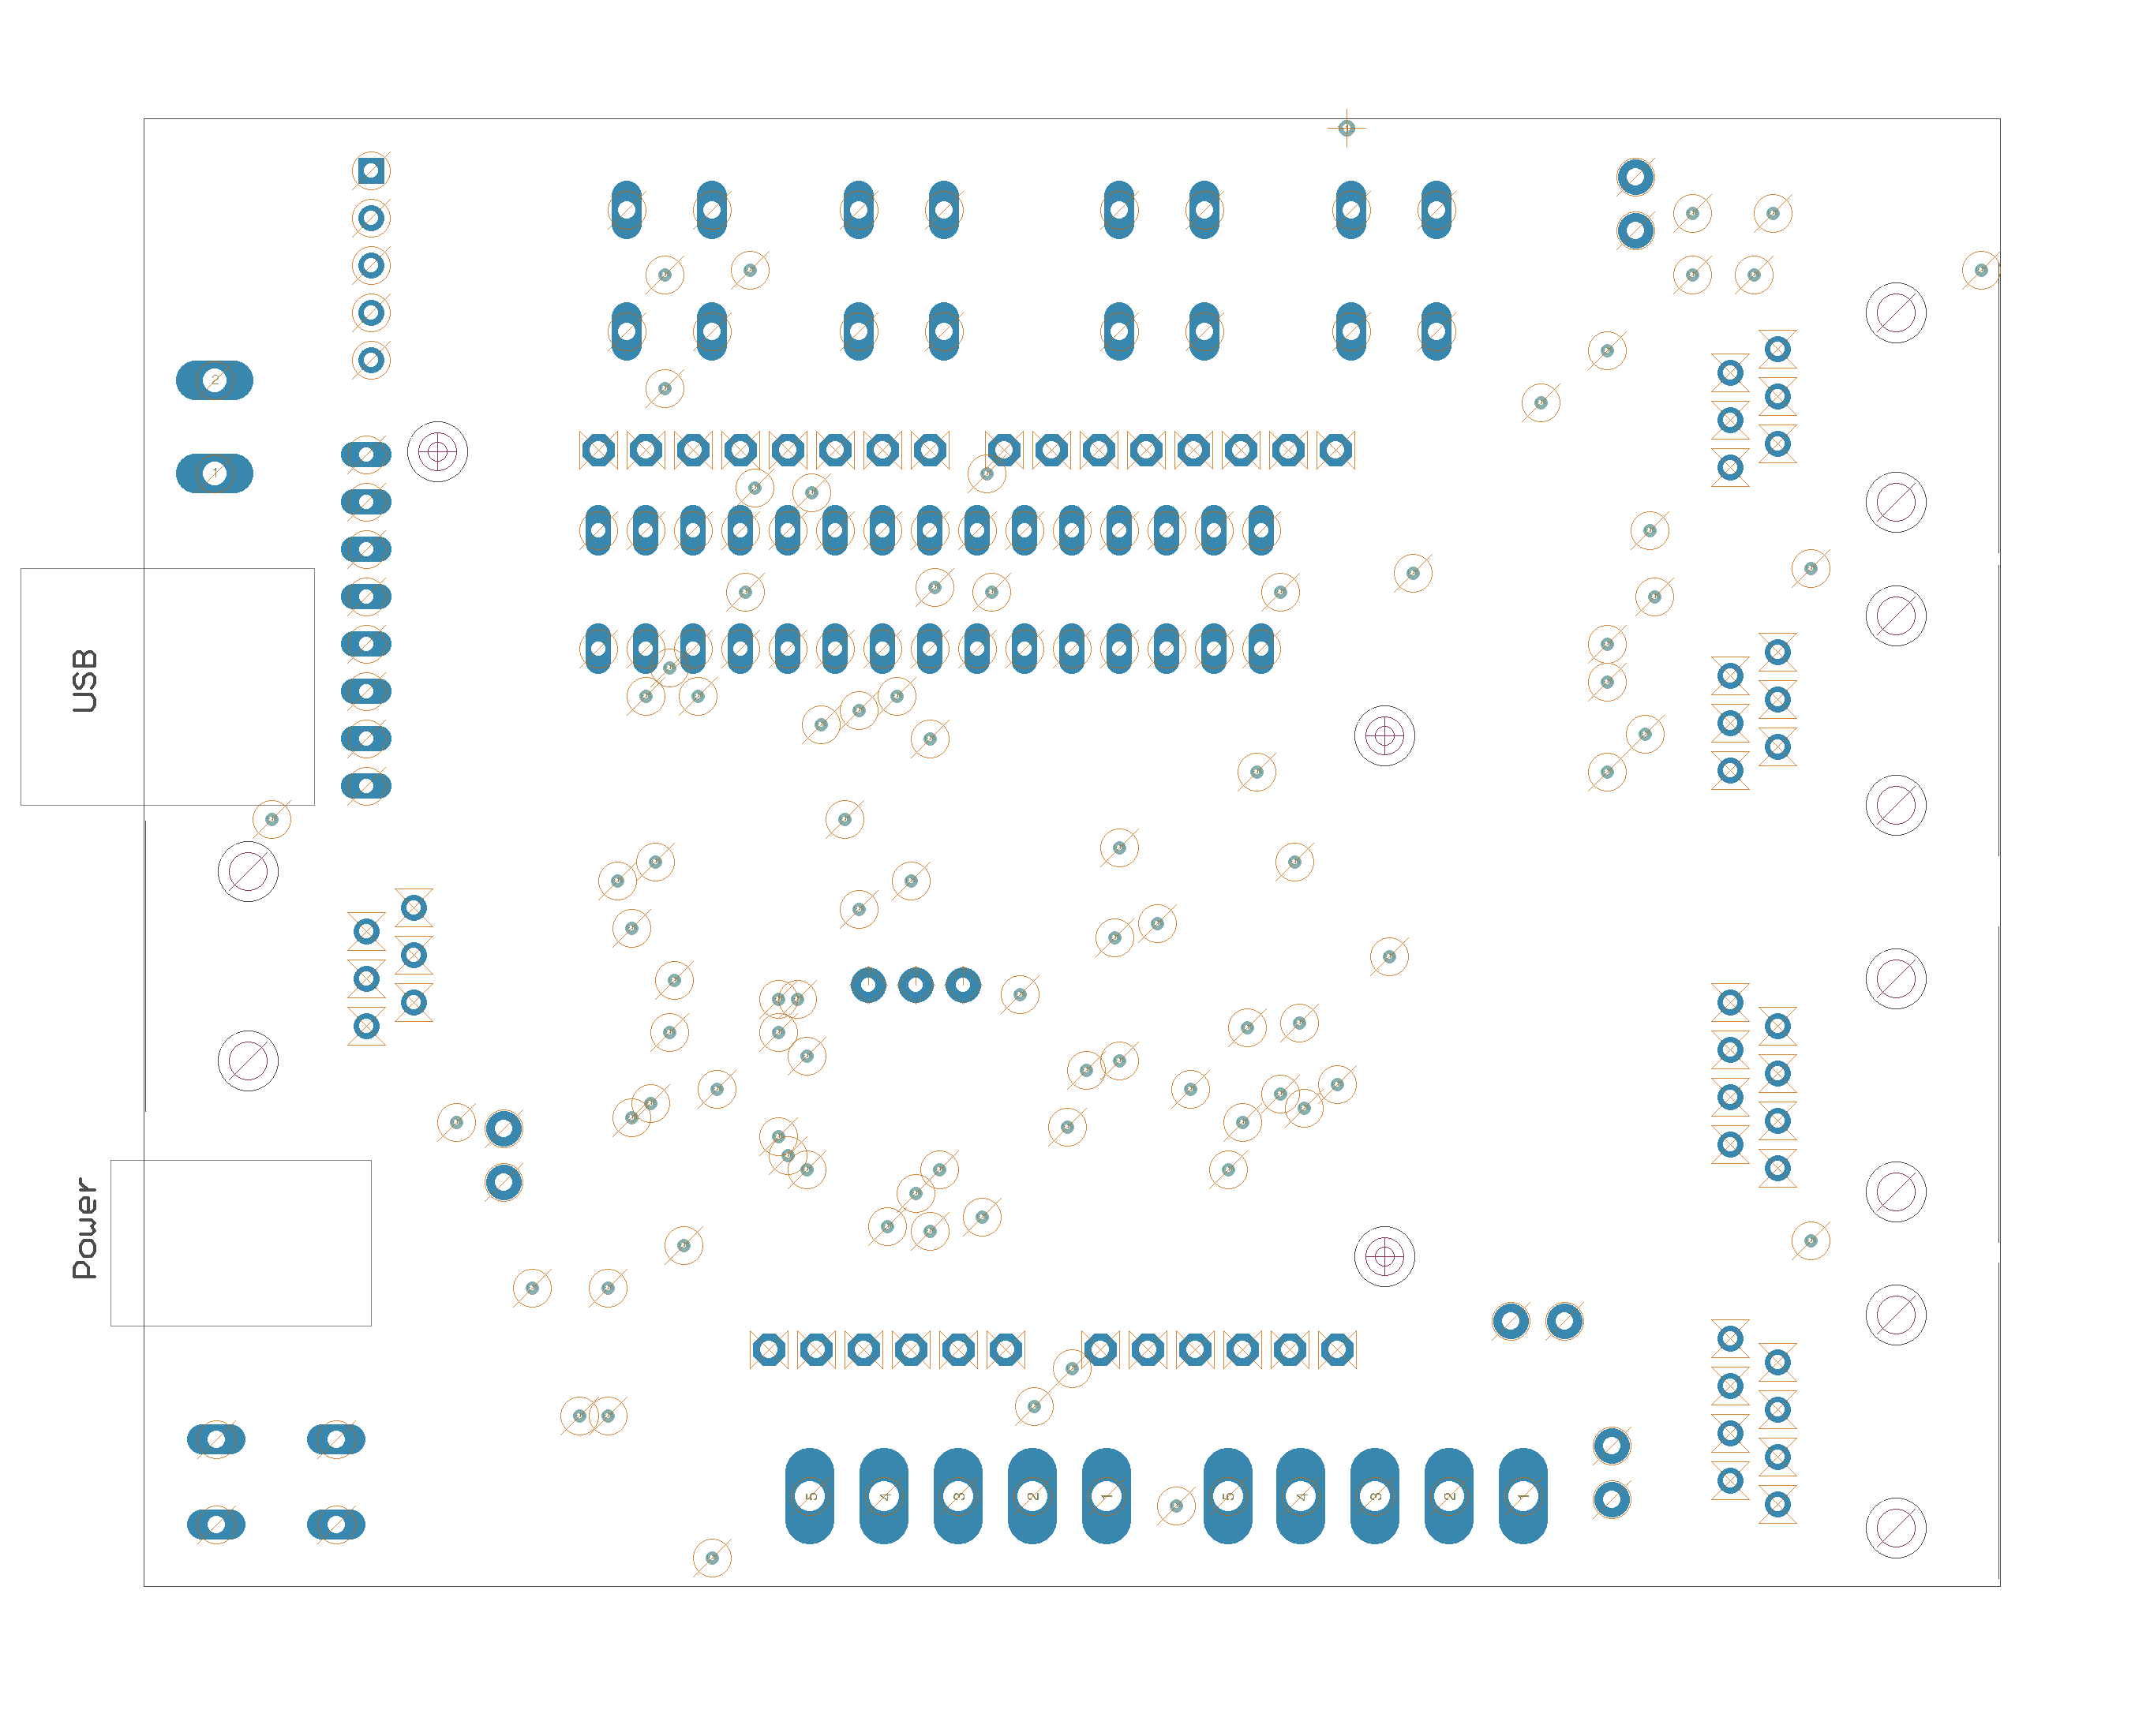
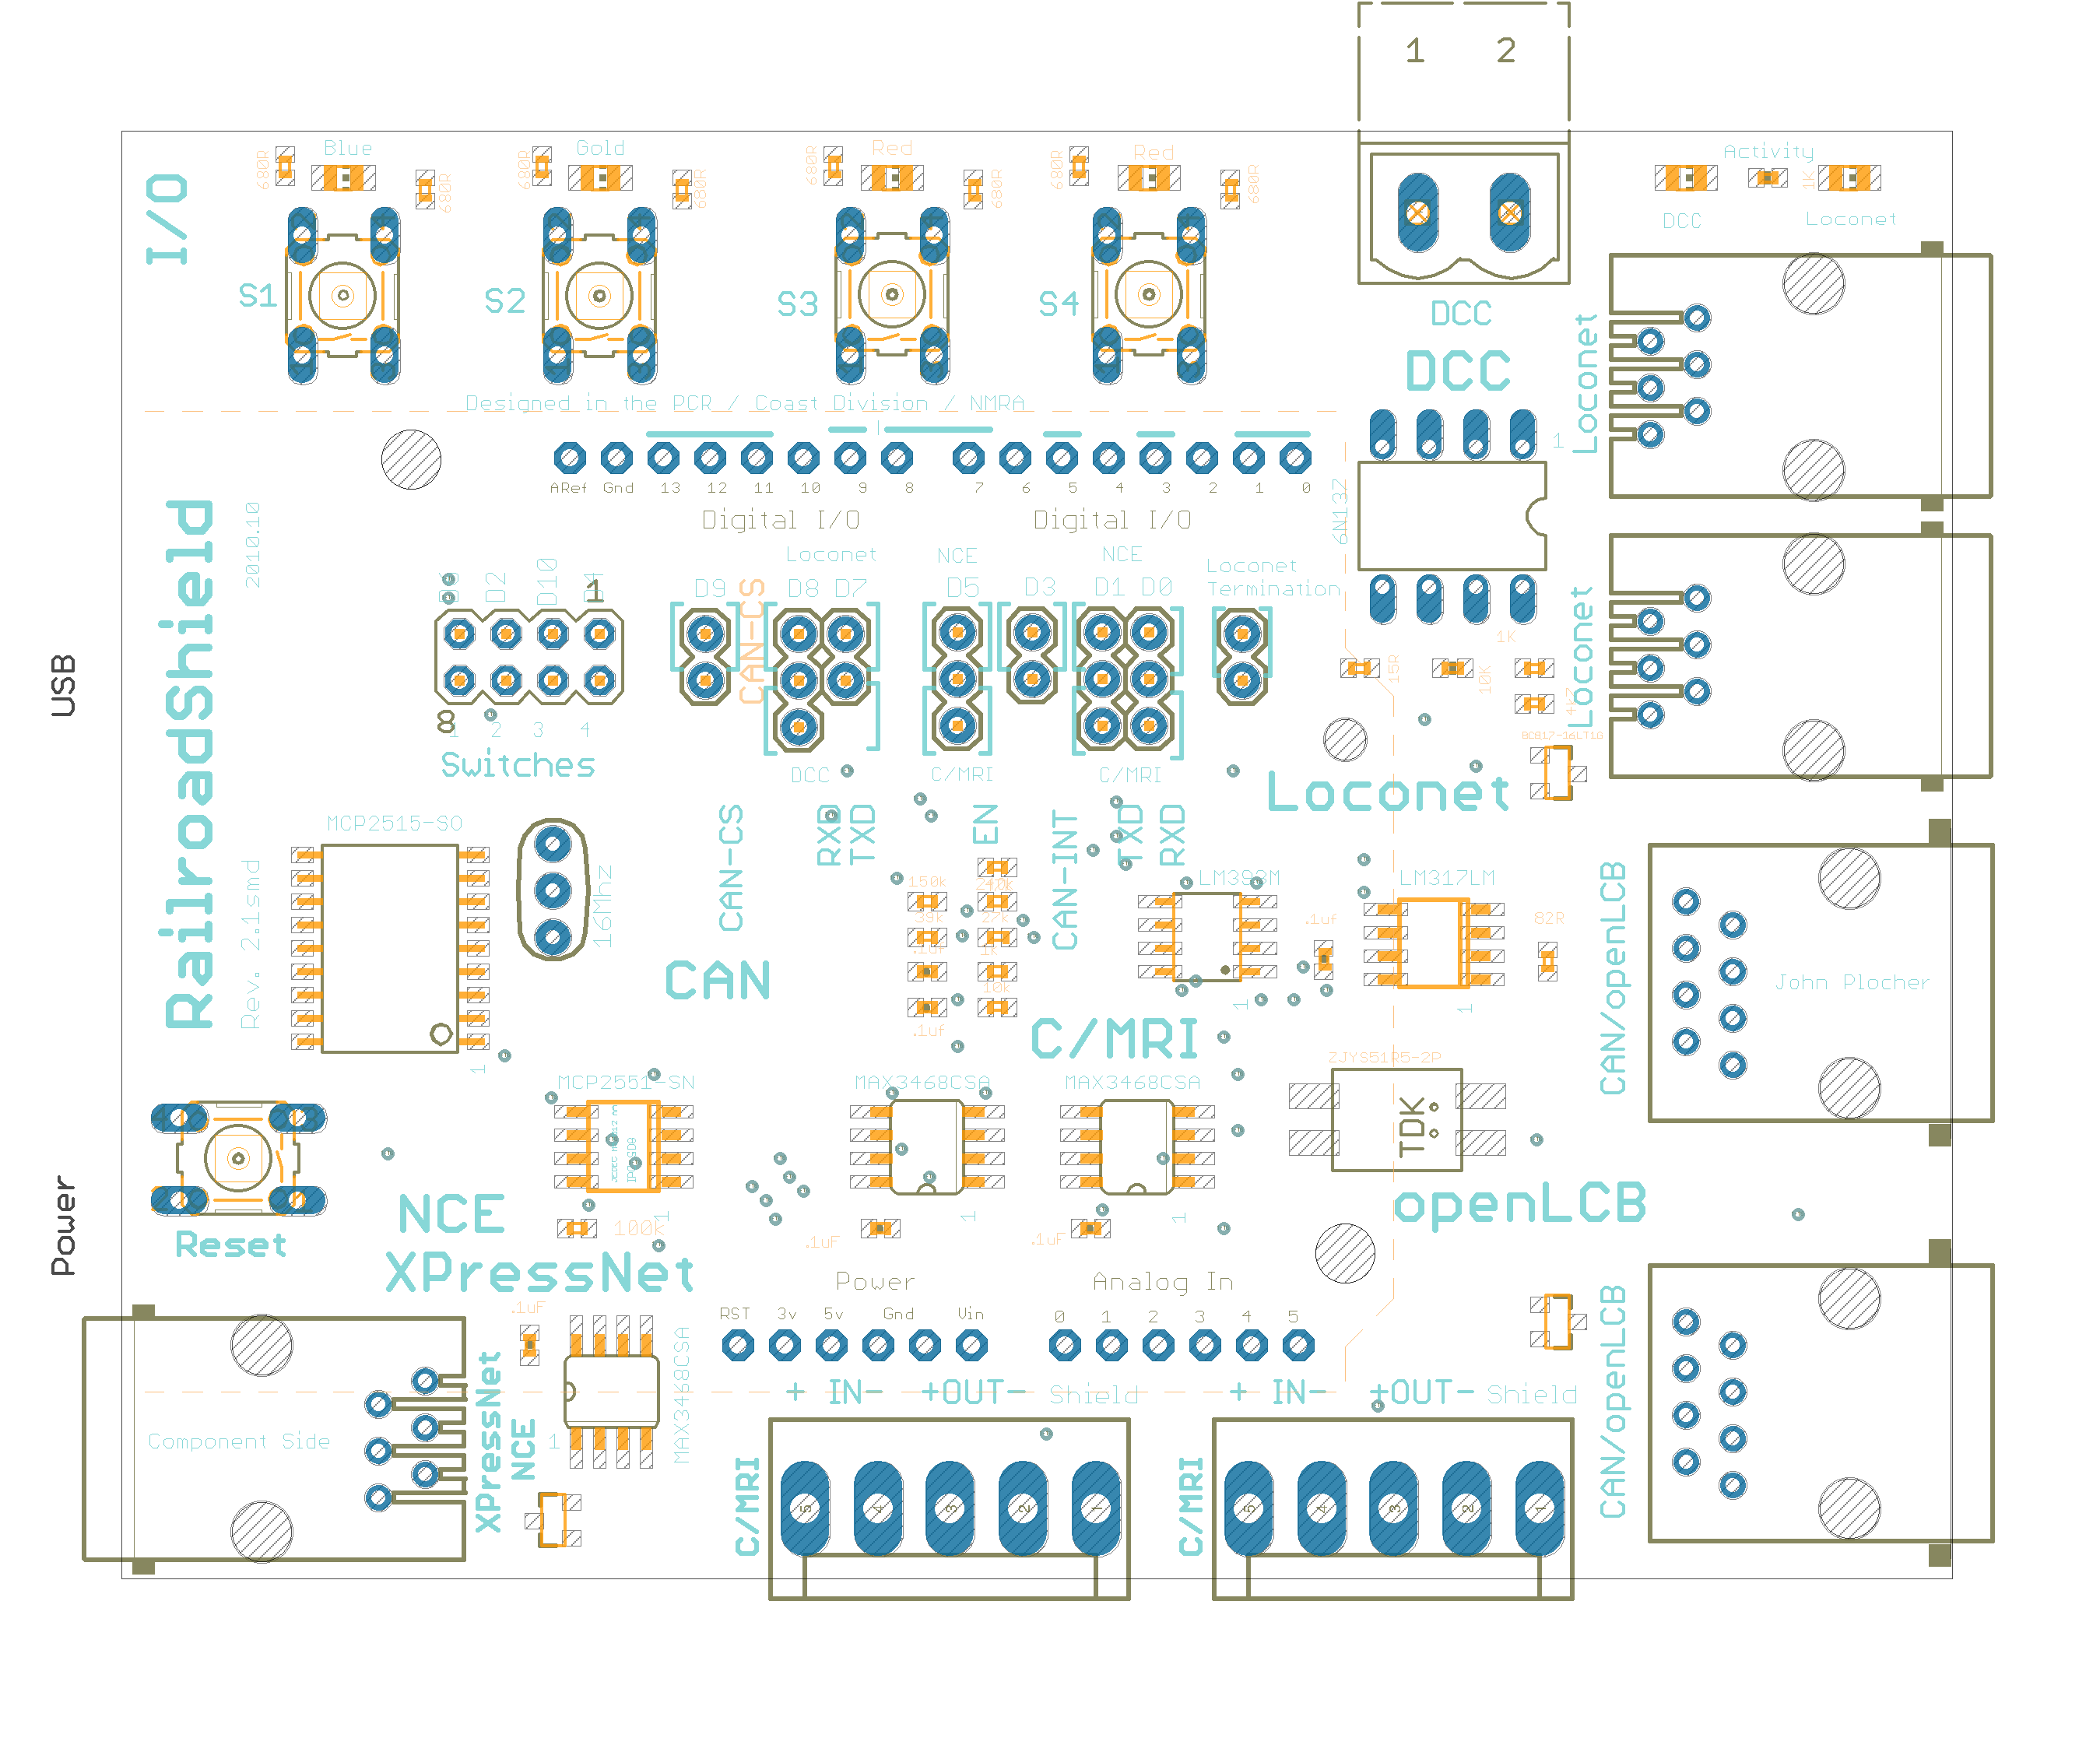
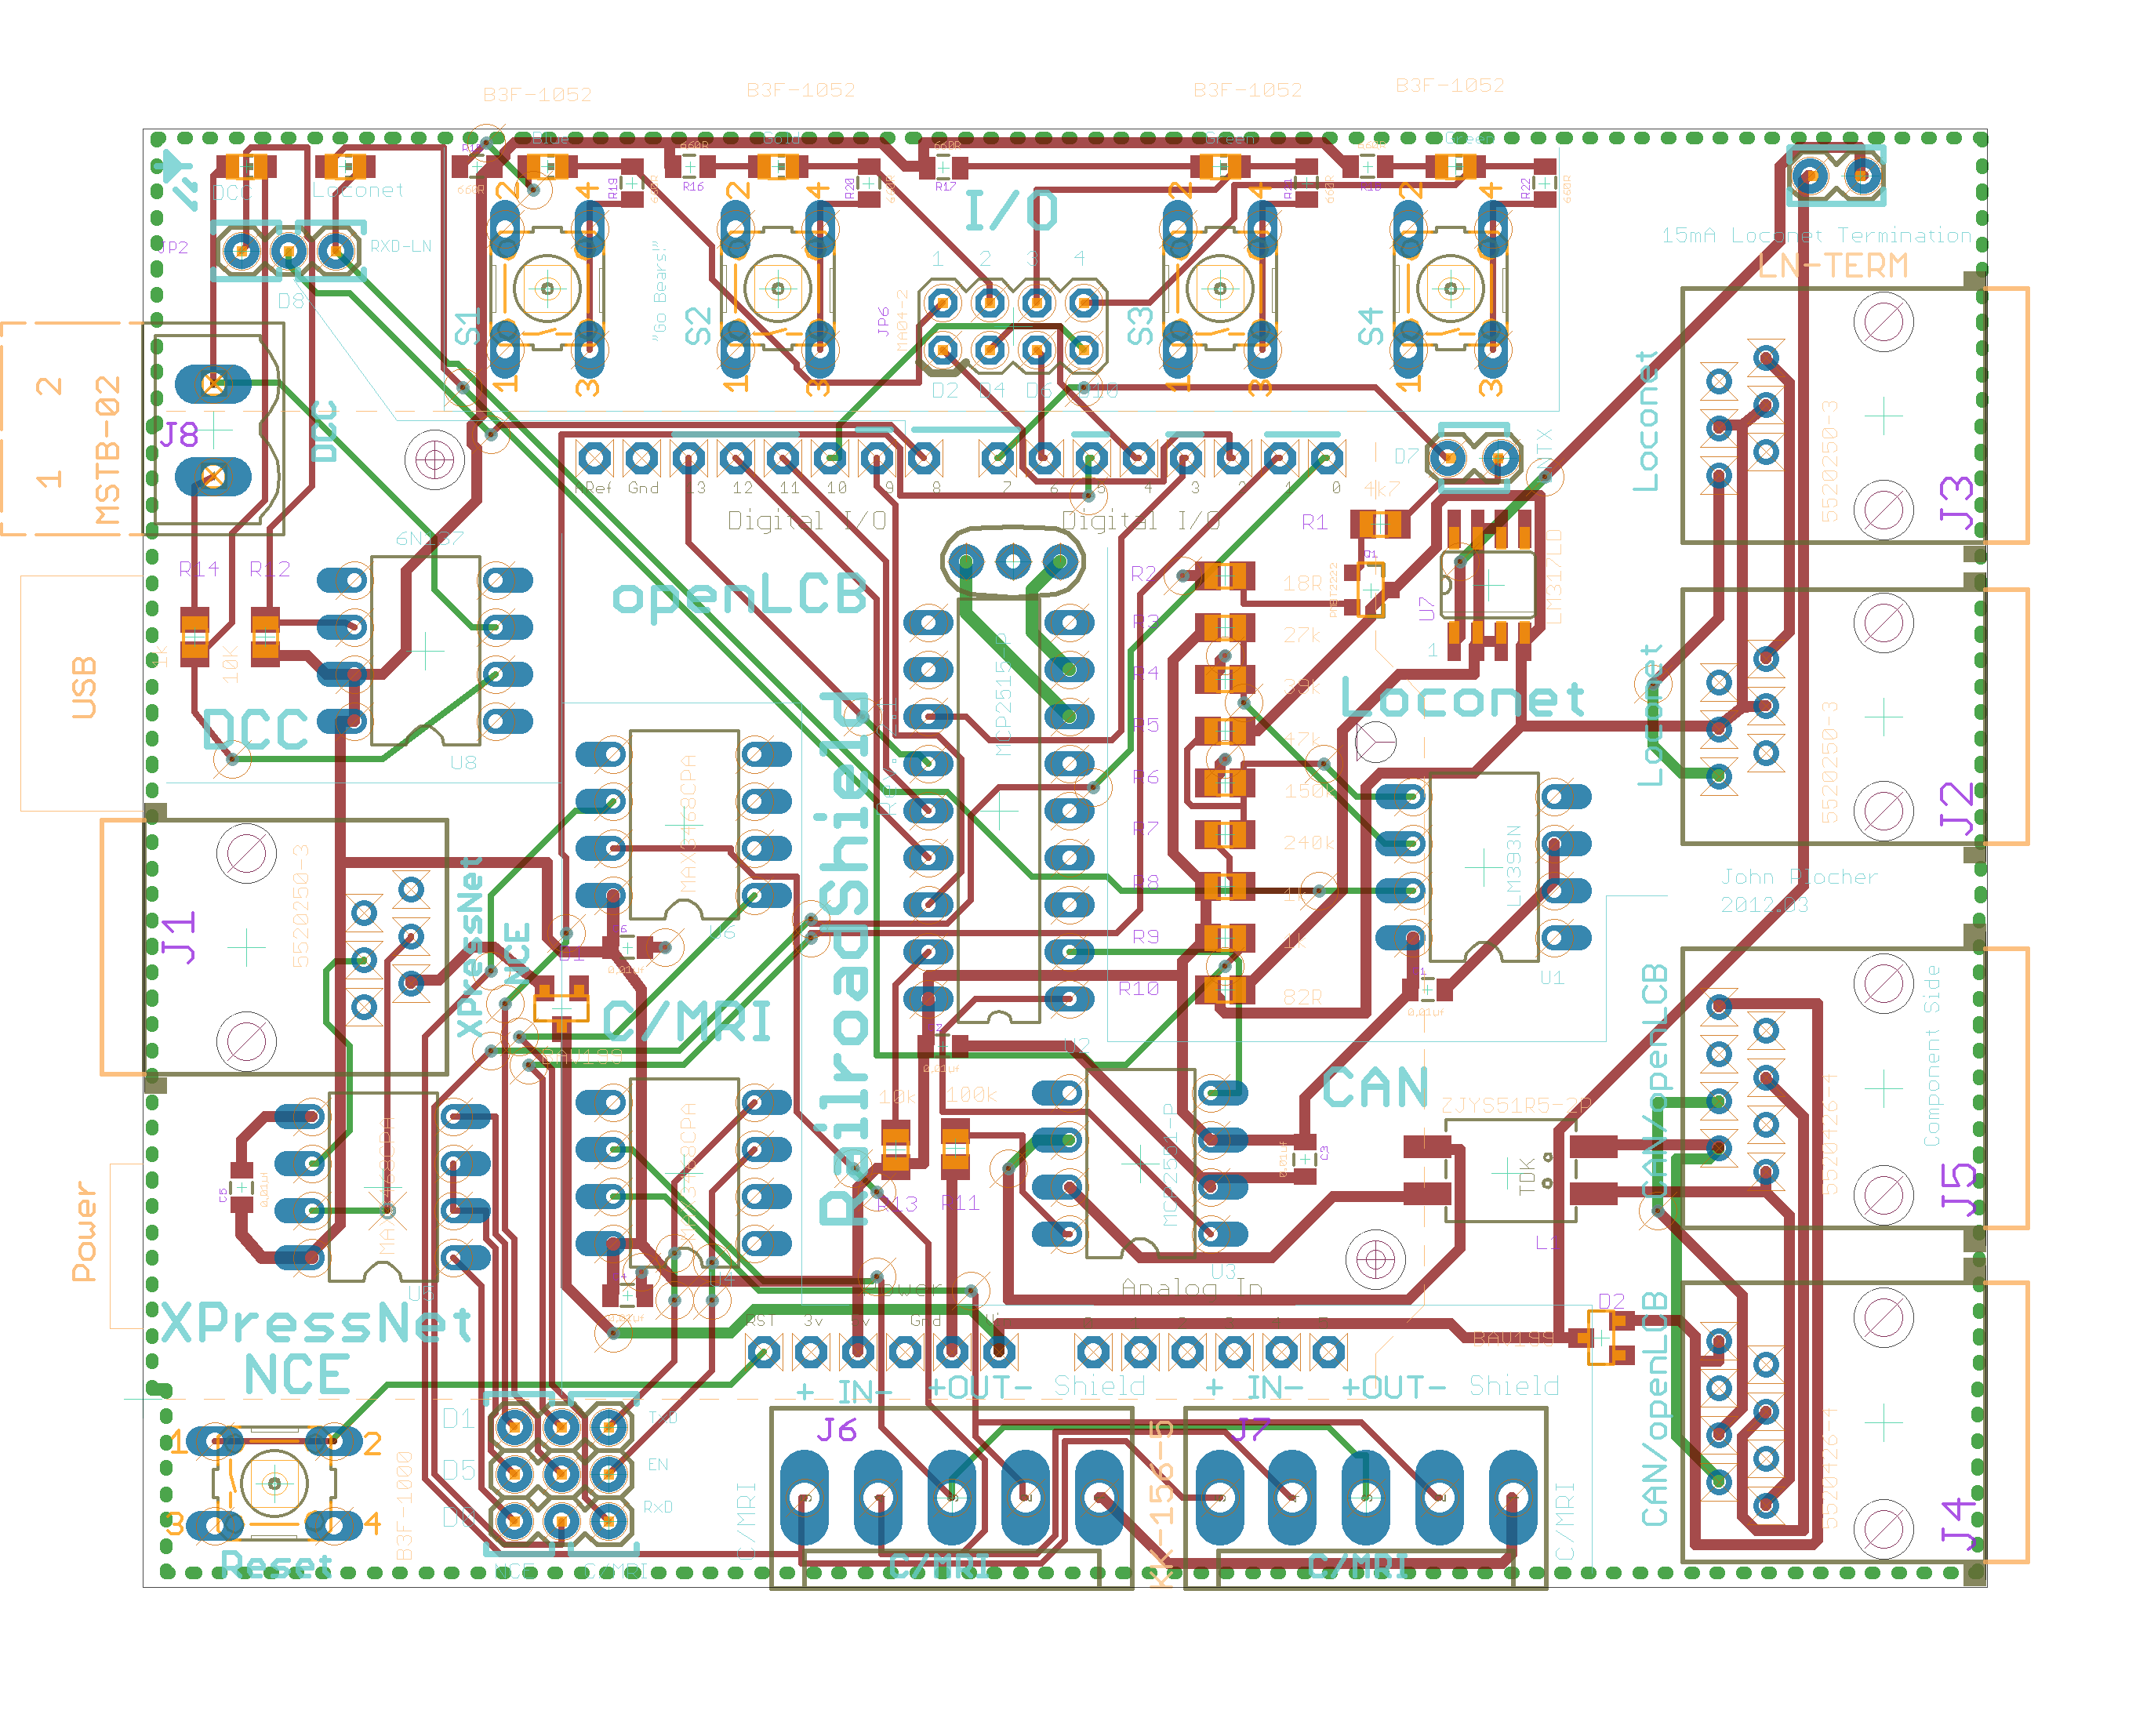
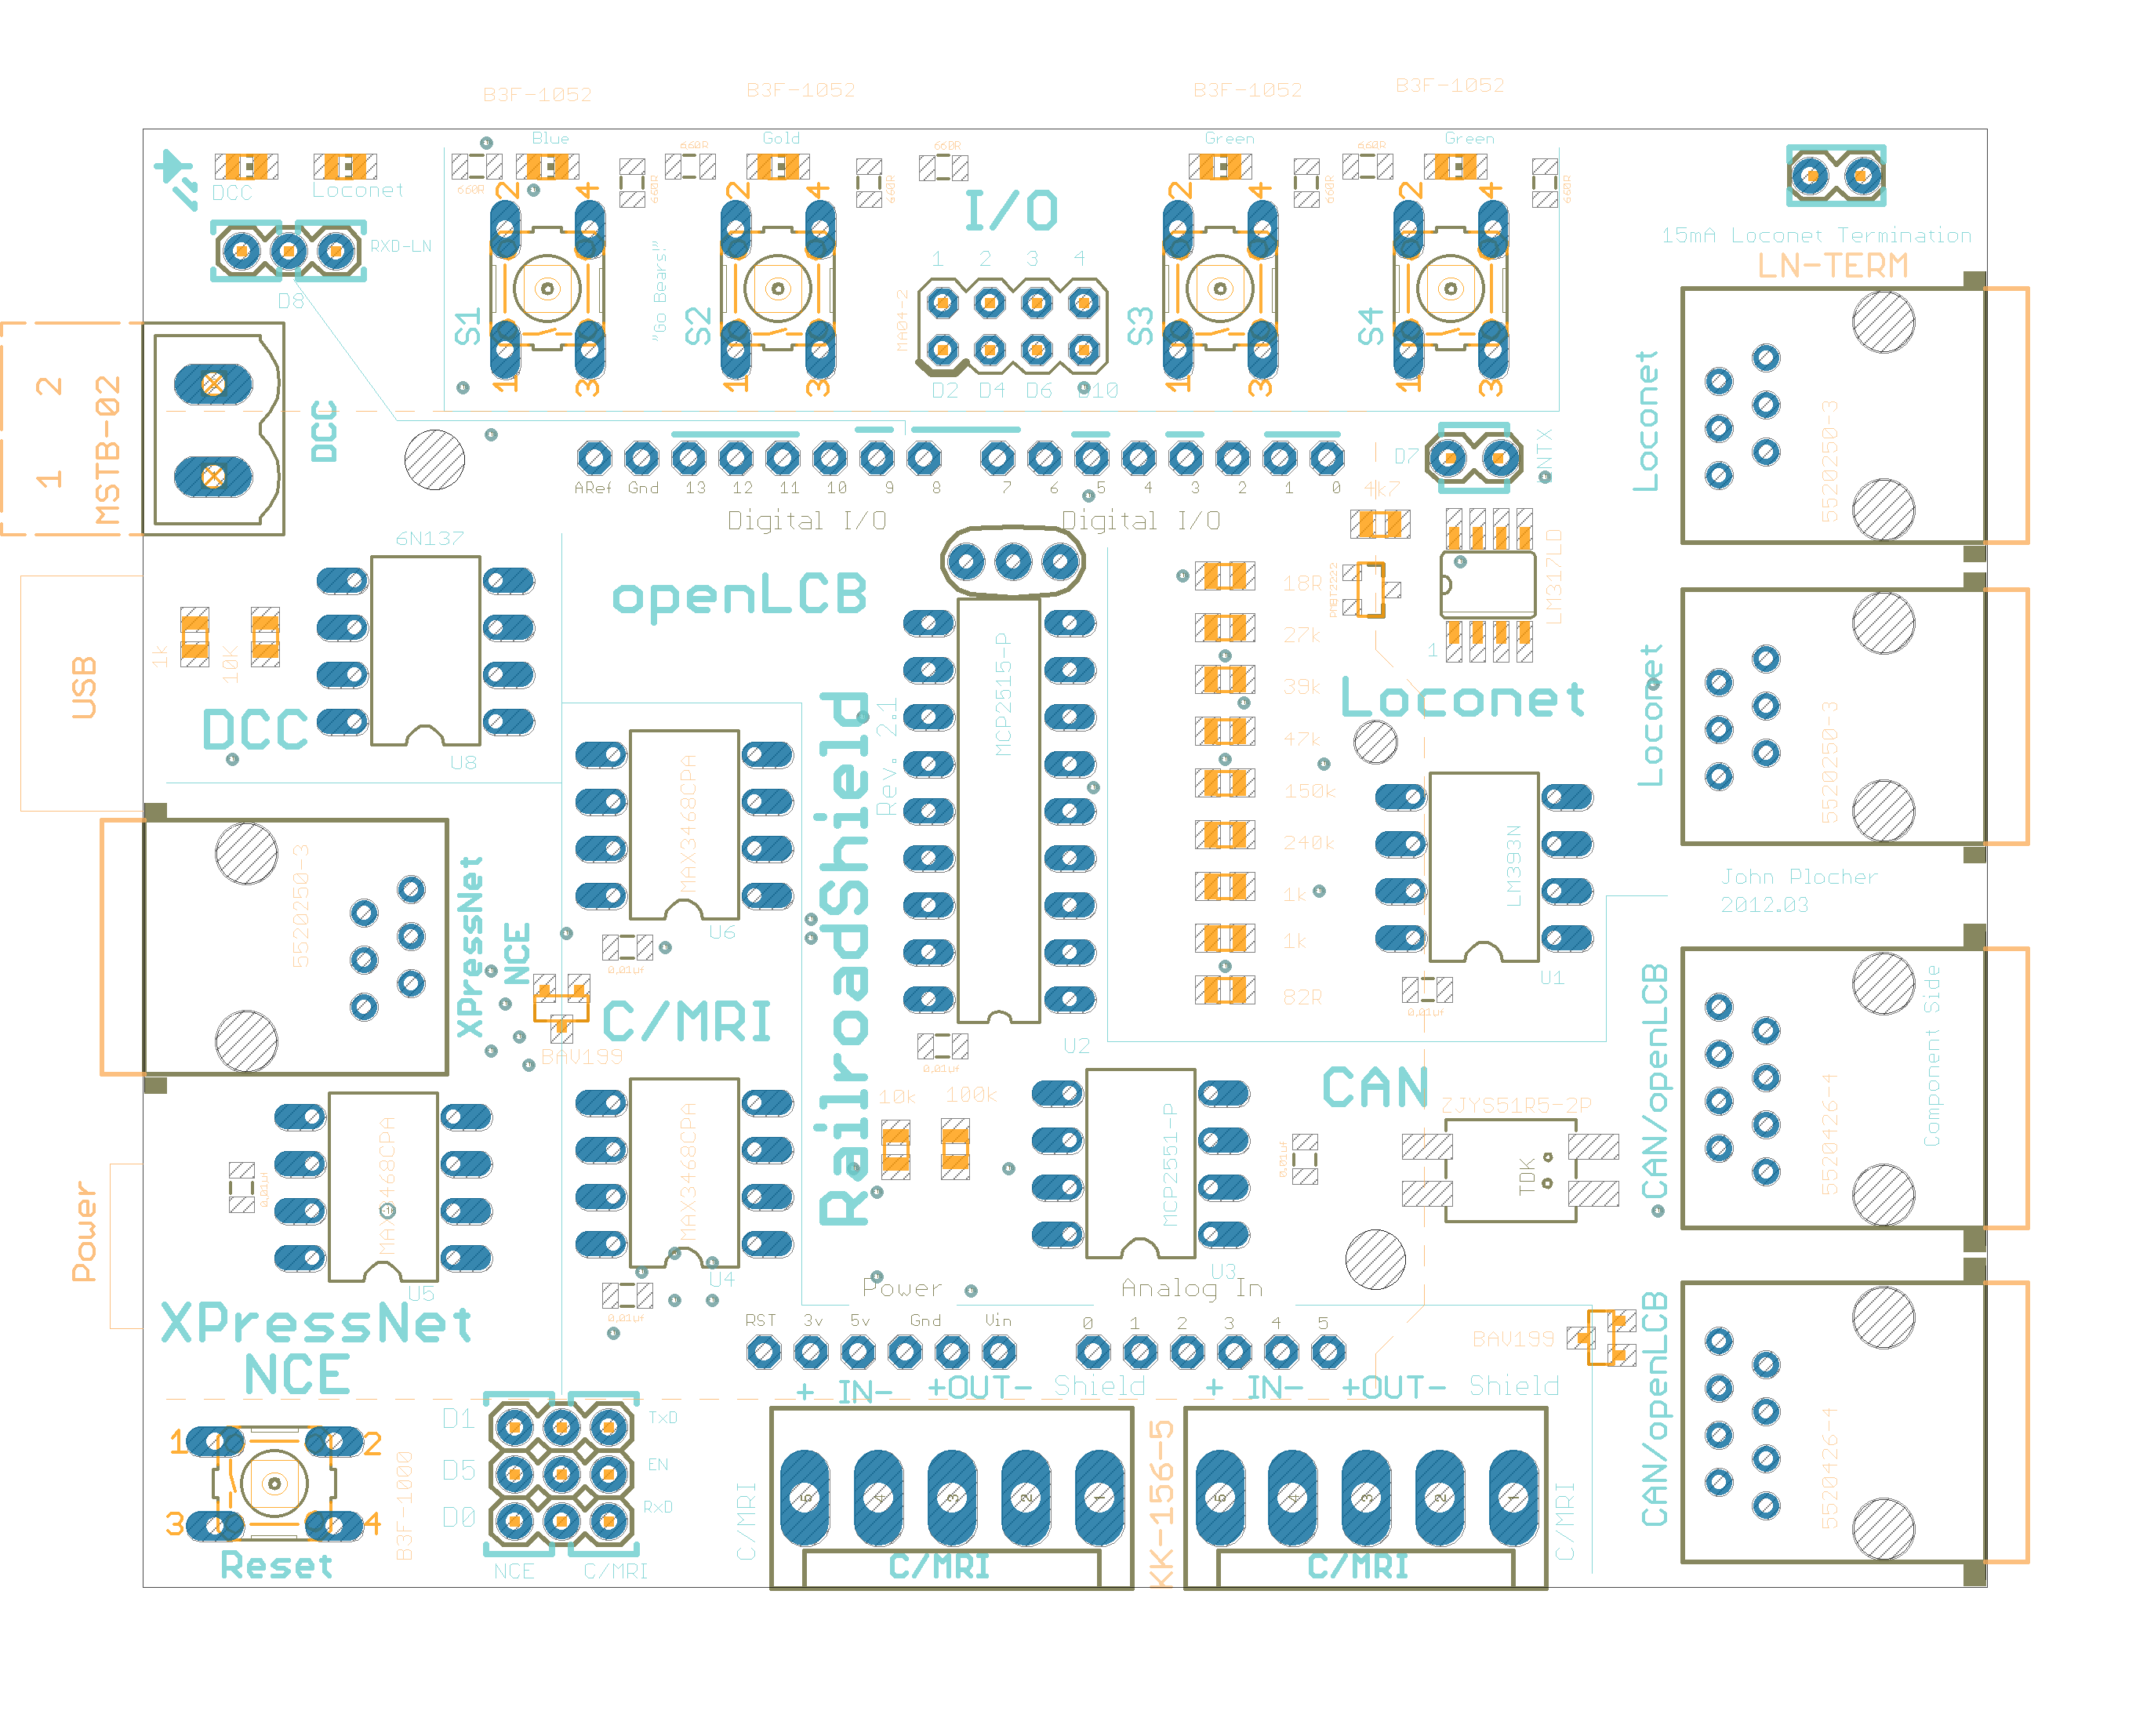
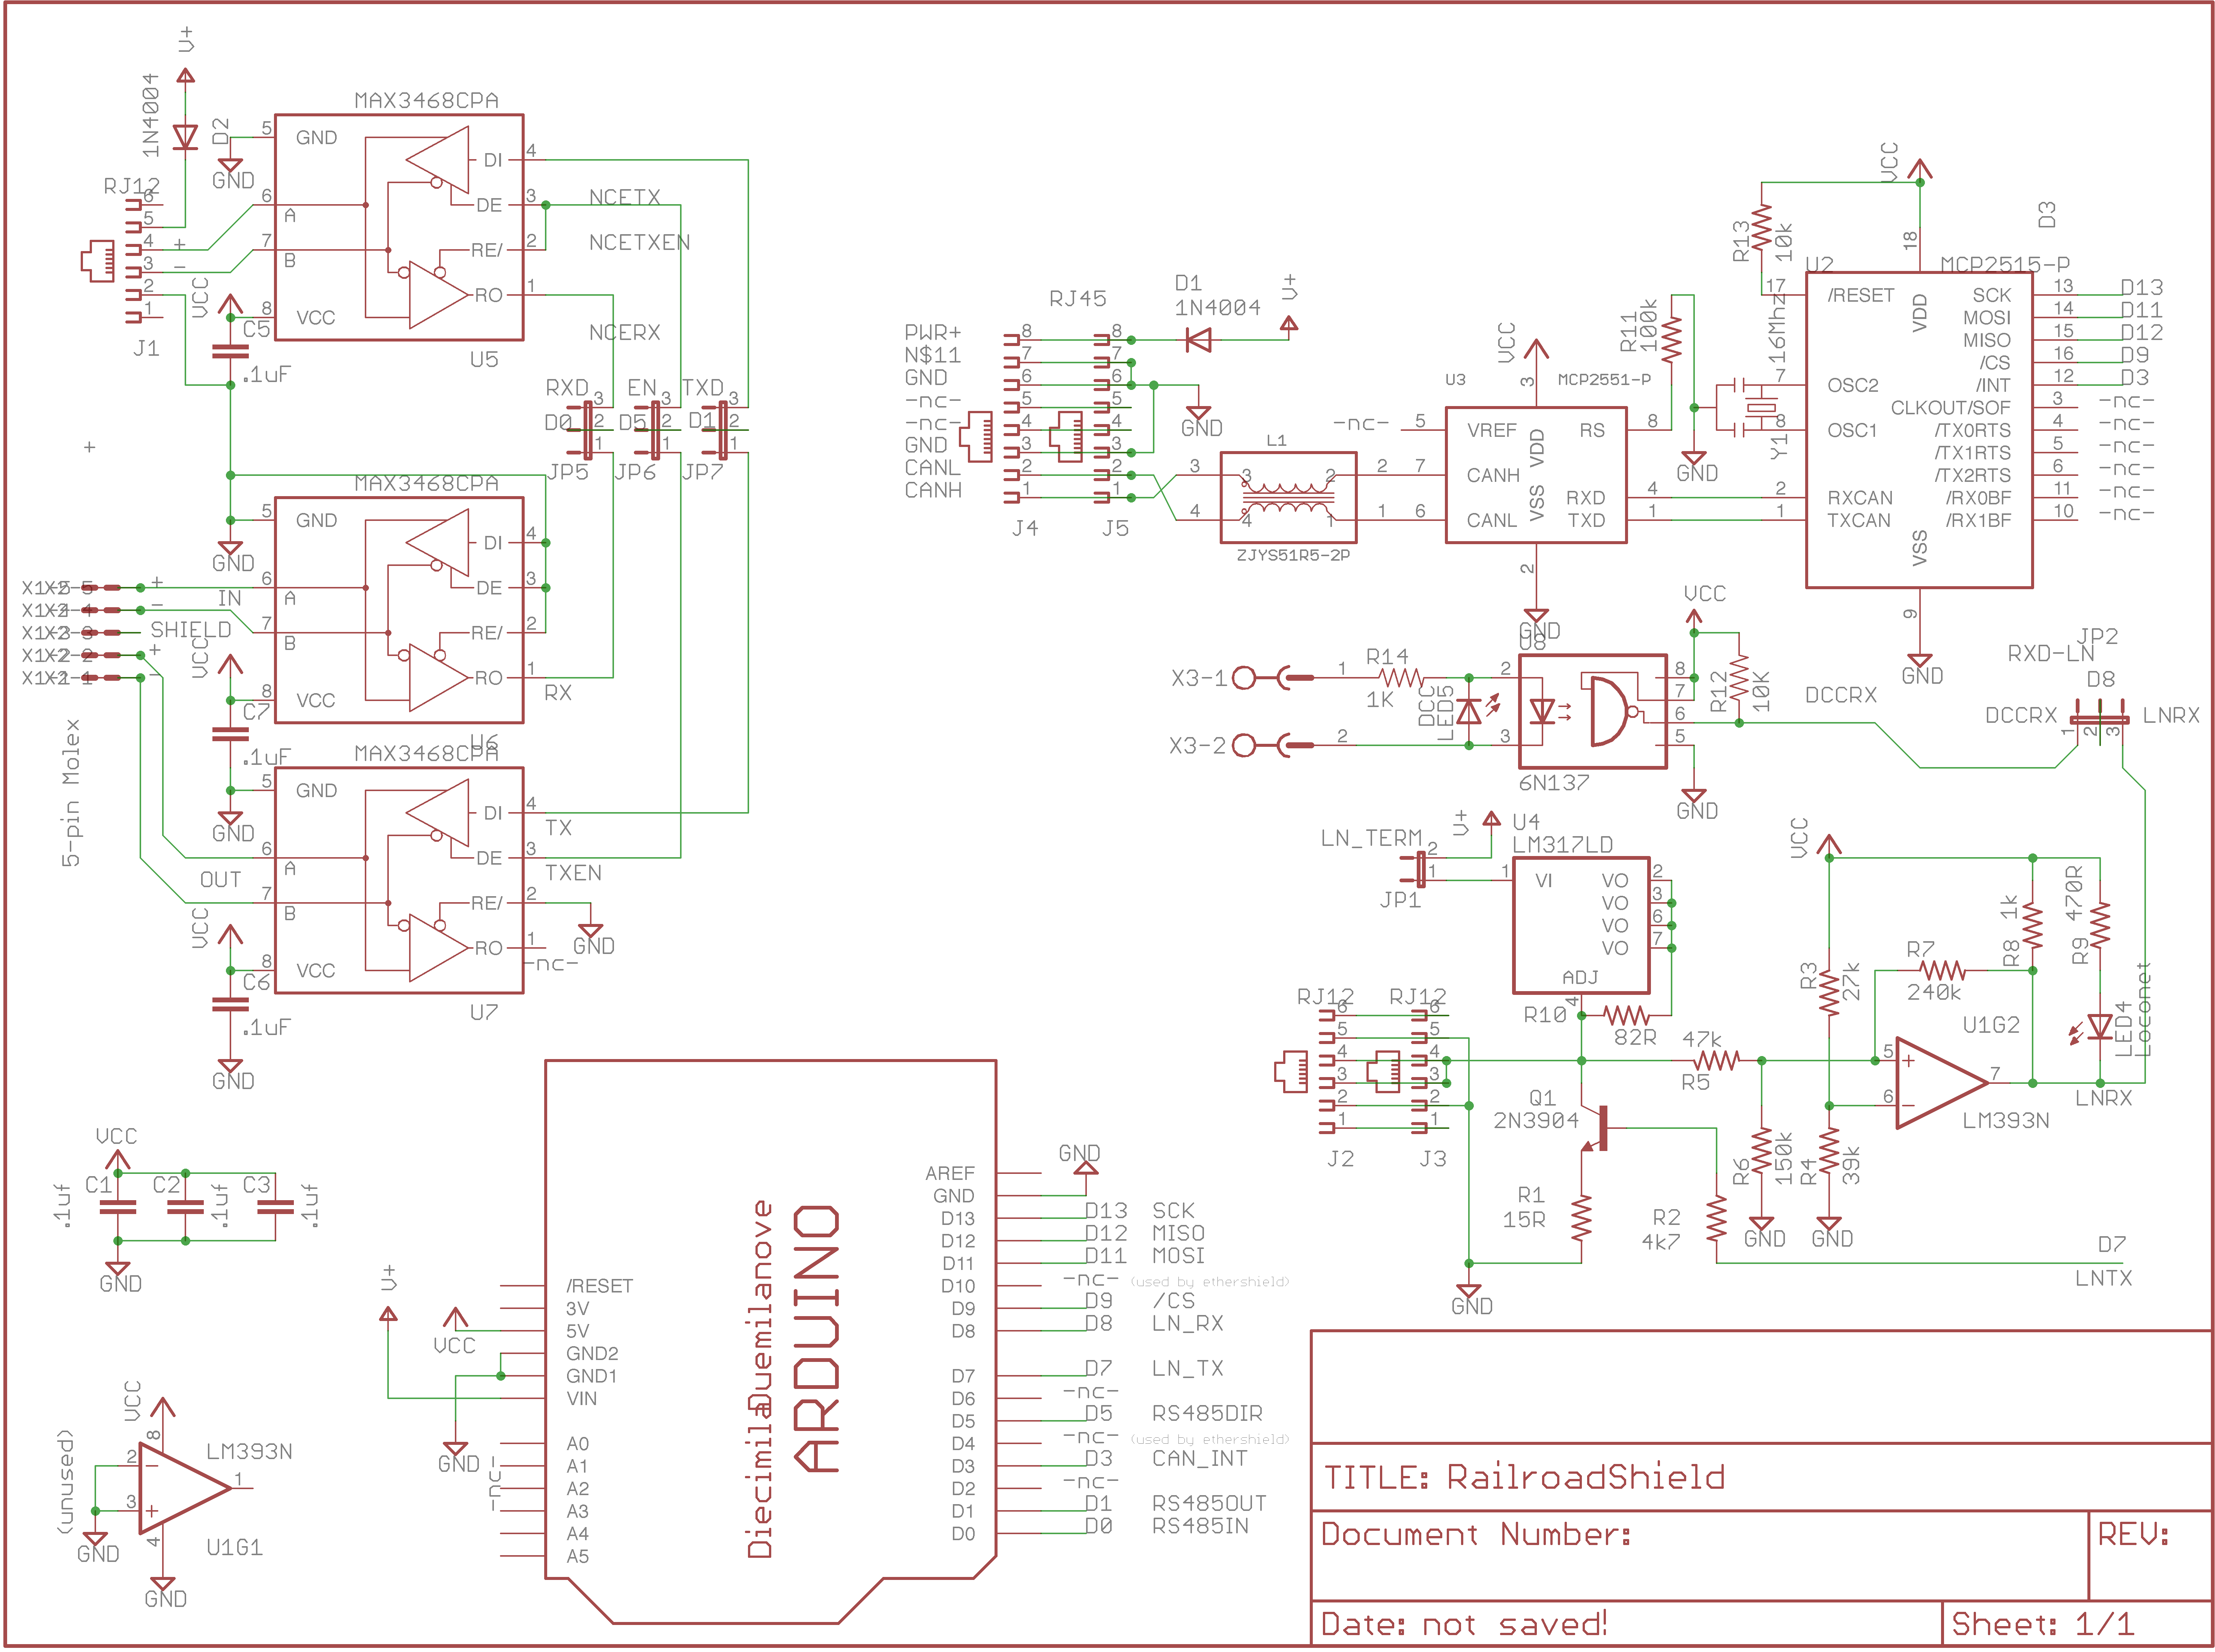
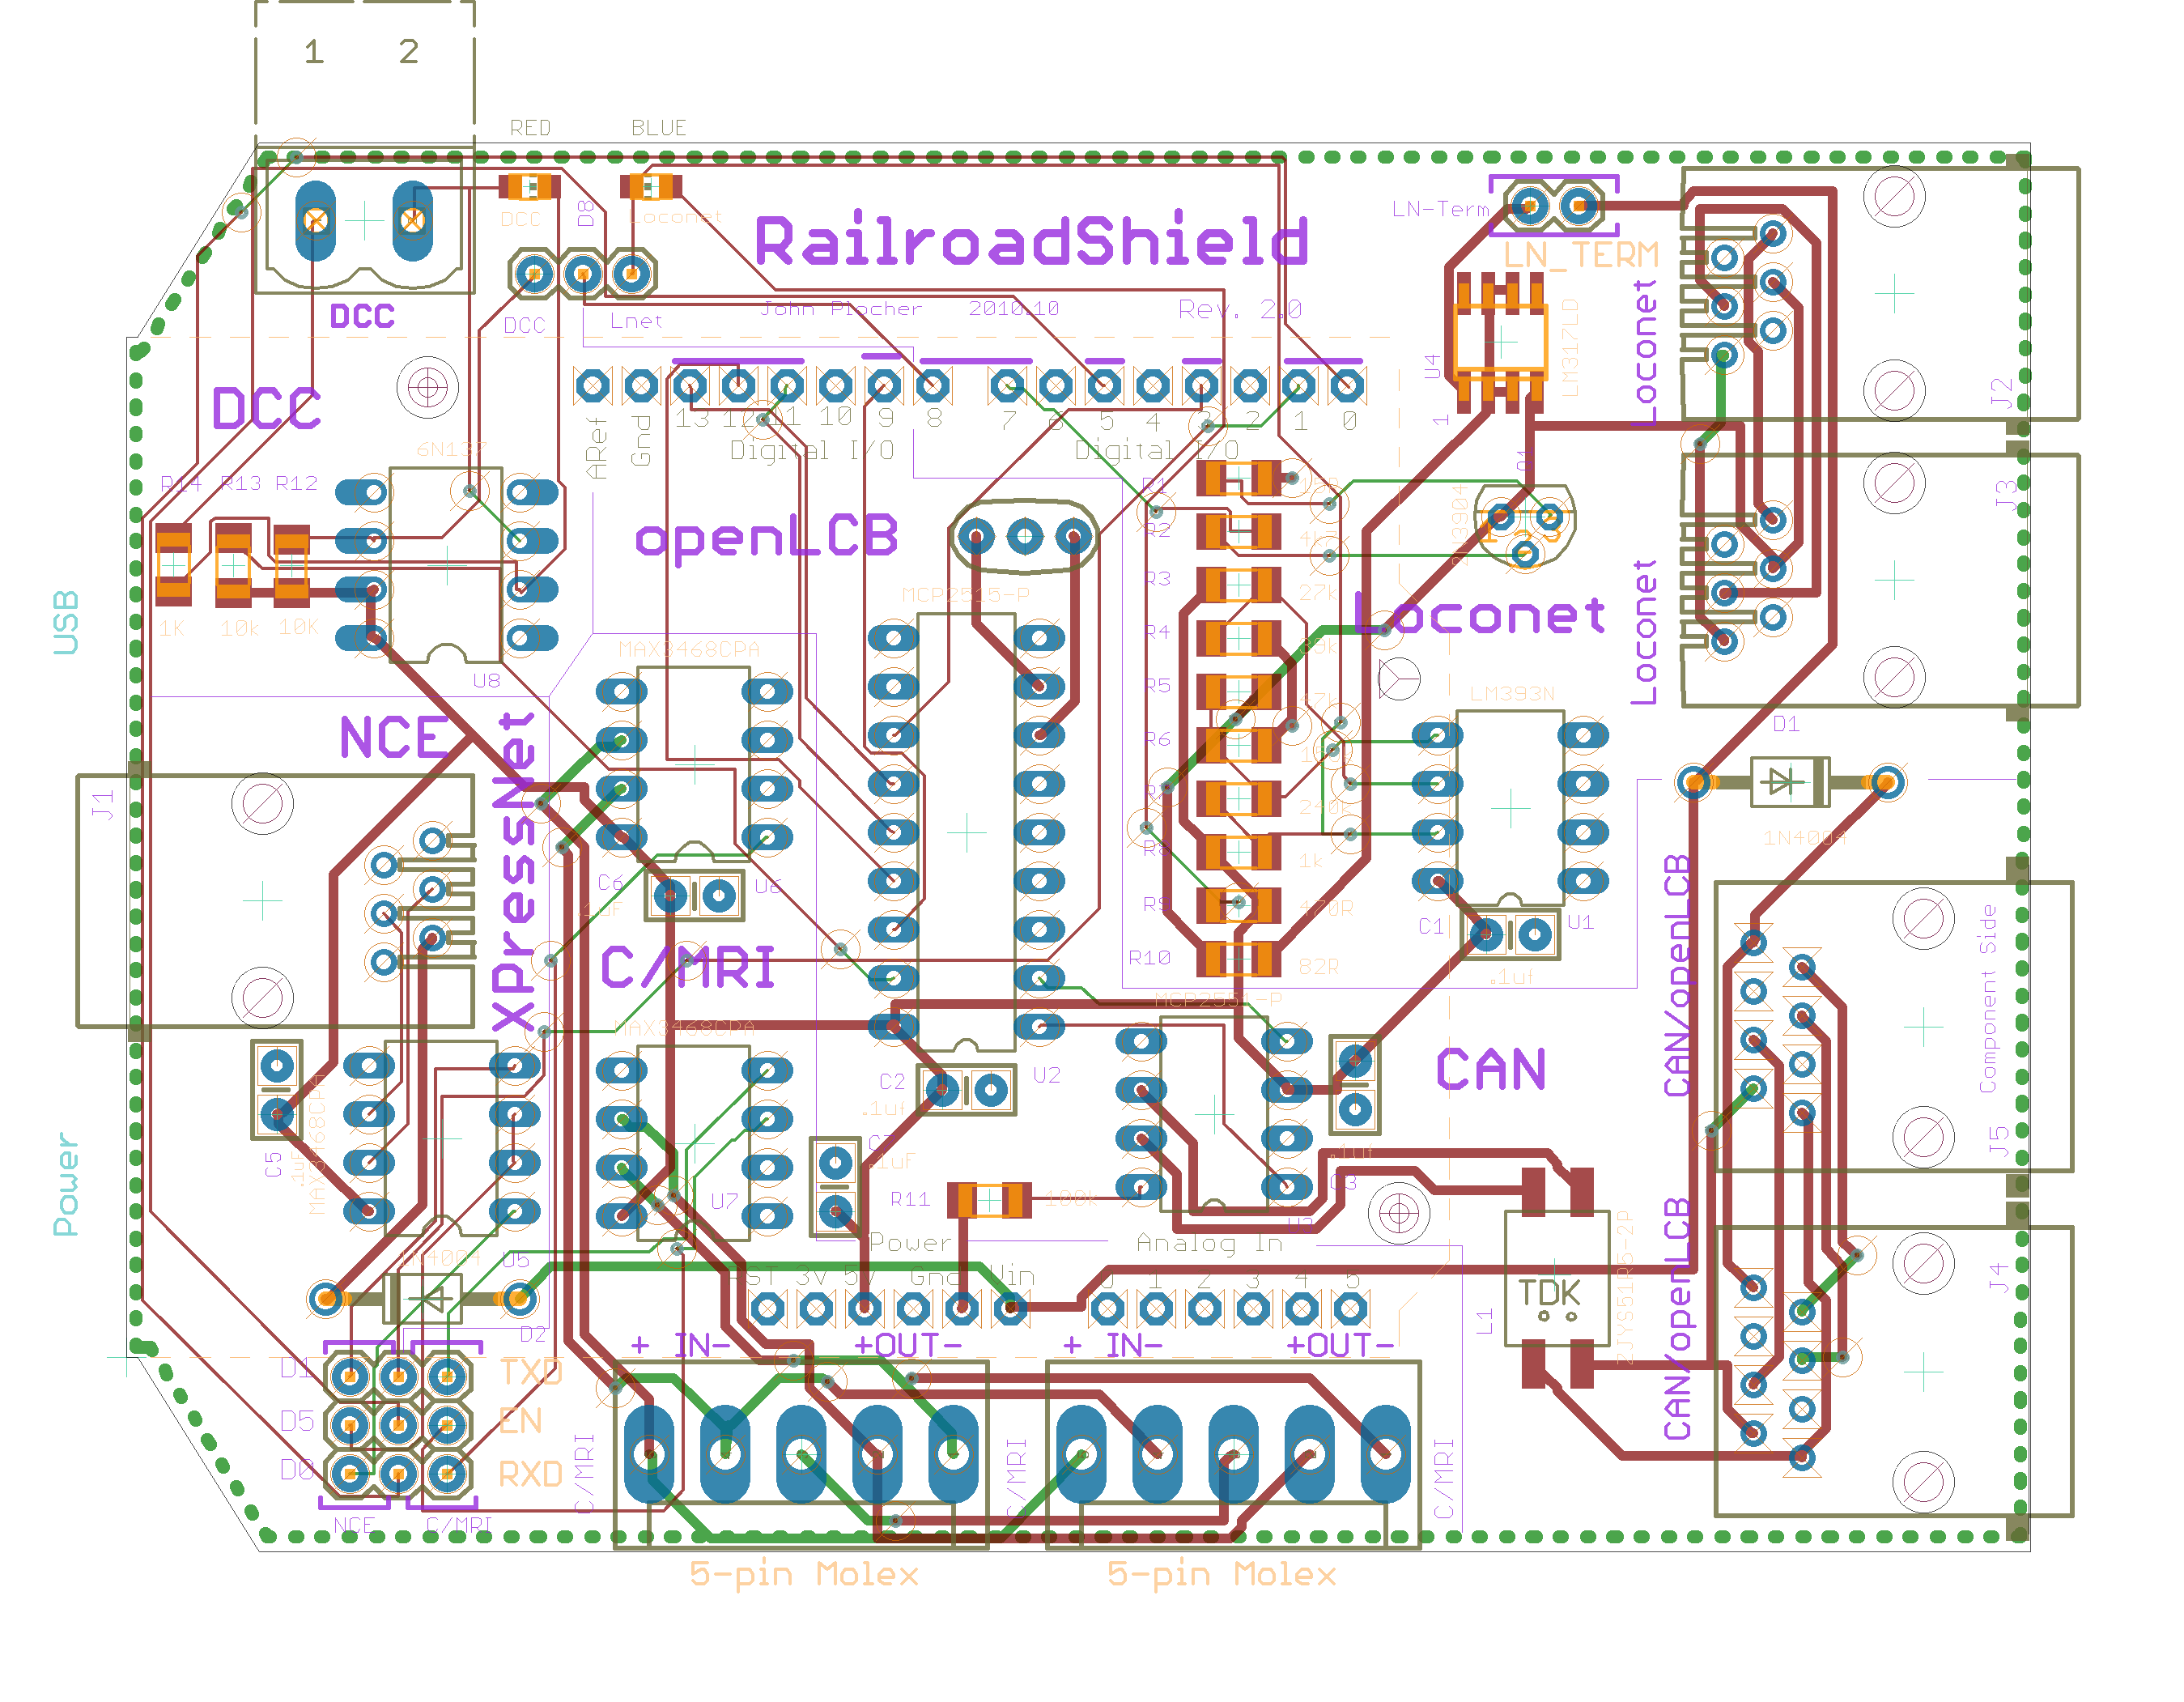
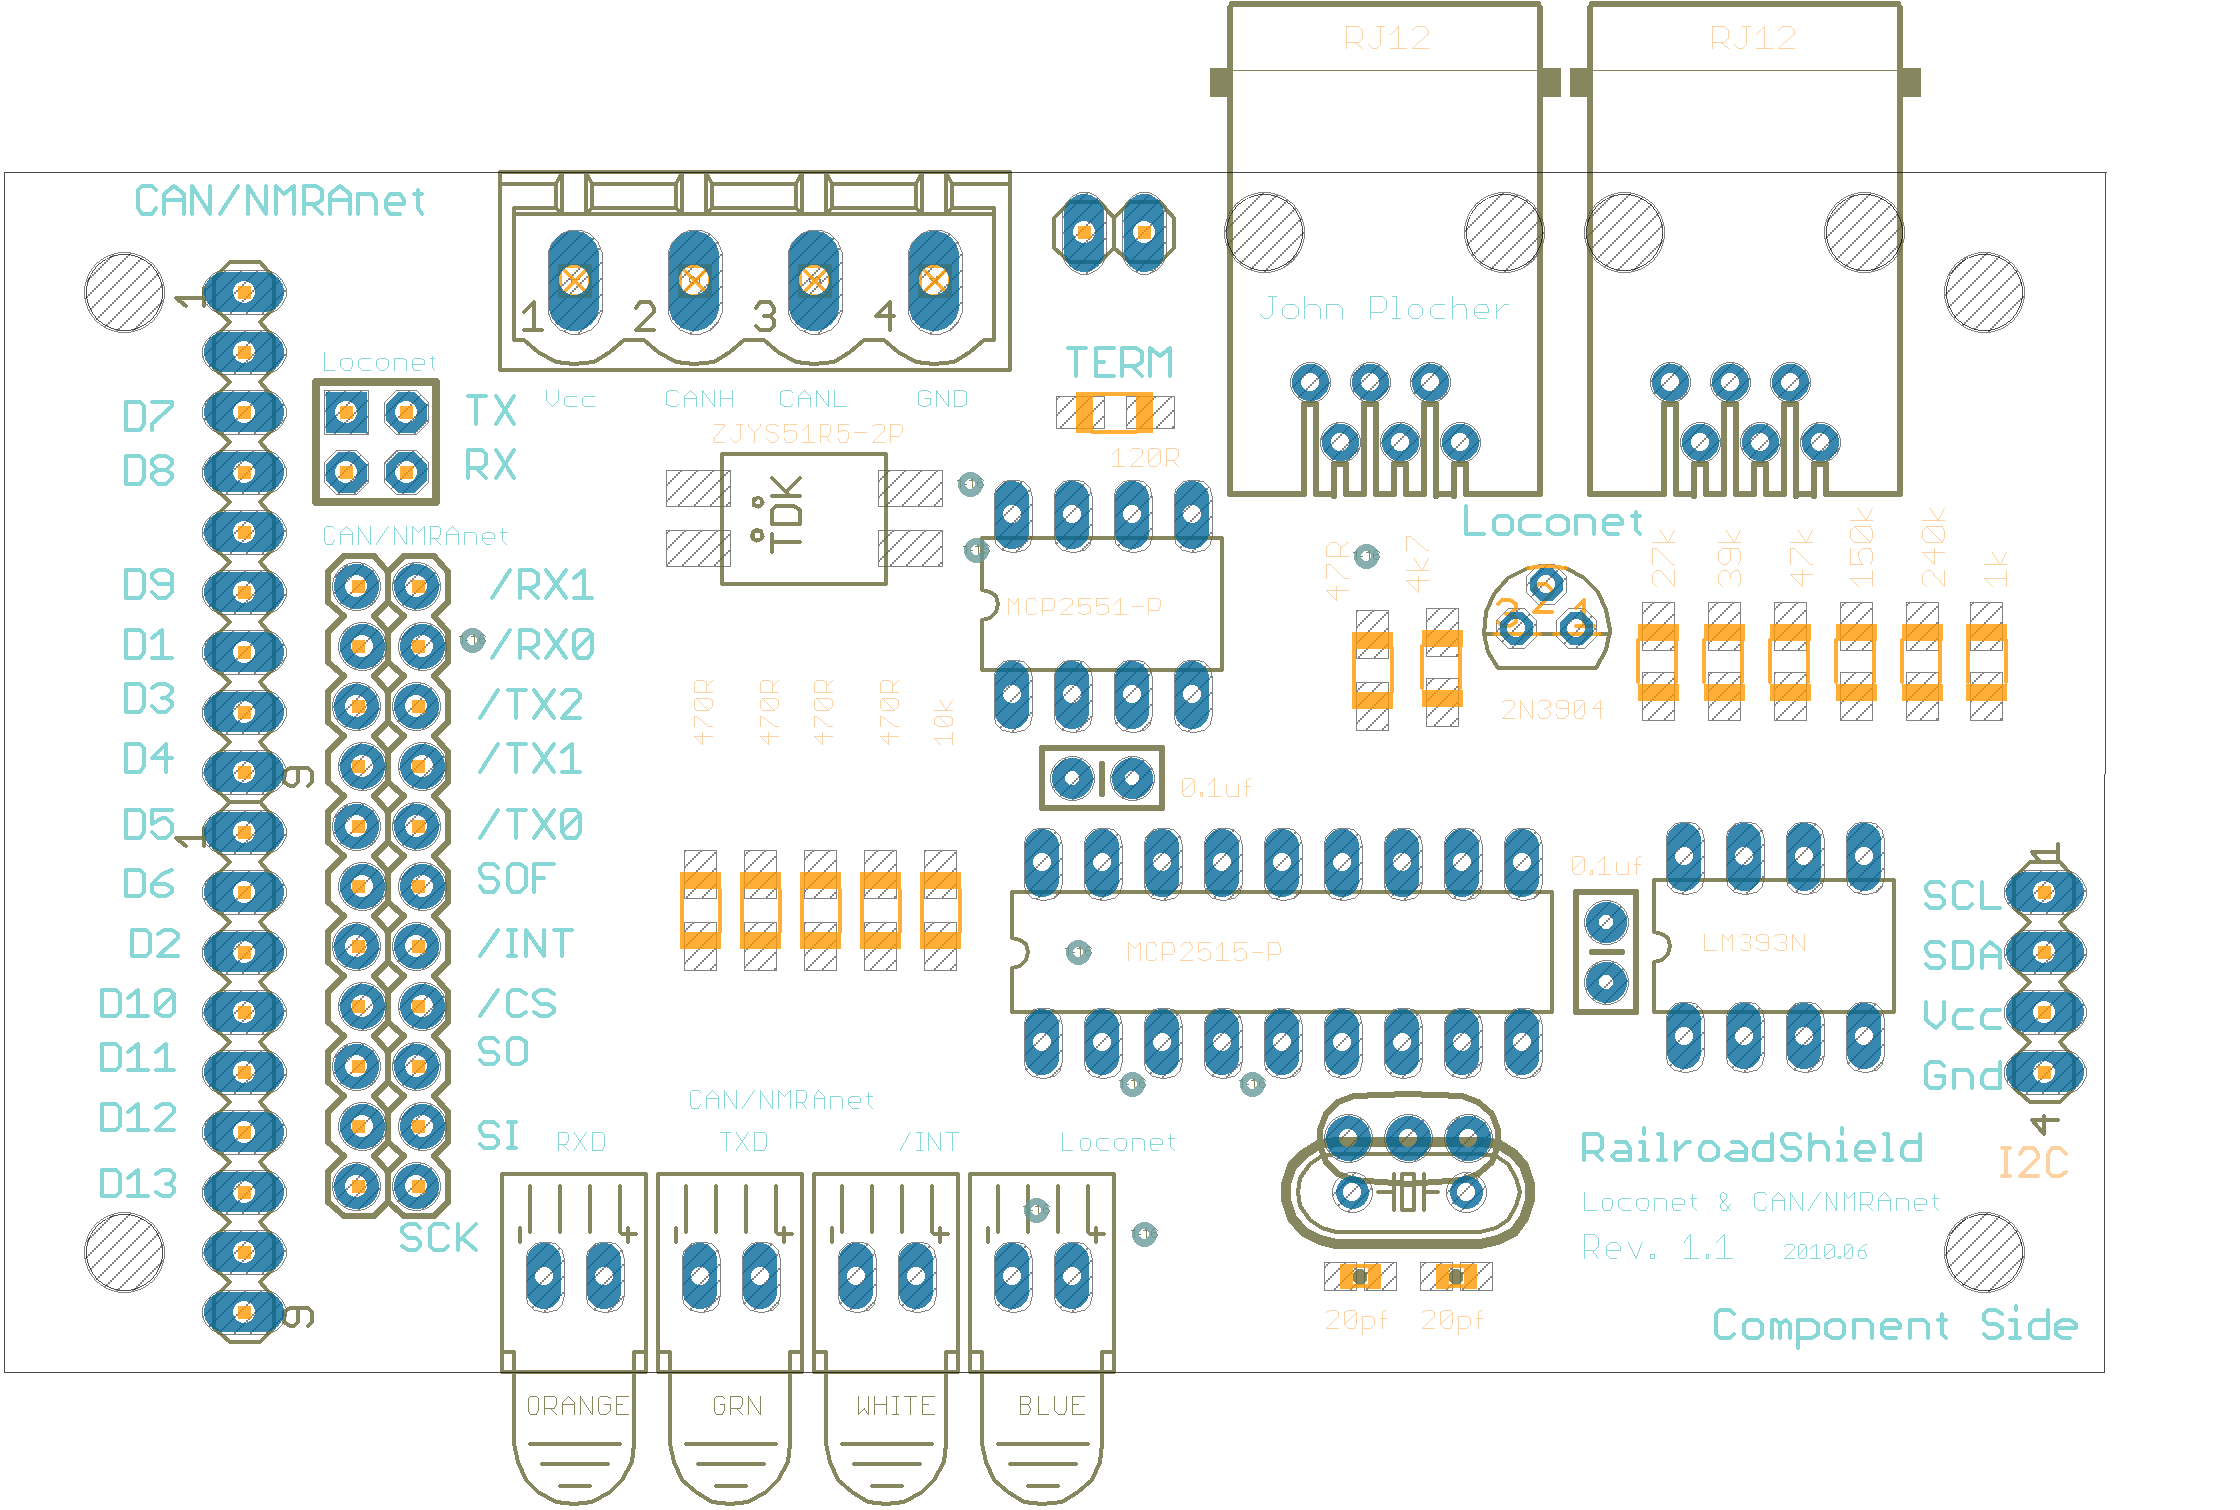
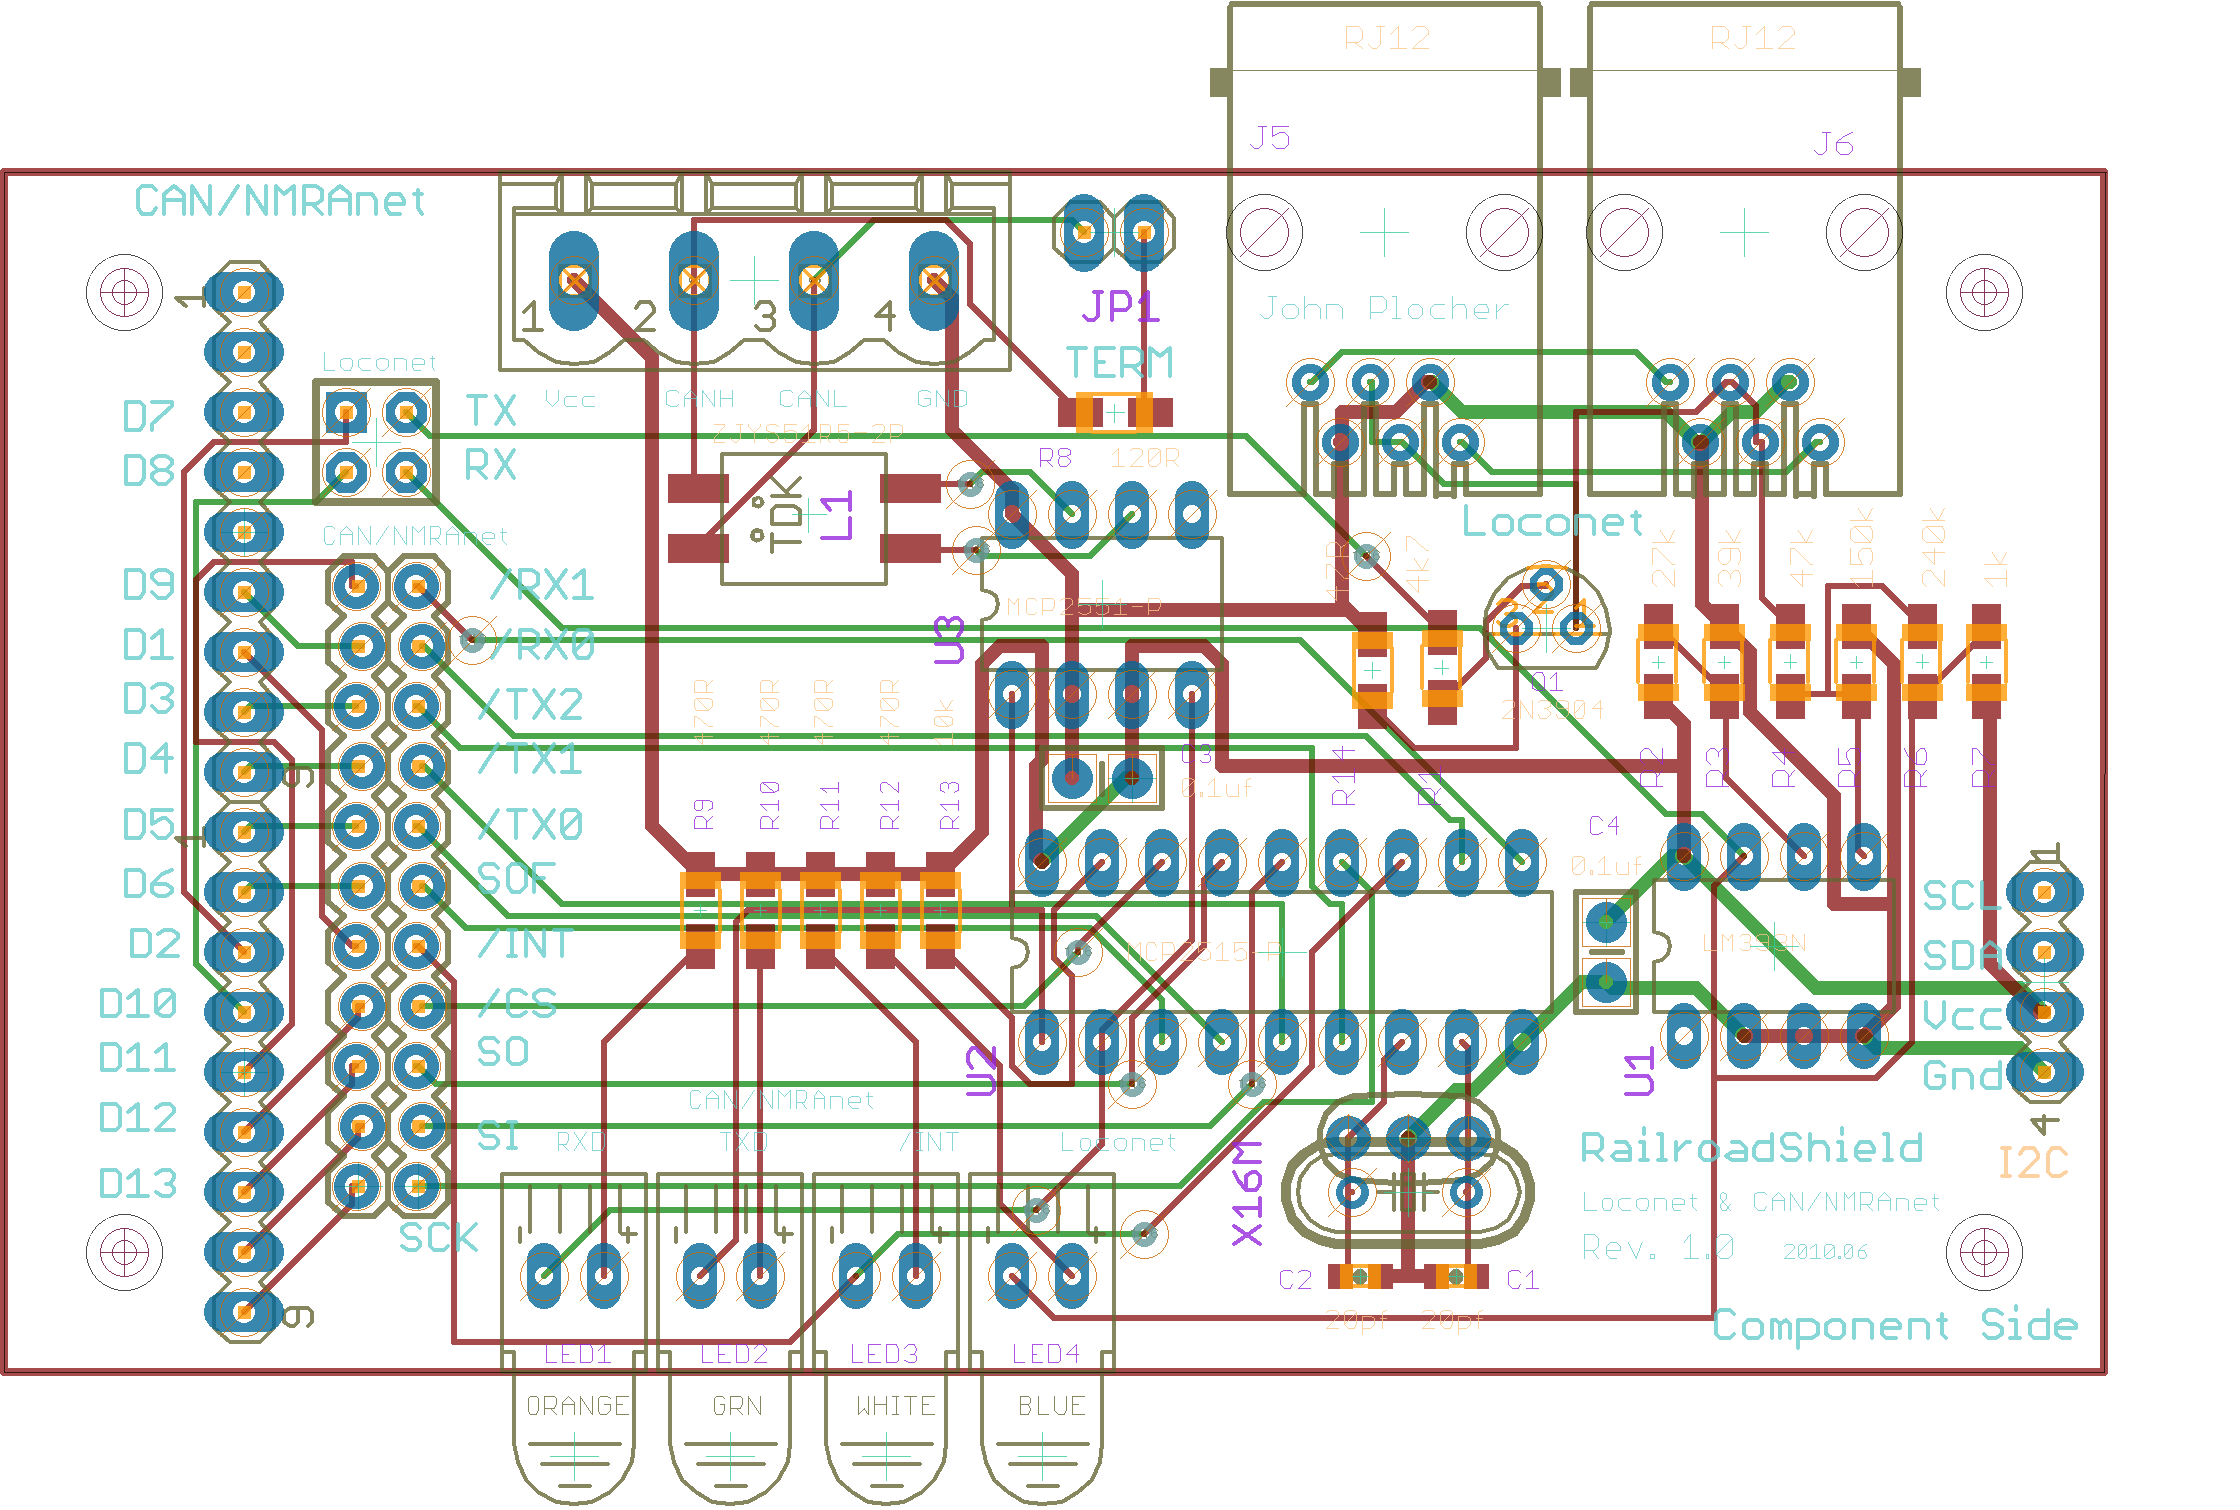
The RailroadShield board is based on an expanded footprint Arduino Shield template so that Decimila, Uno and Duemilanove boards can easily be used with it.
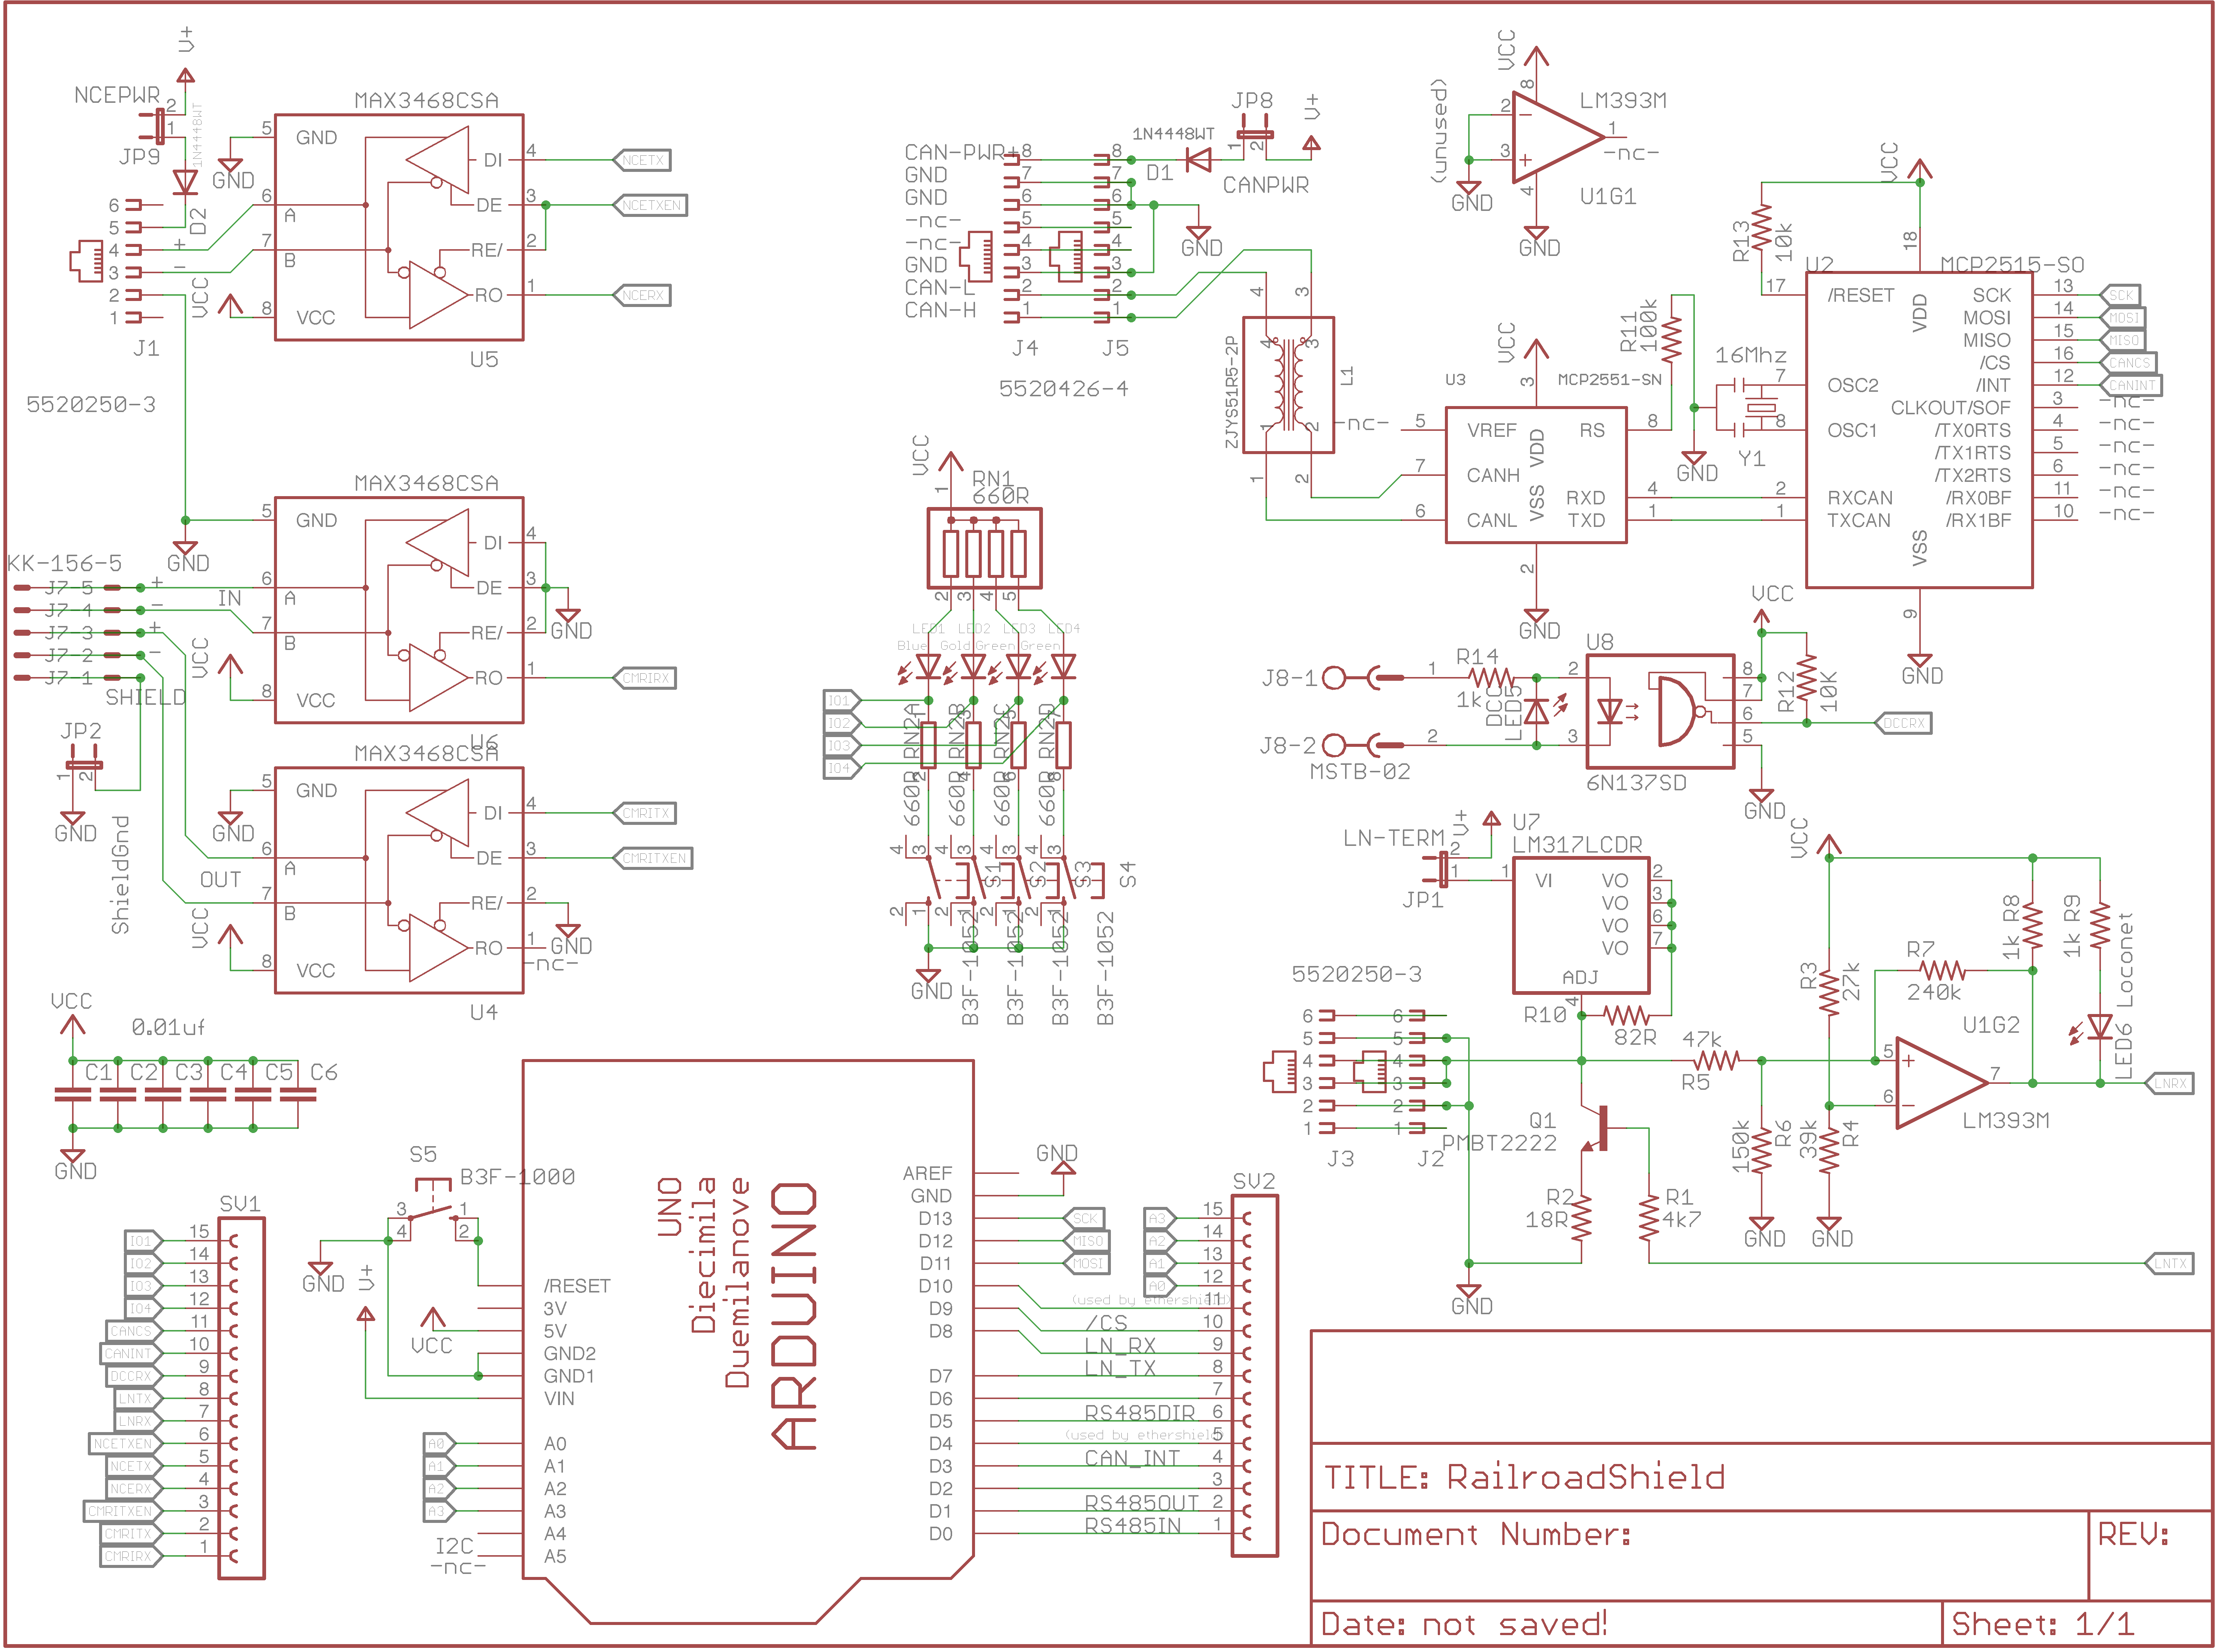
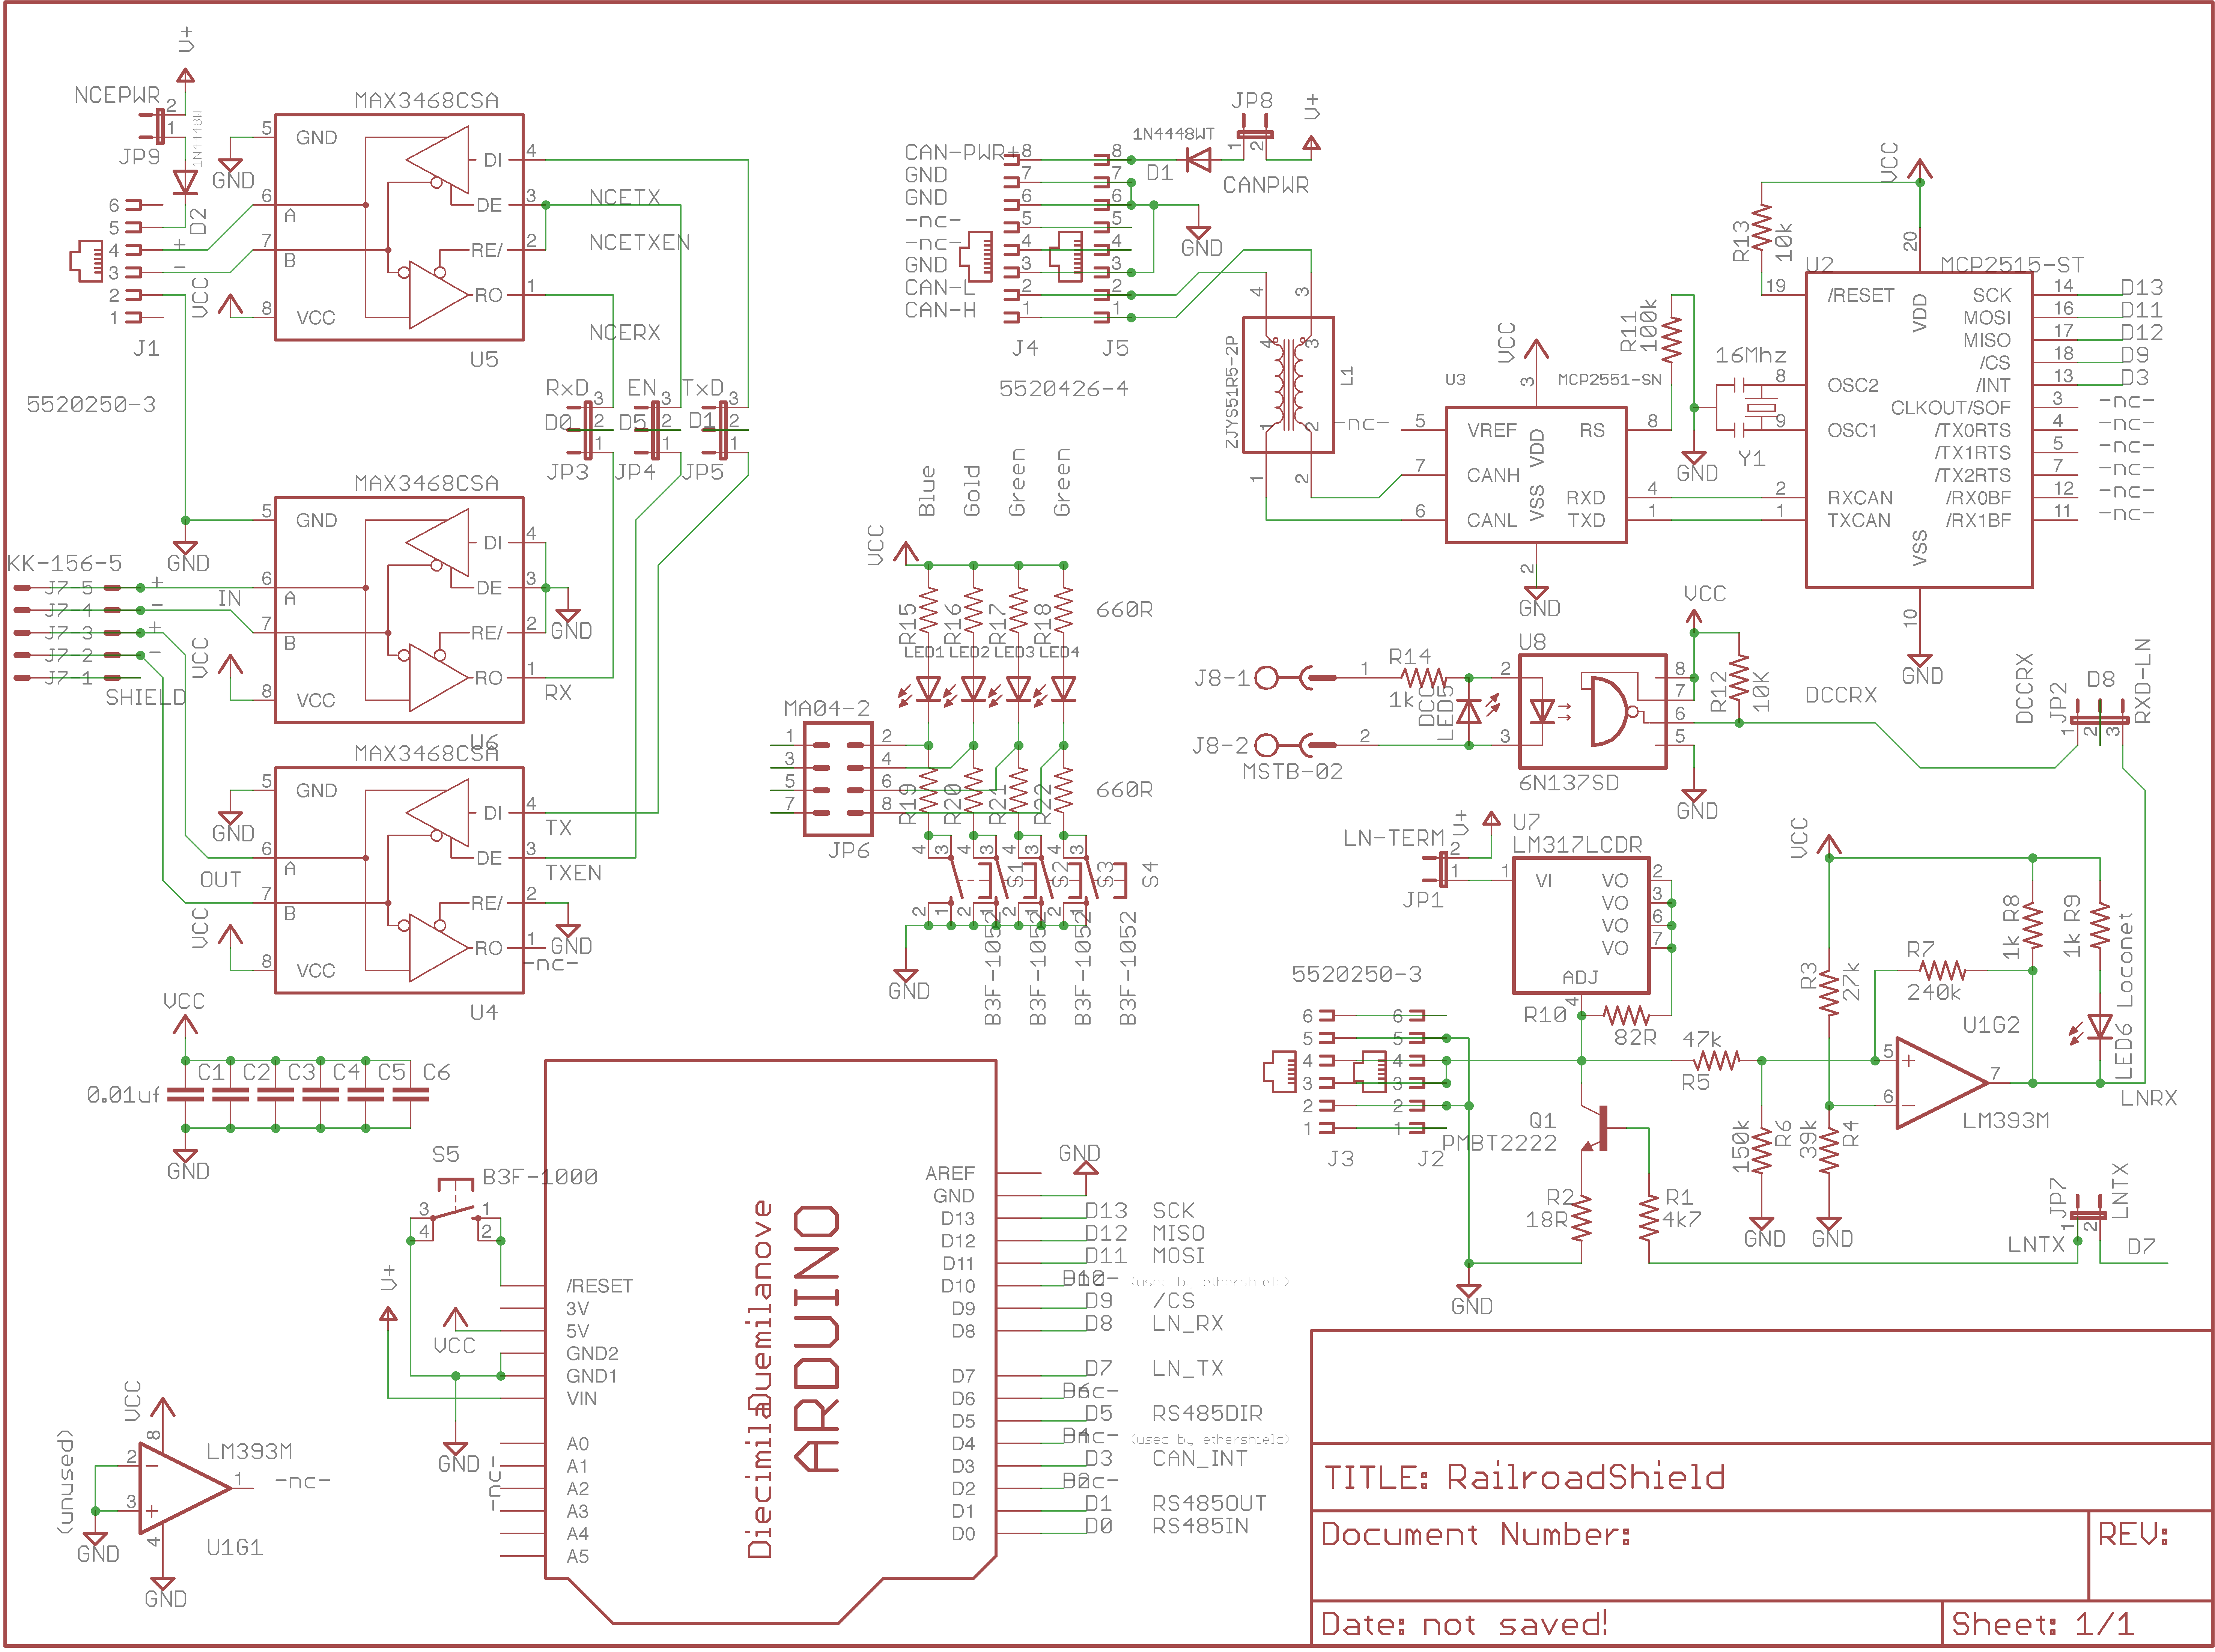
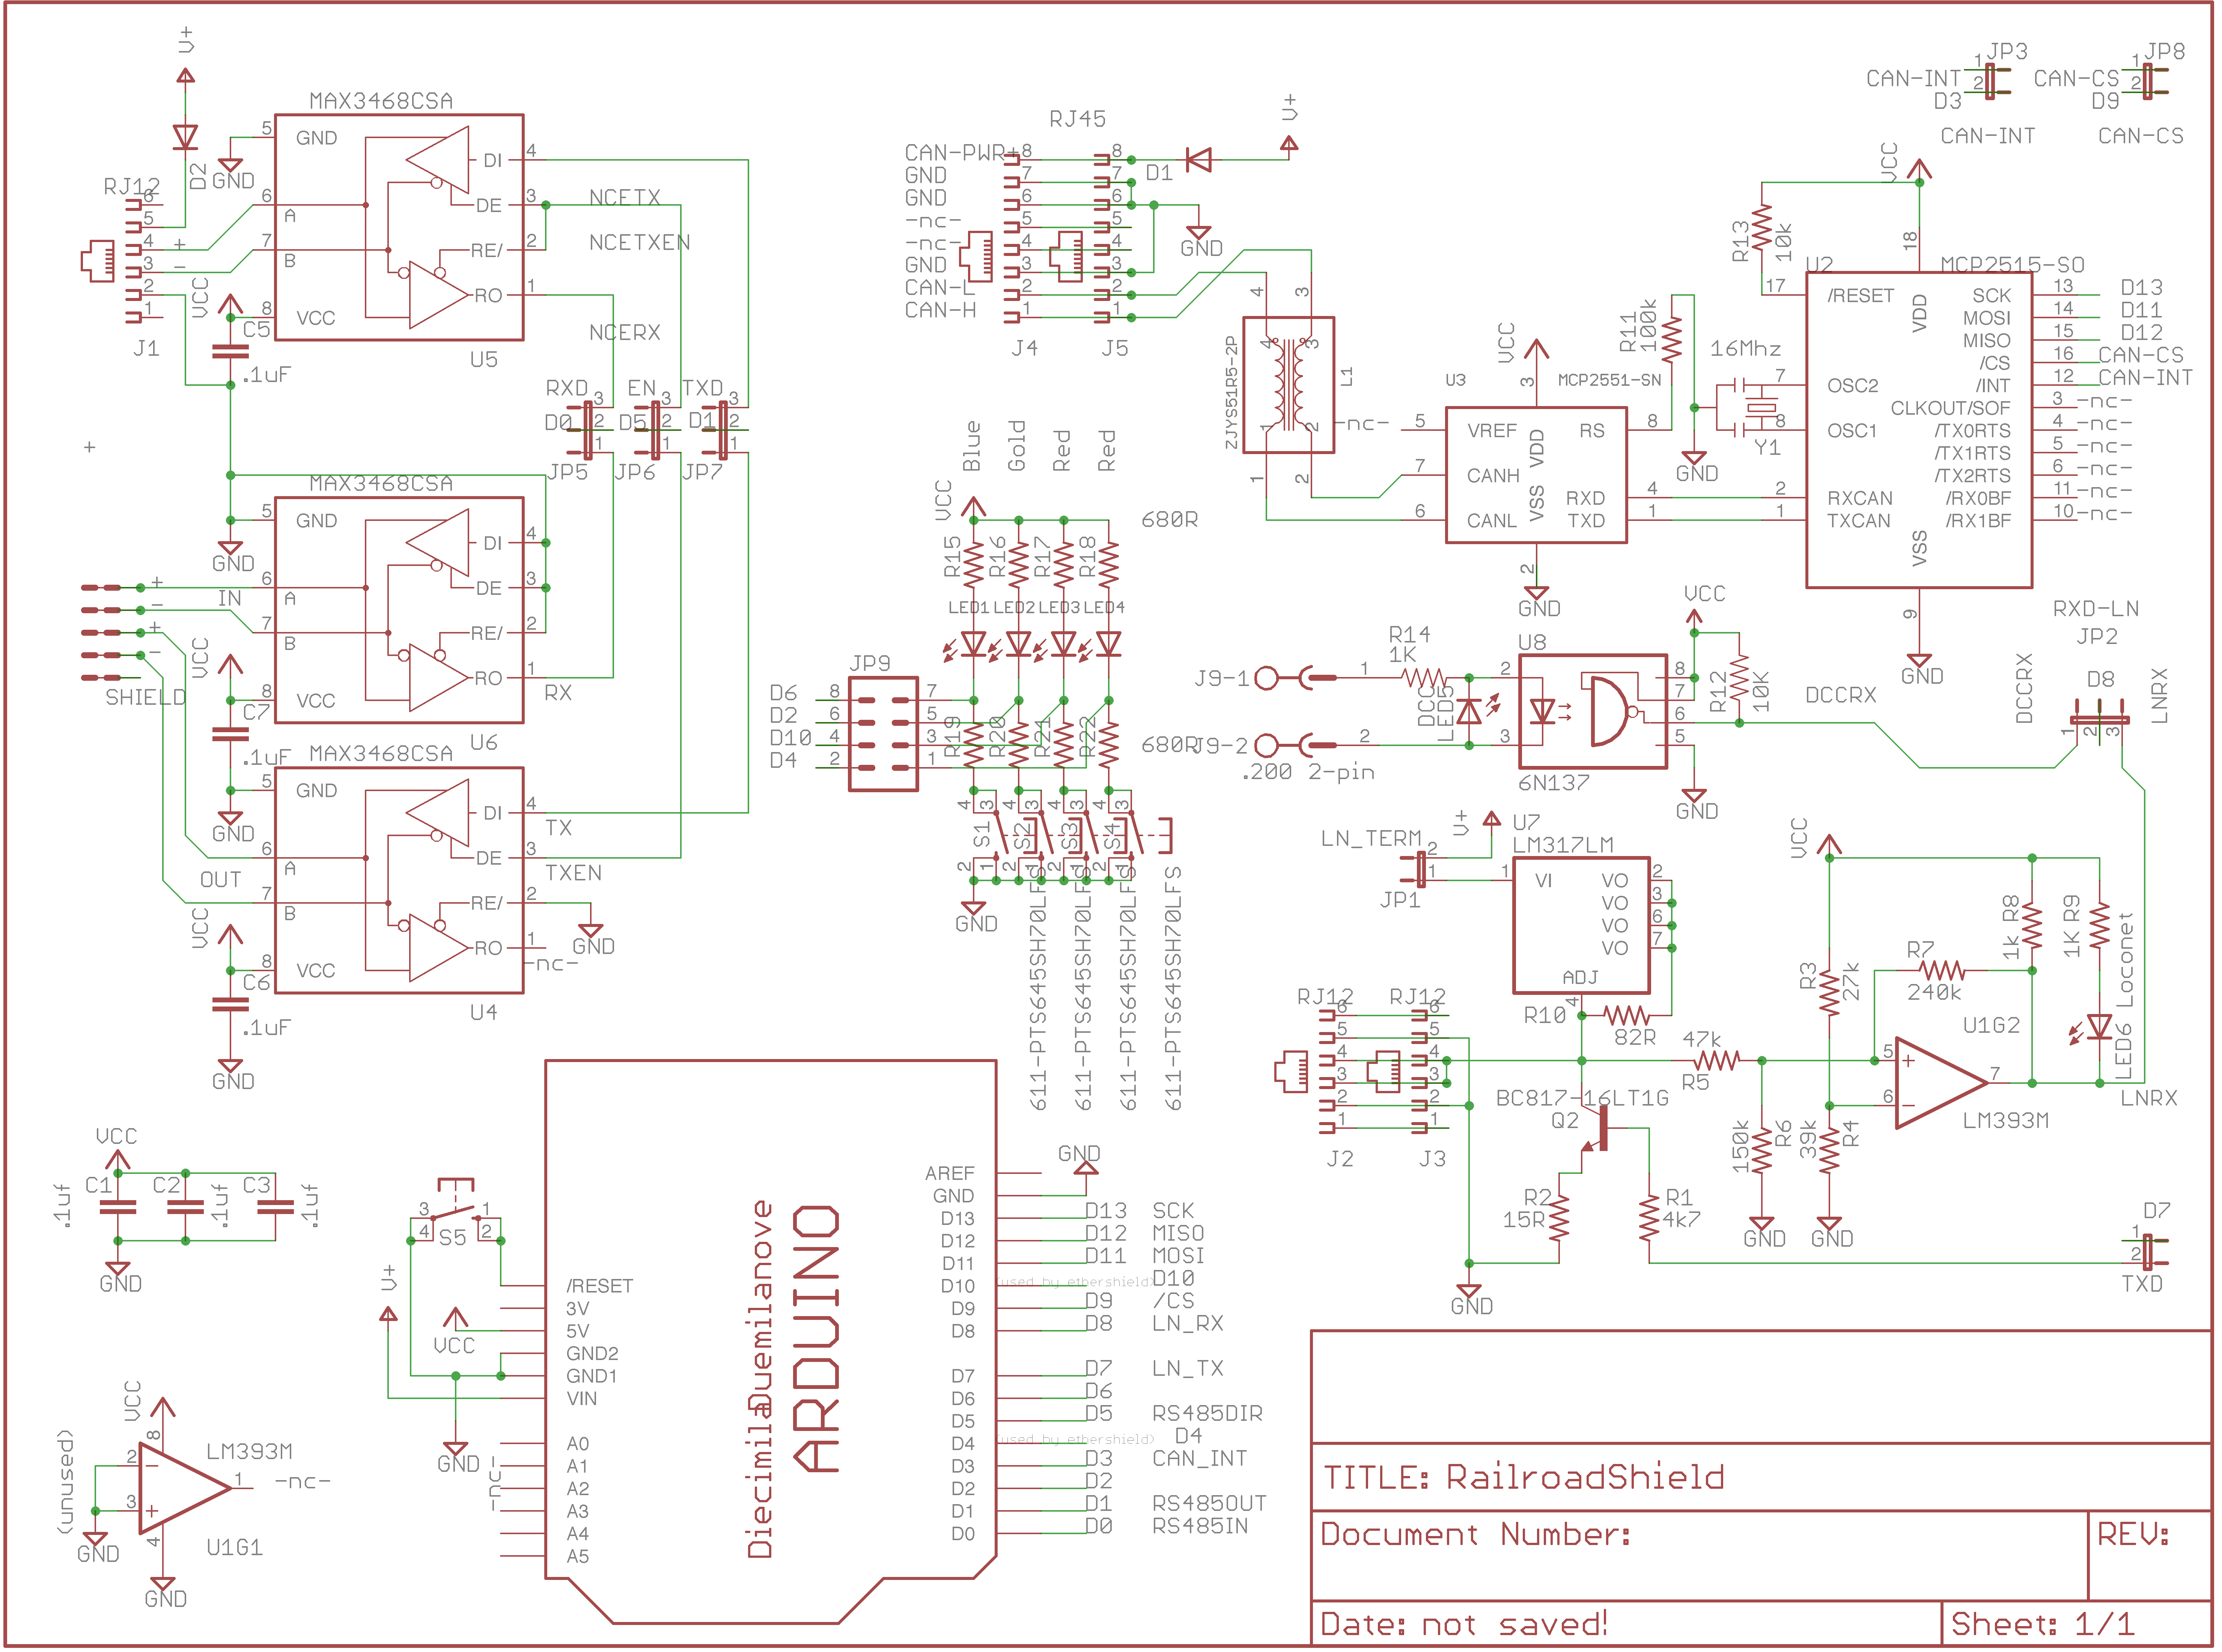
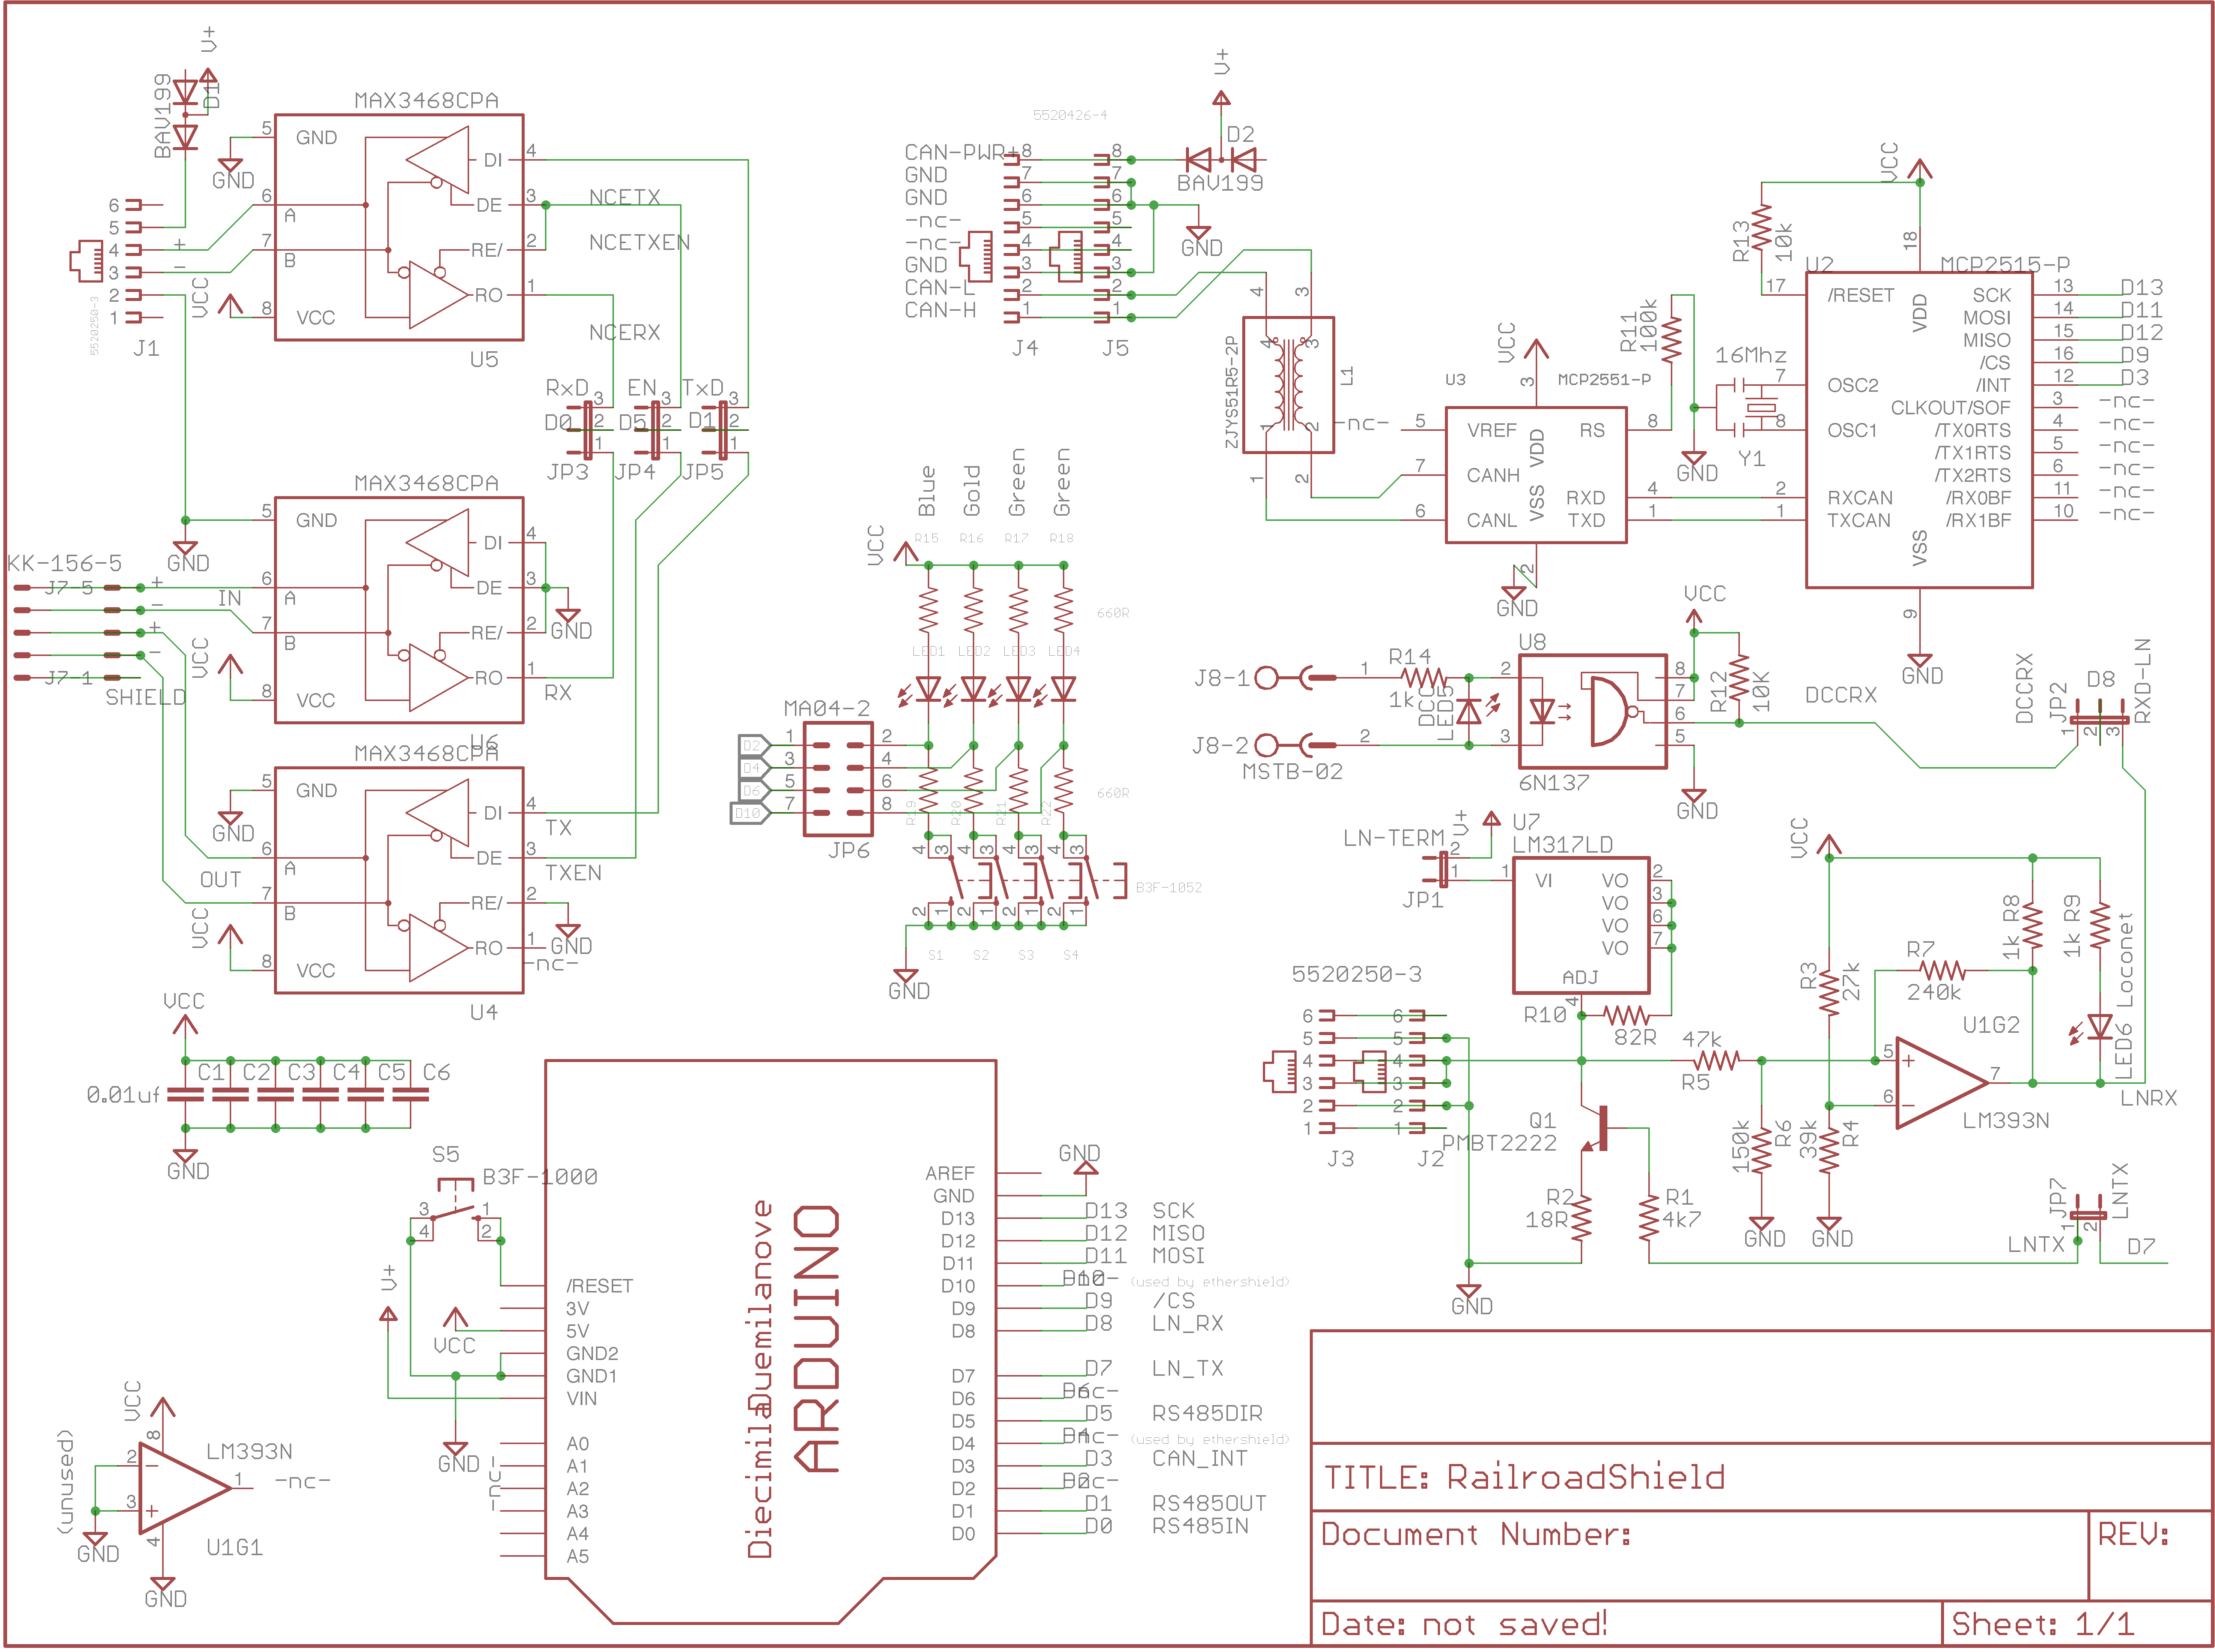
This design has hardware support for
- DCC on D8,
-
- See [http://www.nmra.org/standards/DCC/standards_rps/DCCStds.html NMRA DCC Standards] documentation
- Loconet (RXD on D8, Lnet TXD on D7)
-
- See Digitrax’s Loconet Personal Edition
- CAN/openLCB using MCP2515 & MCP2551 on D13-D11,D9 & D3
-
- See OpenLCB info
- RS485 full duplex/2 wire (NCE & XPressNet) or half duplex/4 wire (C/MRI) using the built in UART on D0/D1 with TX enable on D5
-
- See Lenz’s XpressNet: Specification and
-
- NCE’s cab bus on page 32 of the Power Pro System Reference Manual
- 4 buttons+LEDs for simple I/O testing.
Let me know if you develop sketches or libraries for the above and I will update this page with links. Better yet, contribute the code back to the openlcb.org openLCB project.
This technical documentation is licensed under the CERN Open Hardware Licence v1.2